Author: AR Concrete

  • How do you seal cracks in an old concrete walkway?

    How do you seal cracks in an old concrete walkway?

    Sealing cracks in an old concrete walkway involves cleaning the cracks thoroughly, applying a suitable crack filler, and protecting the repair while it cures. The specific method depends on the crack size and type. For hairline cracks, concrete crack sealant works well. For wider cracks, use concrete patching compound. Proper preparation is crucial for creating a durable repair that prevents water infiltration and further damage.

    Assessing Concrete Walkway Cracks

    Before starting repairs, it’s important to understand what type of cracks you’re dealing with and their underlying causes.

    Types of Cracks in Concrete Walkways

    Concrete walkway cracks generally fall into several distinct categories:

    1. Hairline cracks – Very thin cracks less than 1/16 inch wide that typically don’t affect the walkway’s structural integrity.
    2. Shrinkage cracks – Small, shallow cracks that form during concrete curing and are usually not a structural concern.
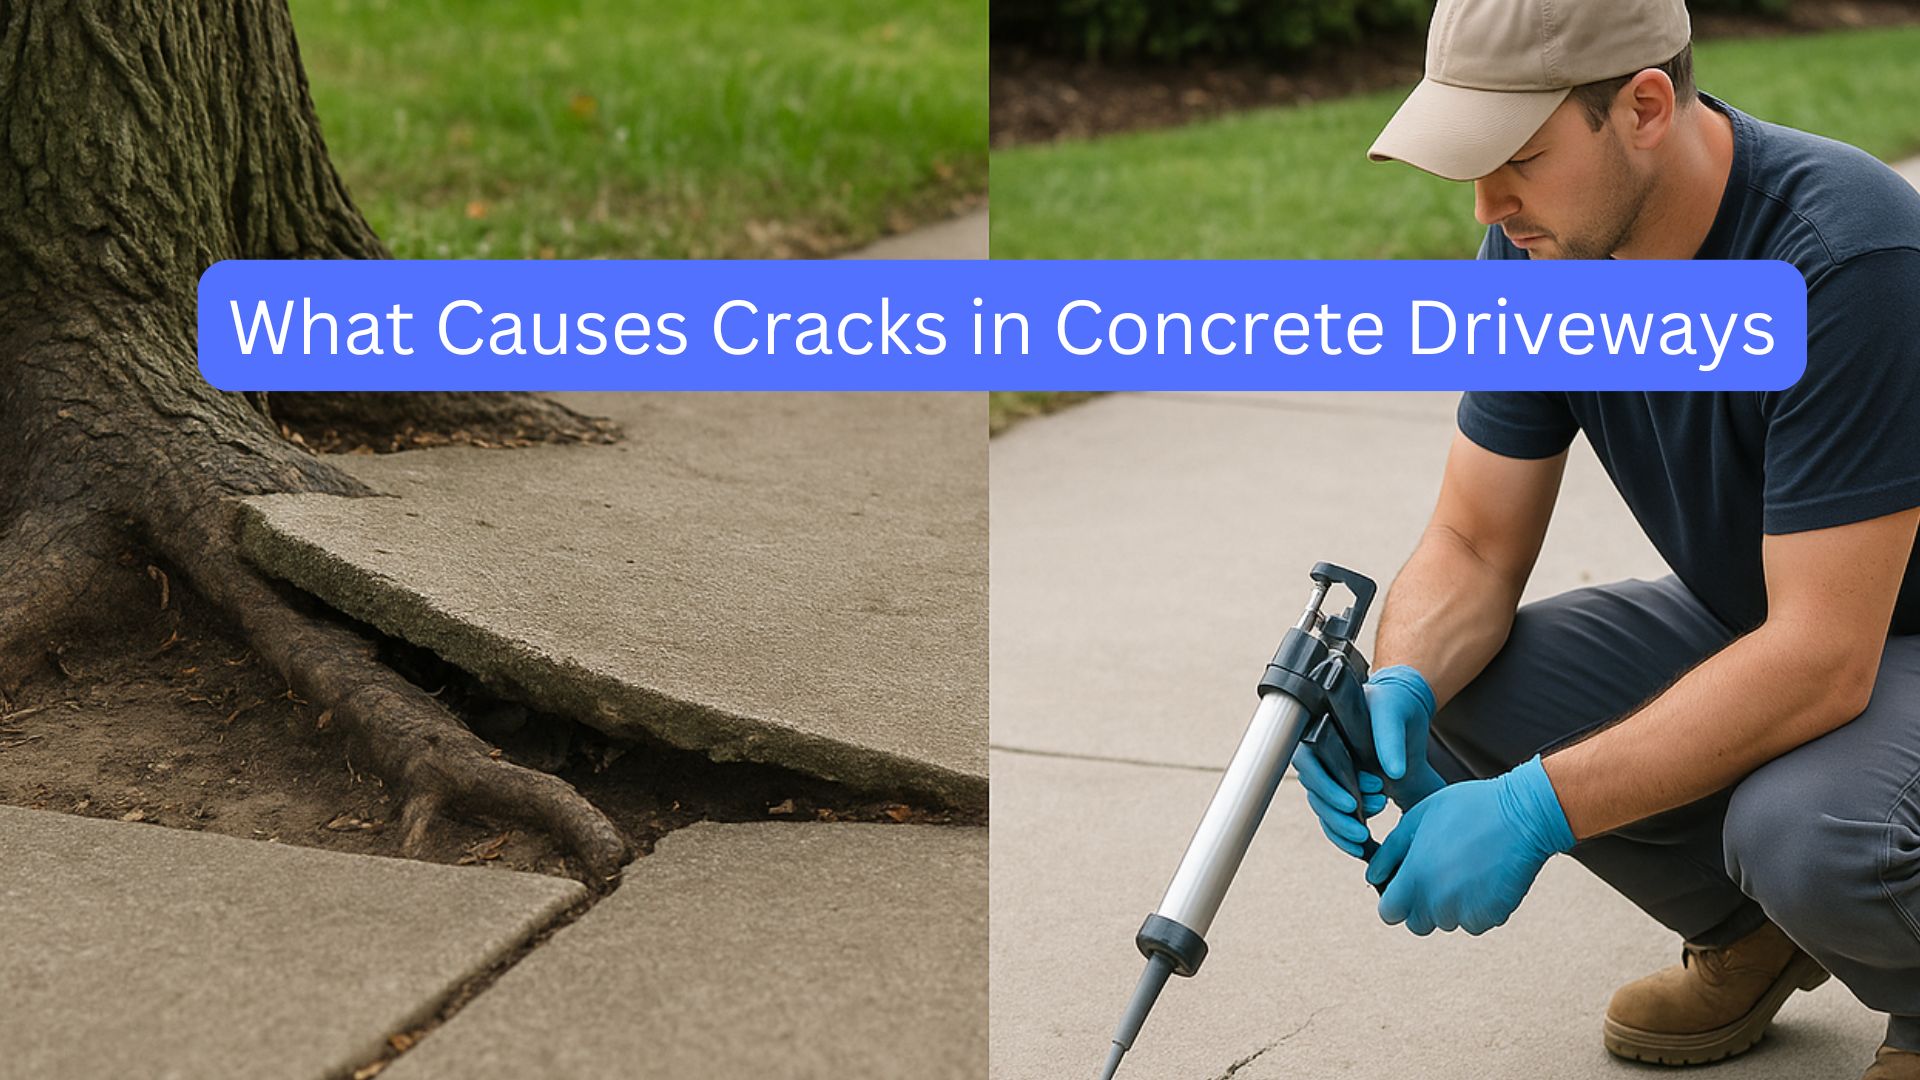
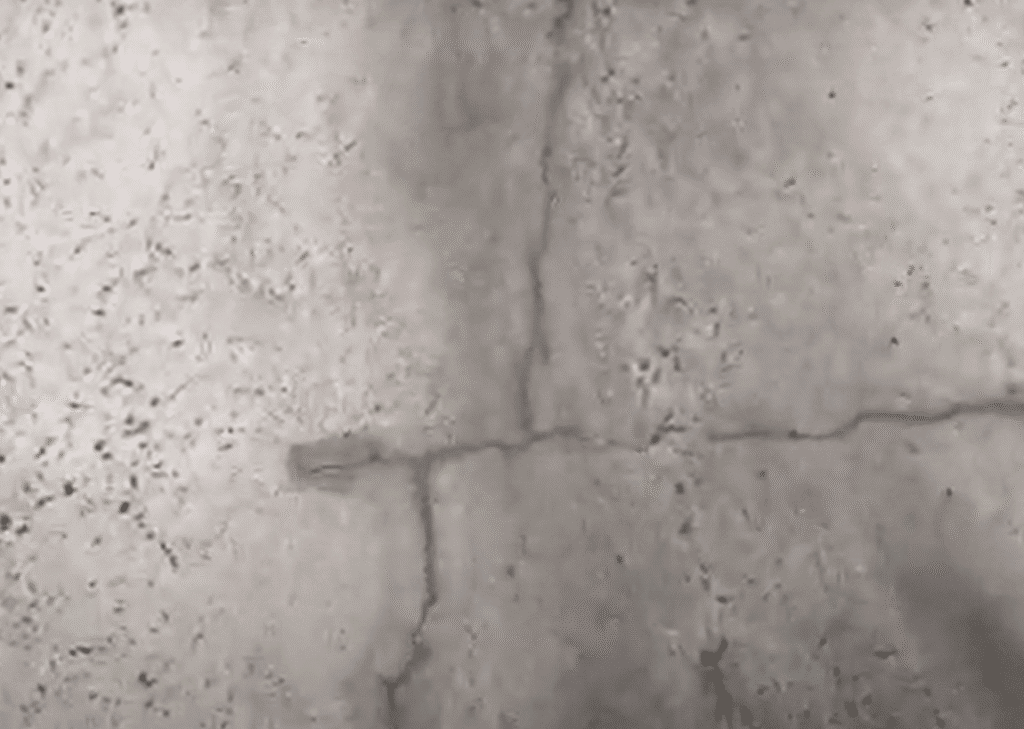
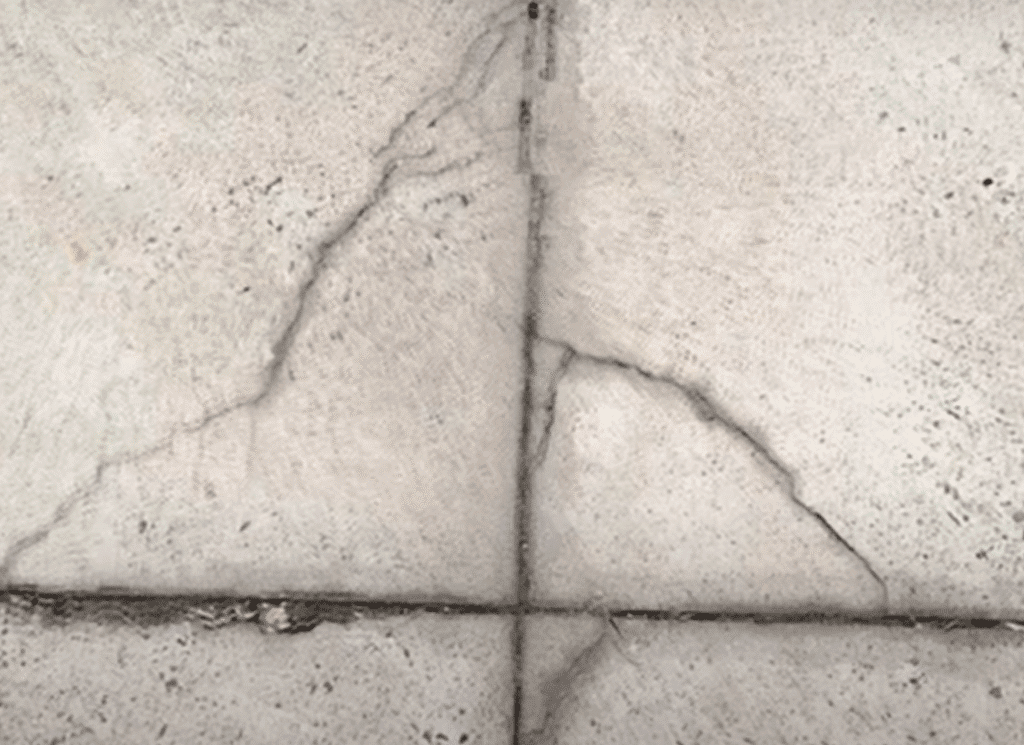
    3. Settlement cracks – Wider cracks that occur when the ground beneath the concrete shifts or settles.
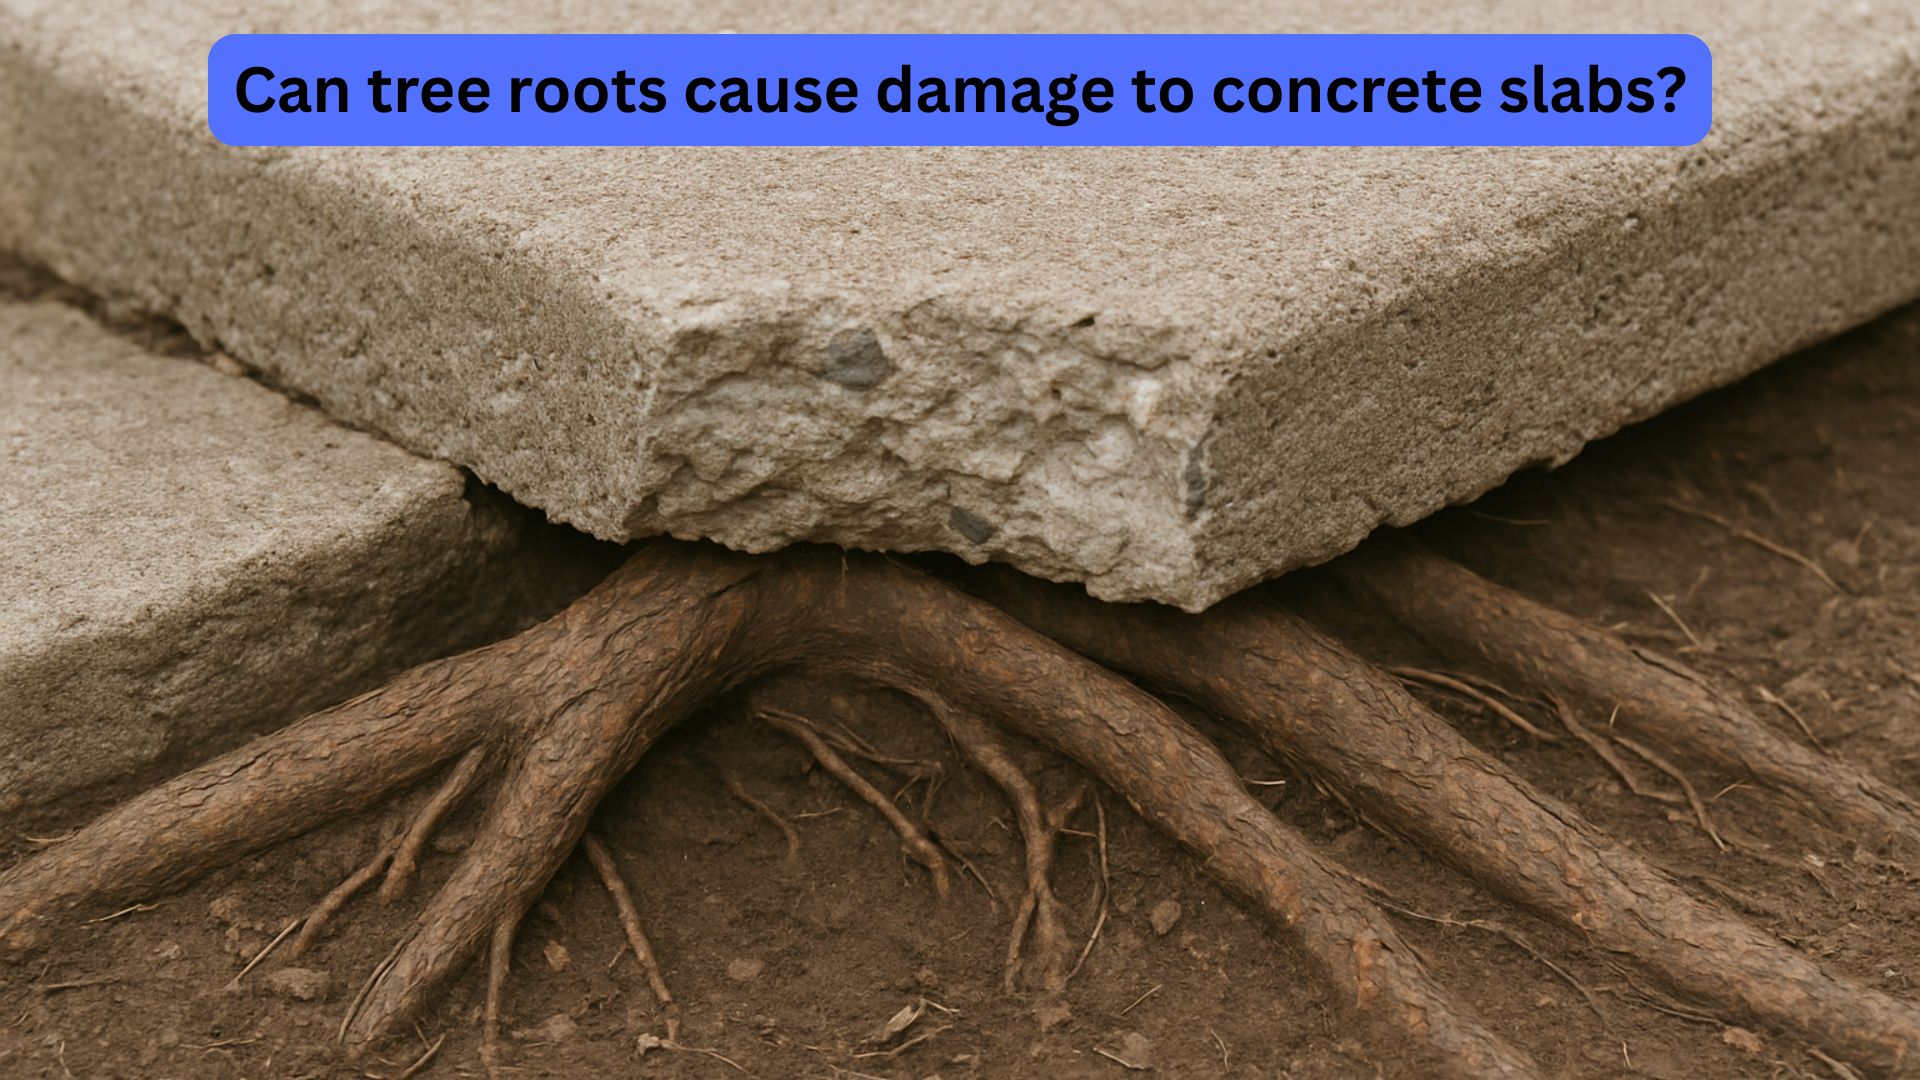
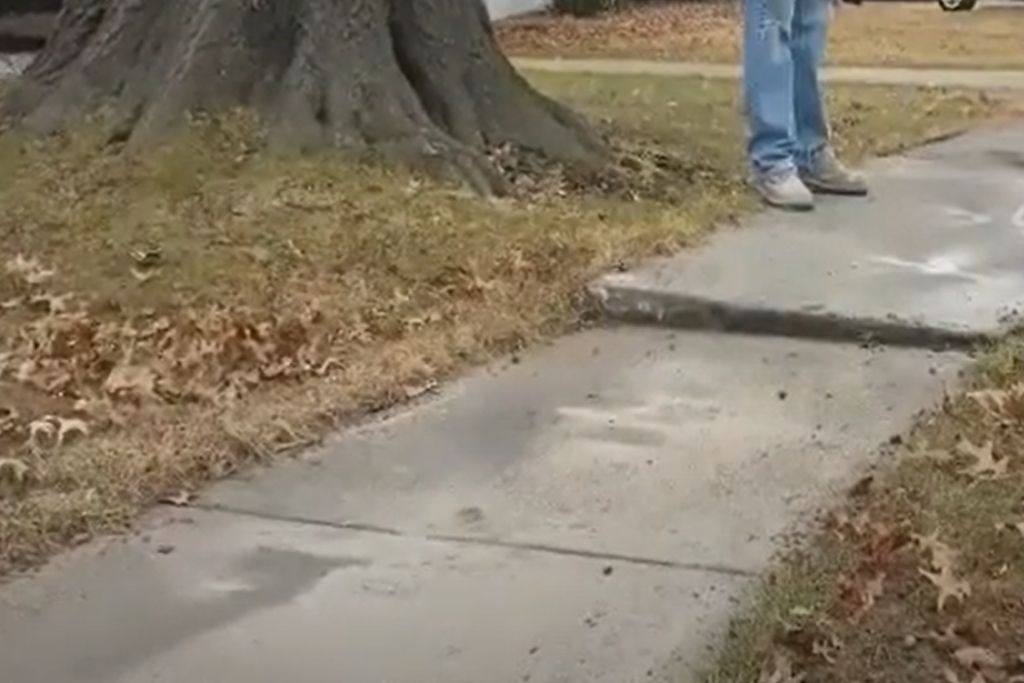
    4. Heaving cracks – Cracks accompanied by uneven surfaces caused by freeze-thaw cycles or tree root pressure.
    5. Structural cracks – Deep cracks that may extend through the full thickness of the concrete and indicate more serious problems.

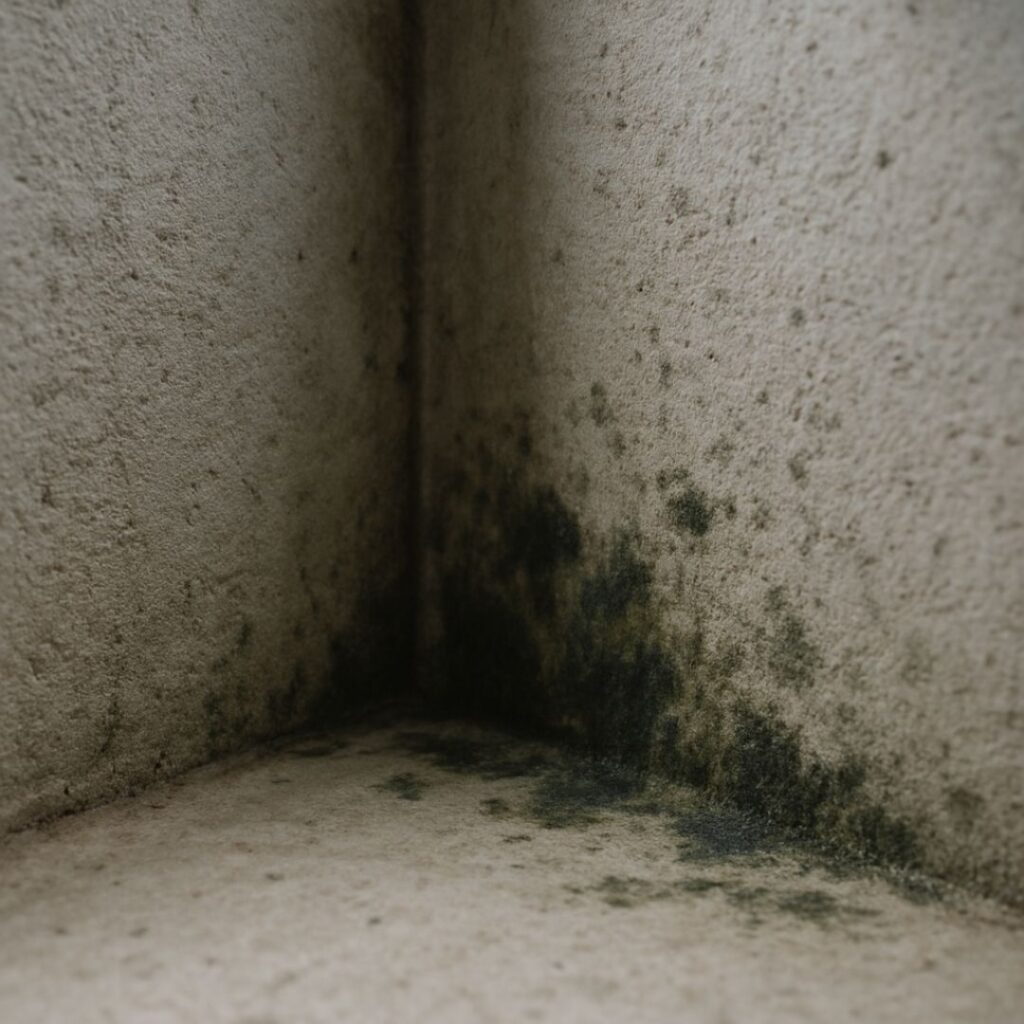
    Understanding the crack type helps determine the appropriate repair method. As discussed in our article about mold growth on concrete surfaces, unsealed cracks can also allow moisture to penetrate, potentially leading to additional issues like mold or further deterioration.

    When to Repair vs. When to Replace

    Not all cracked walkways can or should be repaired. Consider these factors:

    Crack CharacteristicsRecommended ApproachReasoning
    Hairline to 1/4″ wide, stableSeal/RepairCost-effective, prevents water infiltration
    Multiple cracks in patternEvaluate underlying cause firstMay indicate significant base problems
    Cracks with heaving/unevennessLevel or replace sectionsTrip hazard, underlying issues continue
    Cracks wider than 1/2″Patch or consider replacementVery wide cracks suggest serious issues
    Extensive crazing (map cracking)Surface treatment or resurfacingGenerally a surface-level issue

    According to the American Concrete Institute, repairing cracks promptly prevents further deterioration. Their research indicates that sealed cracks can extend a walkway’s life by 5-10 years by preventing water damage, particularly in climates with freeze-thaw cycles.

    Timing Your Crack Repair Project

    The timing of concrete crack repairs significantly impacts their durability:

    1. Temperature – Ideal repair temperatures are between 50°F and 80°F (10°C to 27°C).
    2. Weather forecast – Plan for at least 24 hours without rain after repairs.
    3. Seasonal considerations – Early fall or spring typically provide ideal conditions.
    4. Crack stability – For active cracks that are still moving, repairs done during cooler weather when the concrete is most contracted tend to last longer.

    For best results in Fayetteville and similar climates, spring and early fall typically offer the most stable temperatures for durable concrete repairs.

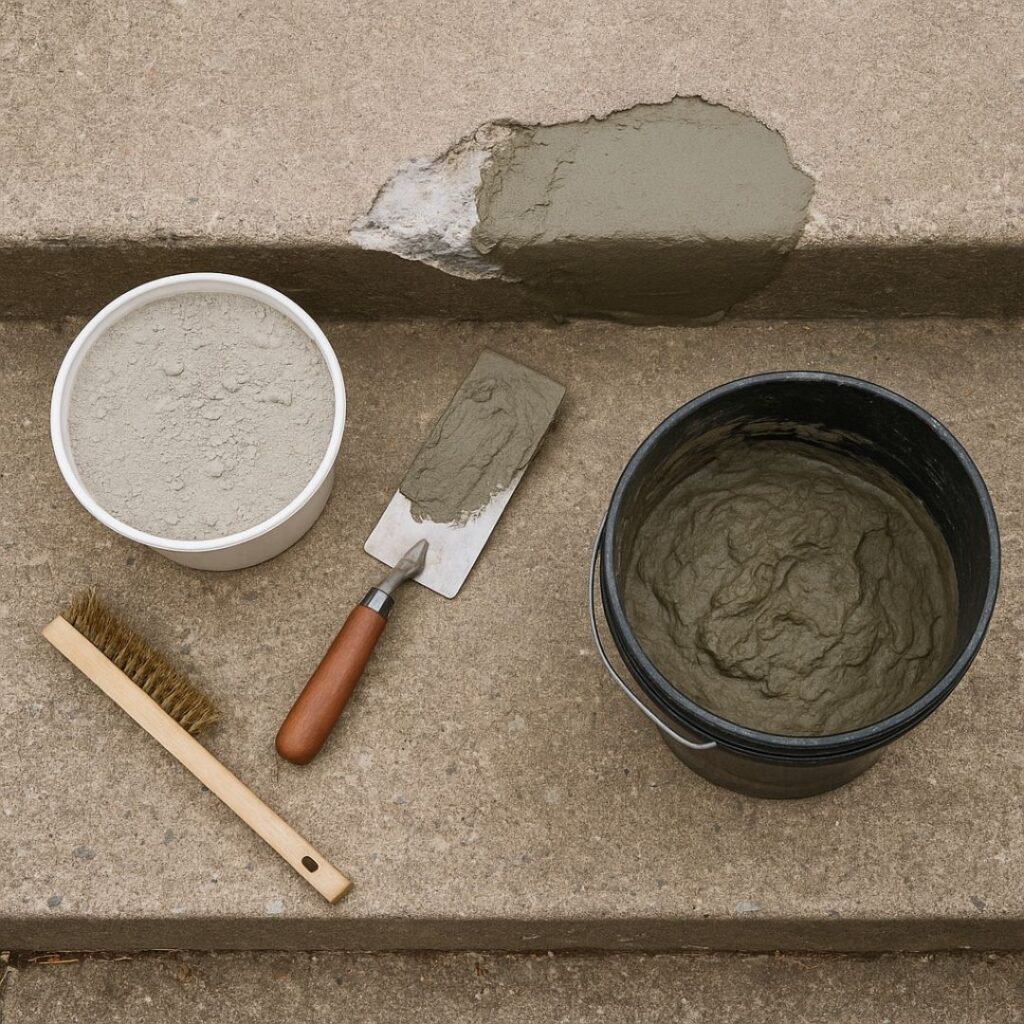
    Materials and Tools Needed

    Gathering the right supplies before starting ensures a smoother repair process.

    Choosing the Right Crack Filler

    Different crack sizes and locations require specific repair materials:

    1. Liquid concrete crack sealant – For hairline cracks up to 1/8 inch wide.
    2. Vinyl concrete patching compound – For cracks 1/8 to 1/4 inch wide.
    3. Concrete repair caulk – Flexible option good for cracks in areas with slight movement.
    4. Mortar repair mix – For wider cracks from 1/4 to 1/2 inch.
    5. Epoxy concrete repair – For structural cracks or high-traffic areas needing extra strength.
    6. Self-leveling concrete filler – For horizontal surface cracks in walkways.

    These products come in different formulations optimized for specific applications. For older walkways, choosing a slightly flexible product often provides better long-term results as it can accommodate minor concrete movement.

    Essential Tools for Crack Sealing

    For effective crack repair, you’ll need:

    • Wire brush – For cleaning loose debris from cracks
    • Chisel and hammer – For widening and shaping cracks when necessary
    • Shop vacuum – For removing dust and fine particles
    • Garden hose or pressure washer – For thorough cleaning
    • Caulk gun – For applying crack repair products in tubes
    • Trowel or putty knife – For smoothing patch compounds
    • Concrete broom or brush – For texturing repairs to match surrounding concrete
    • Protective gear – Gloves, eye protection, and a dust mask
    • Plastic sheeting – To cover repairs during curing

    Having these tools ready before beginning makes the repair process more efficient and produces better results.

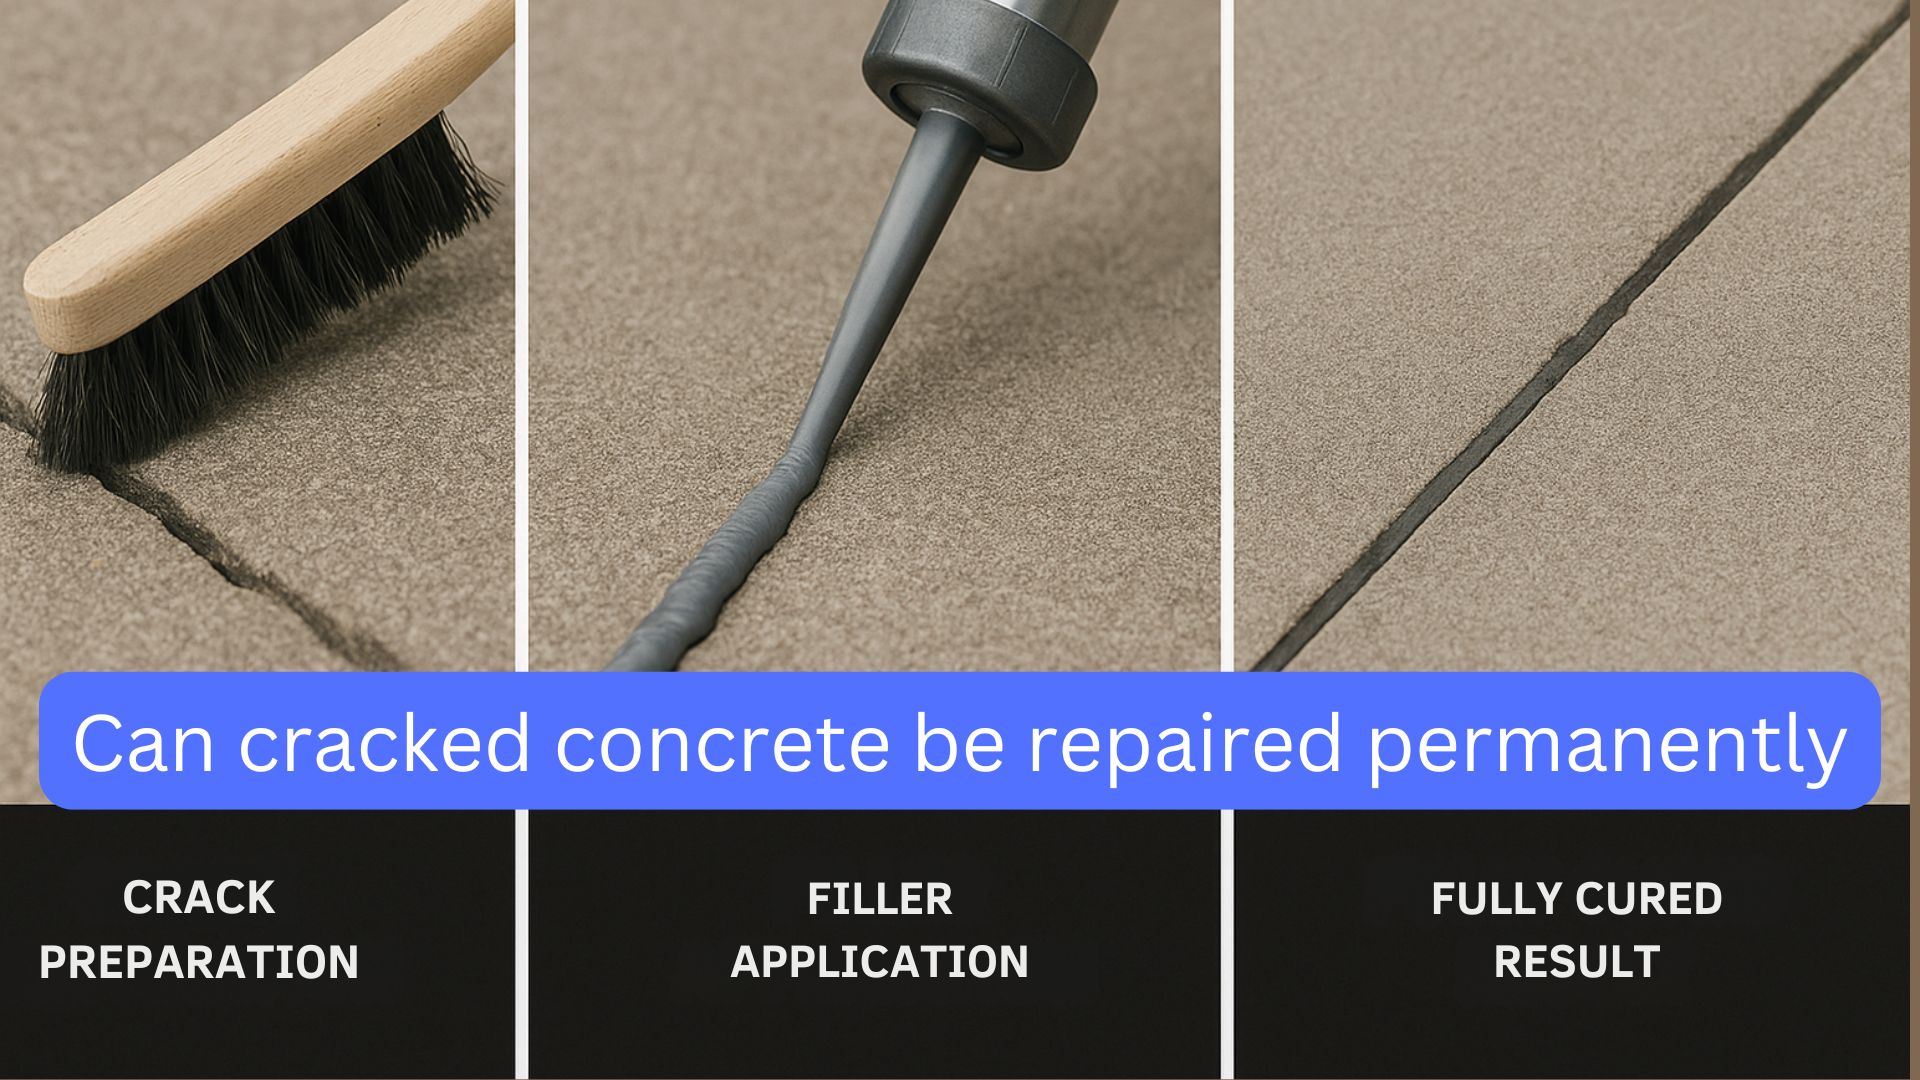
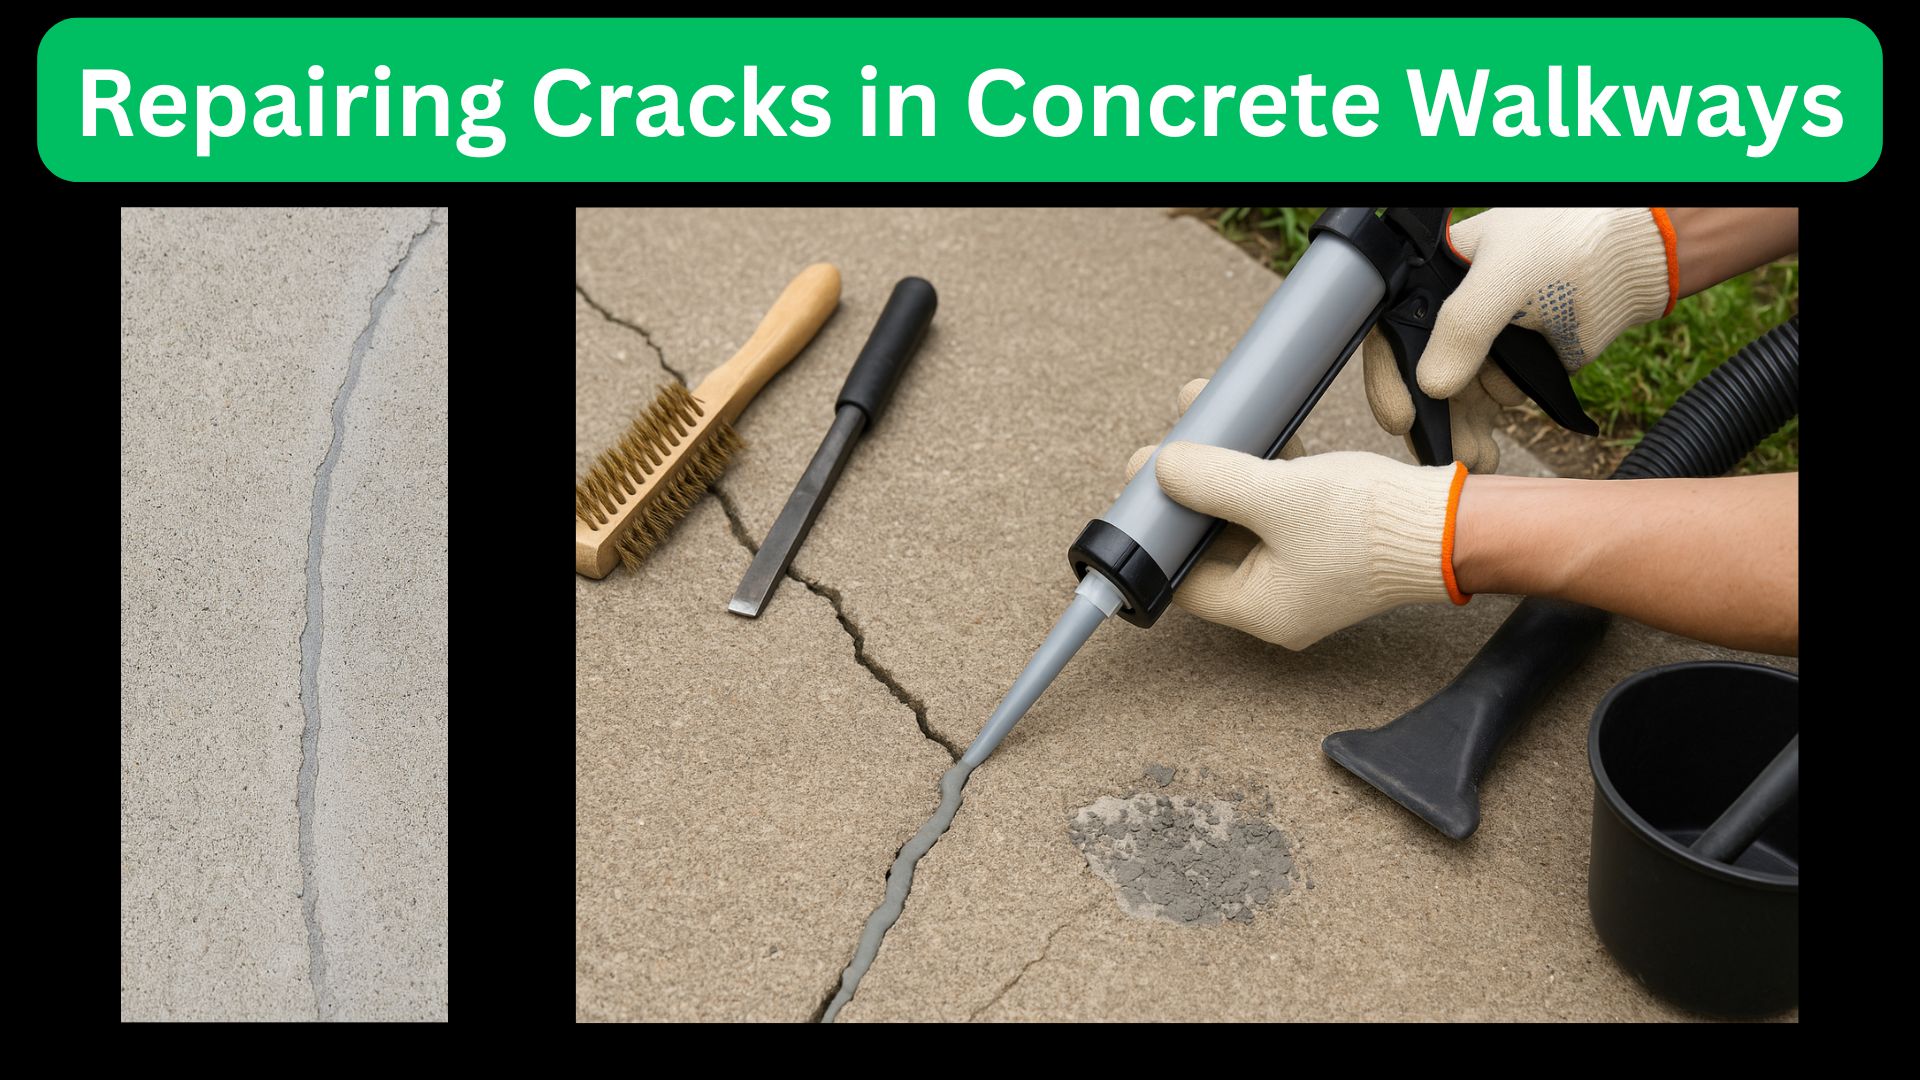
    Step-by-Step Crack Sealing Process

    Following a systematic approach ensures the most durable crack repairs.

    Preparing Cracks for Repair

    Proper preparation is the most critical step:

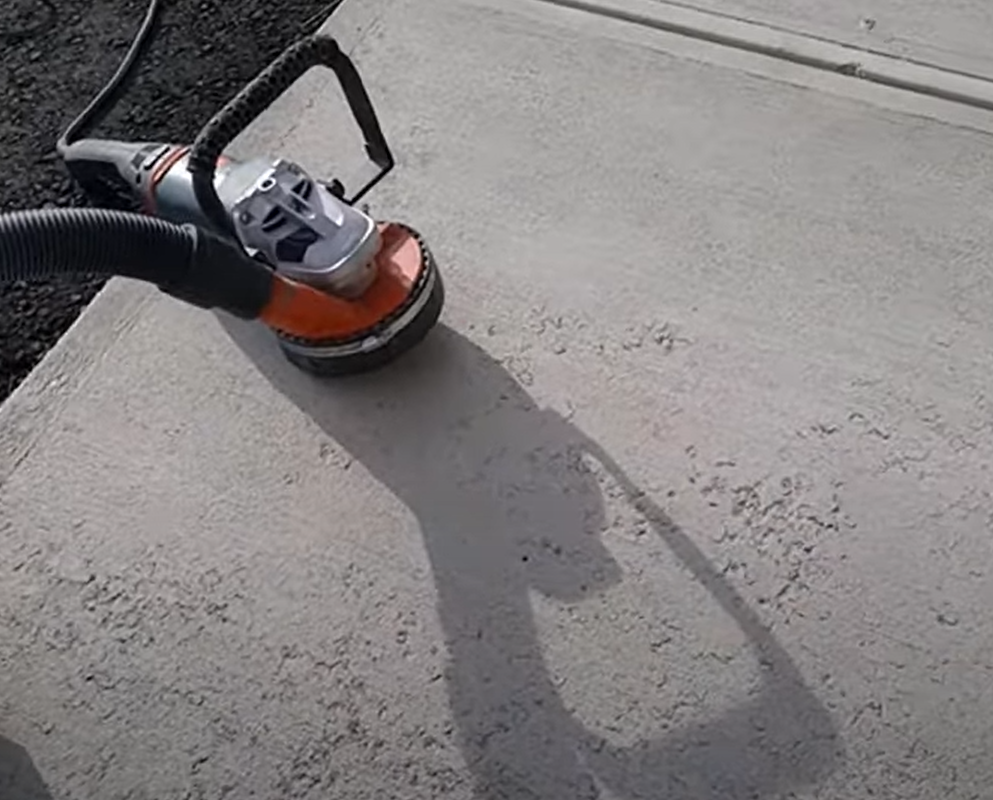
    1. Remove loose material – Use a wire brush, chisel, or angle grinder with a masonry disk to remove any loose concrete, creating clean, solid edges.
    2. Shape the crack – For best results, undercut the crack edges slightly to create a reverse “V” shape that helps lock the repair material in place.
    3. Clean thoroughly – Use a shop vacuum to remove all dust and debris. For outdoor walkways, washing with a garden hose or pressure washer provides additional cleaning.
    4. Allow to dry completely – Concrete must be completely dry before applying most crack fillers. Depending on weather conditions, this may take several hours to a full day.
    5. Apply bonding agent – For wider cracks, applying a concrete bonding adhesive improves the connection between old concrete and new repair materials.

    Thorough preparation can make the difference between a repair that lasts many years and one that fails within months.

    Application Techniques for Different Fillers

    Application methods vary by product type:

    For Liquid Crack Sealers:

    1. Cut the applicator tip to match the crack width
    2. Apply sealer directly into the crack, slightly overfilling
    3. Use a putty knife to smooth the surface flush with surrounding concrete
    4. Allow to dry according to manufacturer instructions (typically 2-4 hours)

    For Patching Compounds:

    1. Mix according to package directions (consistency should be similar to peanut butter)
    2. Dampen the crack area slightly (but not wet)
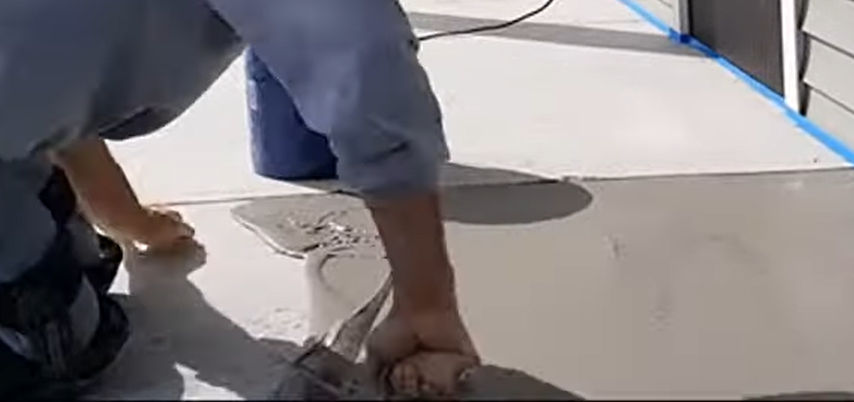
    3. Press the compound firmly into the crack with a trowel
    4. Build up in layers for deeper cracks, allowing partial setting between applications
    5. Texture the surface to match surrounding concrete
    6. Allow to cure per manufacturer instructions (typically 24-48 hours)

    For Caulk-Type Fillers:

    1. Cut nozzle tip to match crack width
    2. Apply a continuous bead, slightly overfilling the crack
    3. Tool the surface immediately with a damp finger or trowel
    4. Remove excess material from surrounding concrete
    5. Allow to cure according to package instructions

    The concrete repair professionals at AR Concrete Fayetteville recommend matching the application technique to both the product being used and the specific crack conditions for optimal results.

    Curing and Protecting Fresh Repairs

    After application, proper curing ensures maximum strength:

    1. Shield from elements – Cover repairs with plastic sheeting in extreme temperatures or if rain is possible.
    2. Control drying rate – In hot, dry, or windy conditions, periodically mist repairs with water or use curing compounds to prevent too-rapid drying.
    3. Protect from traffic – Keep foot traffic off repairs for at least 24 hours, longer for wider or deeper repairs.
    4. Final sealing – After the repair has fully cured (typically 5-7 days), applying a concrete sealer over the entire walkway provides additional protection.

    These curing steps significantly improve repair durability by allowing the filler to reach its maximum strength.

    Advanced Techniques for Problematic Cracks

    Some walkway cracks require specialized approaches beyond basic crack filling.

    Dealing with Wide or Deep Cracks

    For cracks wider than 1/2 inch or deeper than 1/4 of the walkway thickness:

    1. Keying the repair – Create a wider base at the bottom of the crack to lock the repair material in place.
    2. Reinforcing with materials – Consider adding small aggregate or fiberglass reinforcing mesh for additional strength.
    3. Two-stage repairs – Apply a base layer with aggregate, allow to partially set, then finish with a smoother top layer.
    4. Edge reinforcement – For cracks near walkway edges, forming a small curb along the edge can provide additional support.

    These techniques create stronger repairs for more severely damaged sections.

    Addressing Underlying Drainage Issues

    Many concrete cracks result from poor drainage that allows water to erode the base or cause freeze-thaw damage:

    1. Improve slope – Ensure the walkway and surrounding ground slope away from the house (minimum 1/4 inch per foot).
    2. Add drainage channels – For persistently wet areas, installing small drainage channels across or alongside the walkway helps direct water away.
    3. Address downspout output – Ensure gutter downspouts direct water at least 5 feet away from walkways.
    4. Improve soil permeability – For areas with clay soil, adding gravel trenches near walkways improves drainage.

    According to the Federal Highway Administration’s Concrete Repair Guide, addressing drainage issues increases repair longevity by up to 300% compared to simply filling cracks without solving the underlying water problems.

    Solutions for Recurring Cracks

    When cracks repeatedly reappear despite proper repairs:

    1. Control joint installation – Saw-cutting strategic control joints can relieve pressure and prevent random cracking.
    2. Flexible sealants – Use more flexible polyurethane or silicone-based fillers that can accommodate movement.
    3. Isolation techniques – For cracks caused by pressure from adjacent structures, creating isolation gaps can prevent damage transfer.
    4. Root barriers – If nearby trees are causing cracks, installing root barriers prevents further damage.

    These approaches address the causes of cracking rather than just the symptoms, resulting in more permanent solutions.

    Enhancing Your Walkway After Crack Repair

    Once cracks are properly repaired, several additional steps can improve the walkway’s appearance and longevity.

    Concrete Sealers for Long-Term Protection

    Applying a quality concrete sealer after repairs provides multiple benefits:

    1. Water resistance – Prevents moisture penetration that leads to freeze-thaw damage.
    2. Stain protection – Reduces discoloration from leaves, dirt, and other contaminants.
    3. Reduced efflorescence – Minimizes the white mineral deposits that often appear on concrete.
    4. Enhanced appearance – Many sealers intensify concrete color and add subtle sheen.
    5. Extended repair life – Protects crack repairs from water intrusion that could cause failure.

    For older walkways, penetrating silane or siloxane sealers often work best as they don’t create a surface film that might peel over time.

    Resurfacing Options for Aged Walkways

    When a walkway has multiple repaired cracks or general surface deterioration:

    1. Concrete overlays – Thin (1/4 to 1/2 inch) layer of polymer-modified cement that creates a completely new surface.
    2. Microtopping – Ultra-thin decorative concrete coating that refreshes appearance.
    3. Stamped overlay – Adds pattern and texture while covering repaired areas.
    4. Concrete staining or painting – Applies new color that can help disguise repaired sections.

    Resurfacing can completely transform an old, cracked walkway for substantially less than replacement costs.

    Maintenance to Prevent Future Cracking

    Establishing a maintenance routine helps prevent new cracks and preserves repairs:

    1. Regular cleaning – Remove dirt, debris, and vegetation that can trap moisture against the concrete.
    2. Periodic resealing – Reapply concrete sealer every 2-5 years depending on exposure and wear.
    3. Prompt stain removal – Clean oil, fertilizer, and other chemical spills quickly to prevent concrete damage.
    4. Winter care – Use sand rather than salt for traction, and avoid metal shovels that can damage the surface.
    5. Annual inspection – Check for new cracks or signs that previous repairs need attention.

    These maintenance practices significantly extend the life of both original concrete and repairs.

    Conclusion

    Sealing cracks in an old concrete walkway is a manageable DIY project with the right approach and materials. The key steps include thoroughly cleaning the cracks, choosing the appropriate filler based on crack width and location, applying the repair material correctly, and allowing proper curing time.

    For the best long-term results, address any underlying drainage or soil issues that may have caused the cracking in the first place. After repairs are complete, applying a quality concrete sealer to the entire walkway provides additional protection against future damage.

    While severely damaged walkways may eventually require replacement, proper crack repair can extend the life of existing concrete by many years. For complex situations or extensive damage, the concrete repair specialists at AR Concrete Fayetteville can provide professional assessment and solutions.

    With regular maintenance and prompt attention to new cracks as they appear, your repaired concrete walkway can remain functional and attractive for years to come.

    How Do You Seal Cracks in an Old Concrete Walkway FAQs

    Can I repair concrete cracks in cold weather?

    Repairing concrete cracks in cold weather is challenging but possible with specialized cold-weather products that can cure at temperatures as low as 40°F. For best results in cold conditions, use repair materials specifically labeled for low-temperature application, warm the repair material before use by storing it indoors, work during the warmest part of the day, and protect repairs from freezing with insulating materials like foam boards or thermal blankets for at least 48 hours after application.

    Will the color of the crack filler match my old concrete walkway?

    Crack fillers typically don’t perfectly match old concrete walkways because concrete naturally changes color with age and exposure to elements. To improve matching, look for tintable repair products that can be adjusted to more closely match your concrete color, consider using concrete pigments to add color to standard repair materials, or apply a thin concrete stain or paint over repaired areas (and potentially the entire walkway) to create a more uniform appearance after repairs are complete.

    How soon after sealing cracks can the walkway be used?

    After sealing cracks in a concrete walkway, light foot traffic can typically resume after 24 hours for most products, but full curing that allows for heavy items, furniture, or vehicle traffic usually requires 3-7 days depending on the specific repair material used, crack depth, and weather conditions. For best results, follow the manufacturer’s specific curing time recommendations, which will be listed on the product packaging or data sheet, as premature use can compromise the strength and longevity of the repair.

  • Can Mold Grow on Concrete Surfaces?

    Can Mold Grow on Concrete Surfaces?

    Yes, mold can grow on concrete surfaces. Despite concrete’s hard, seemingly inhospitable nature, it is porous and absorbs moisture, which provides conditions for mold growth. Mold grows when spores land on damp concrete and find organic material like dirt, dust, or pollen. It commonly appears in shaded, moist areas where concrete remains wet for extended periods.

    Understanding Mold Growth on Concrete

    Concrete might seem like an unlikely surface for mold growth, but certain conditions make it quite hospitable for mold colonies.

    Why Mold Grows on Concrete

    Mold requires four key elements to grow:

    1. Mold spores – These microscopic reproductive cells are everywhere in our environment and constantly land on all surfaces, including concrete.
    2. Moisture – This is the most critical factor. Concrete absorbs and retains moisture, creating a damp environment where mold thrives.
    3. Food source – While concrete itself doesn’t provide nutrients, the organic matter that accumulates on concrete surfaces does. This includes dirt, dust, pollen, leaves, and even the oils from fingerprints.
    4. Appropriate temperature – Most molds grow best in warm environments (70-90°F), though some species can grow in cooler temperatures.
    Identifying mold: Powdery looking Aspergillus mold which is typical in concrete basements like this one

    Concrete’s naturally porous surface creates thousands of tiny pockets where water, organic matter, and mold spores can collect. Even well-installed concrete absorbs some moisture, especially in humid conditions or when exposed to regular water contact.

    Common Types of Mold Found on Concrete

    Several mold species commonly grow on concrete surfaces:

    Mold TypeAppearanceCommon LocationsHealth Concerns
    AspergillusYellow-green to black, powdery textureBasement walls, foundation slabsRespiratory issues, particularly with long exposure
    CladosporiumOlive-green to brown/black, pepper-like spotsConcrete walkways, shaded exterior surfacesAllergic reactions, skin rashes
    PenicilliumBlue-green to white, fuzzy patchesDamp interior concrete, basement floorsAllergic reactions, respiratory irritation
    Stachybotrys (Black Mold)Dark black or greenish-black, slimyPersistently wet concrete in high humidityMore serious health effects possible with prolonged exposure
    MucorWhite to gray, fluffy growthExtremely damp concrete near water sourcesPotential respiratory issues

    According to the Centers for Disease Control and Prevention, while some molds are more concerning than others, any extensive mold growth warrants attention, especially for those with respiratory conditions or compromised immune systems.

    Identifying Mold on Concrete Surfaces

    Mold on concrete doesn’t always look like the obvious fuzzy growth most people associate with moldy food. Learning to identify different appearances helps with early detection.

    Visual Signs of Mold Growth

    Mold on concrete can appear in several forms:

    1. Discoloration – Black, green, brown, or white patches that differ from the concrete’s normal color.
    2. Texture changes – Fuzzy, slimy, or powdery areas on an otherwise smooth concrete surface.
    3. Pattern growth – Spreading circular patterns or spots, especially in damp areas.
    4. Black speckling – Tiny black dots that gradually expand into larger colonies.
    5. Persistent staining – Discolored areas that return after cleaning, indicating mold growth beneath the surface.

    In early stages, mold might look like simple dirt or water staining. The key difference is that mold typically grows and spreads over time, while stains remain constant.

    Distinguishing Mold from Efflorescence and Dirt

    Not all discoloration on concrete is mold. Two common look-alikes are:

    1. Efflorescence – This white, powdery substance is mineral salt that migrates to the concrete surface when water moves through the concrete and evaporates. Unlike mold:
      • It’s typically white or light gray
      • Has a crystalline, powdery texture
      • Disappears when wet and reappears when dry
      • Doesn’t have a musty odor
    2. Dirt/Algae – Sometimes ordinary dirt or algae growth can resemble mold:
      • Dirt typically has a more uniform appearance
      • Algae is usually greener and slicker than most molds
      • Both clean away completely and don’t return quickly unless re-exposed

    As explained in the article about weather damage to concrete, many concrete discolorations are related to moisture issues that can facilitate mold growth if not addressed.

    Using Smell and Simple Tests to Confirm Mold

    Beyond visual identification, you can:

    1. Check for musty odors – Most molds release musty, earthy smells, especially in enclosed spaces.
    2. Perform a bleach test – Apply a few drops of diluted household bleach to the suspected area:
      • If it lightens dramatically within 1-2 minutes and stays lightened, it’s likely mold
      • If it has no effect or returns to the original color quickly, it may be dirt or staining
    3. Use a mold test kit – Commercial kits can identify mold presence and sometimes the specific type of mold present.
    4. Examine with a magnifying glass – Mold often has a distinct fuzzy or branching structure visible under magnification.

    When in doubt, treating suspicious growth as mold until proven otherwise is the safest approach, especially for indoor concrete surfaces.

    Conditions That Promote Mold Growth on Concrete

    Understanding what encourages mold on concrete helps prevent it through environmental modifications.

    Moisture Sources for Concrete Mold

    Moisture is the primary factor in concrete mold growth. Common sources include:

    1. Direct water exposure – Rain, landscape irrigation, or washing that regularly wets concrete.
    2. High humidity – Ambient moisture in the air that condenses on cooler concrete surfaces.
    3. Groundwater seepage – Water that moves up through concrete from the soil below.
    4. Plumbing leaks – Hidden water sources that keep concrete consistently damp.
    5. Condensation – Often occurs on concrete in basements and crawlspaces due to temperature differences.
    6. Poor drainage – Areas where water pools or doesn’t dry quickly after rain.

    Research from the National Institute of Standards and Technology indicates that concrete maintaining more than 70% internal relative humidity provides sufficient moisture for mold growth when other conditions are favorable.

    Environmental Factors That Support Mold

    Beyond moisture, several environmental factors contribute to mold growth:

    1. Limited airflow – Stagnant air allows humidity to remain high around concrete surfaces.
    2. Limited sunlight – UV rays naturally inhibit mold growth, so shaded areas are more susceptible.
    3. Warm temperatures – Most molds thrive between 70-90°F, though some can grow in cooler conditions.
    4. Neutral to acidic pH – While concrete starts alkaline (which inhibits mold), its surface pH often neutralizes over time.
    5. Organic matter accumulation – Dirt, dust, and plant material provide food for mold growth.

    Areas combining several of these factors—like shaded, humid basement corners with poor air circulation—create ideal conditions for mold growth on concrete.

    Seasonal Patterns in Concrete Mold Growth

    Mold growth on concrete often follows seasonal patterns:

    1. Spring – Increased rain and warming temperatures create ideal growth conditions, especially outdoors.
    2. Summer – High humidity and warm temperatures accelerate growth, particularly in basements where cool concrete causes condensation.
    3. Fall – Decaying leaves and organic matter provide additional food sources for mold.
    4. Winter – In heated buildings, the temperature difference between warm indoor air and cold concrete creates condensation issues.

    In Fayetteville and similar climates, the combination of humid summers and significant seasonal temperature changes creates particularly favorable conditions for concrete mold growth.

    Preventing Mold Growth on Concrete

    Preventing mold is easier and less expensive than removing established colonies. Several strategies can keep concrete mold-free.

    Moisture Control Strategies

    Since moisture is the most important factor in mold growth, controlling it is the primary prevention strategy:

    1. Improve drainage – Ensure concrete slopes away from buildings (minimum 1/4 inch per foot).
    2. Fix leaks promptly – Address any plumbing or roof leaks that expose concrete to water.
    3. Use dehumidifiers – In basements and other damp areas, maintain humidity below 60%.
    4. Improve ventilation – Use fans to increase air circulation in enclosed areas with concrete surfaces.
    5. Install vapor barriers – For new concrete installations, use proper vapor barriers to prevent ground moisture migration.
    6. Apply waterproof coatings – Sealers and waterproofing compounds reduce concrete’s ability to absorb moisture.

    The concrete repair specialists you contract through AR Concrete Fayetteville can evaluate moisture issues affecting concrete and recommend appropriate solutions.

    Concrete Sealers and Protective Treatments

    Several specialized products can make concrete less hospitable to mold:

    1. Densifiers – These penetrating treatments make concrete less porous and less likely to absorb moisture.
    2. Antimicrobial sealers – Contain ingredients that actively inhibit mold growth on concrete surfaces.
    3. Epoxy coatings – Create a non-porous barrier that prevents moisture absorption.
    4. Acrylic sealers – Provide a protective film that reduces water penetration while allowing some vapor transmission.
    5. Silicone water repellents – Create a hydrophobic surface that sheds water rather than absorbing it.

    For optimal protection, these treatments should be applied to clean, dry concrete and reapplied according to manufacturer recommendations.

    Landscaping and Design to Minimize Mold Risk

    Thoughtful design can significantly reduce mold problems on exterior concrete:

    1. Provide adequate sun exposure – Design landscapes to allow sunlight to reach concrete surfaces for part of the day.
    2. Maintain proper clearances – Keep shrubs and plants trimmed back from concrete to improve airflow.
    3. Control runoff – Direct downspouts and irrigation away from concrete surfaces.
    4. Use mold-resistant mulch – Some mulches (like cedar) have natural antimicrobial properties.
    5. Provide proper slope and drainage – Ensure water flows away from, not toward or onto, concrete surfaces.

    These landscape design elements help keep concrete drier and less susceptible to mold growth.

    Removing Mold from Concrete Surfaces

    When prevention fails and mold appears, proper removal techniques ensure thorough cleaning without damaging the concrete.

    Safe and Effective Cleaning Solutions

    Several cleaning solutions effectively remove mold from concrete:

    Cleaning SolutionEffectivenessBest ForPrecautions
    Bleach Solution (1:9 bleach:water)High for surface moldSmooth, sealed concrete, outdoor surfacesStrong fumes, can damage plants, clothing
    Vinegar (undiluted white vinegar)Moderate to highIndoor or sensitive locations, porous concreteOdor dissipates within hours
    Hydrogen Peroxide (3%)ModerateIndoor use, colored concreteLess effective on established colonies
    Commercial Mold RemoversHighVaries by productFollow manufacturer instructions carefully
    Borax Solution (1 cup to 1 gallon water)ModerateIndoor use, residual protectionLess effective on severe mold
    Baking Soda SolutionLow to moderateGentle cleaning, residue concernsMay require multiple applications

    For severe or recurring mold problems, professional-grade products containing quaternary ammonium compounds offer longer-lasting protection but require careful handling.

    Step-by-Step Mold Removal Process

    For effective mold removal from concrete:

    1. Safety preparation
      • Wear rubber gloves, eye protection, and an N95 respirator mask
      • Ensure good ventilation
      • Cover nearby items that could be damaged by cleaning solutions
    2. Initial cleaning
      • Remove loose mold with a stiff brush
      • Vacuum the area with a HEPA vacuum if available
    3. Apply cleaning solution
      • Apply your chosen solution generously to the affected area
      • Allow it to sit for 10-15 minutes (follow product instructions)
      • Scrub vigorously with a stiff brush
      • Rinse thoroughly with clean water
    4. Secondary treatment
      • After the area dries, apply a mold inhibitor
      • Consider applying a concrete sealer once fully dry
    5. Monitor the area
      • Check regularly for signs of returning mold
      • Address any moisture issues that may cause recurrence

    For stubborn mold, especially on porous concrete, multiple treatments may be necessary.

    Professional Mold Remediation for Severe Cases

    Some situations warrant professional mold remediation:

    1. Extensive growth – Mold covering large areas (more than 10 square feet)
    2. Recurring problems – Mold that returns despite repeated cleaning
    3. Black mold concerns – Potential Stachybotrys or other toxic molds
    4. Health sensitivities – When building occupants have respiratory conditions or compromised immune systems
    5. Inaccessible areas – Mold growing in crawlspaces or other difficult-to-reach areas

    Professional remediators bring specialized equipment like commercial-grade HEPA filtration, containment systems, and industrial-strength antimicrobial treatments that provide more thorough remediation than DIY methods.

    Long-Term Management of Concrete to Prevent Mold

    Beyond immediate cleaning, long-term strategies help keep concrete mold-free.

    Regular Inspection and Maintenance Routines

    Establishing a regular maintenance schedule helps prevent mold problems:

    1. Monthly visual inspections – Check prone areas for early signs of mold growth
    2. Seasonal cleaning – Clean concrete surfaces thoroughly each season
    3. Prompt stain investigation – Check any new discoloration to determine if it’s mold
    4. Drainage maintenance – Keep gutters, downspouts, and landscape drainage functioning properly
    5. Sealant evaluation – Check for deteriorating sealants or coatings that might allow moisture penetration

    Regular maintenance prevents small mold problems from becoming extensive colonies that are more difficult to remove.

    Humidity and Moisture Monitoring

    Ongoing environmental monitoring helps maintain mold-unfriendly conditions:

    1. Use humidity meters – Inexpensive devices that measure ambient humidity in enclosed spaces
    2. Check for condensation – Regularly inspect for condensation on concrete surfaces
    3. Monitor weather patterns – Be particularly vigilant during prolonged rainy or humid periods
    4. Regular dehumidifier maintenance – Clean and maintain dehumidifiers to ensure proper function
    5. Inspect for new water sources – Watch for new plumbing leaks, roof issues, or drainage problems

    Maintaining humidity below 60% in enclosed spaces significantly reduces mold risk on concrete surfaces.

    Improving Concrete Quality for Mold Resistance

    For new installations or major renovations, several concrete quality improvements increase mold resistance:

    1. Lower water-to-cement ratios – Creates denser, less porous concrete
    2. Proper curing techniques – Ensures optimal concrete density and surface hardness
    3. Integral water repellents – Additives that make the entire concrete mix water-resistant
    4. Surface hardeners – Treatments that densify the concrete surface, reducing porosity
    5. Antimicrobial additives – Concrete mixtures containing mold-inhibiting compounds

    The concrete specialists at AR Concrete Fayetteville can recommend appropriate quality improvements for new concrete installations based on specific site conditions and mold risk factors.

    Conclusion

    Yes, mold can and does grow on concrete surfaces despite concrete’s seemingly inhospitable nature. The combination of concrete’s porosity, its ability to retain moisture, and the organic material that inevitably accumulates on its surface creates conditions where mold can thrive when moisture is present.

    Preventing mold on concrete focuses primarily on moisture control through proper drainage, ventilation, dehumidification, and protective sealants. Regular cleaning and maintenance also play crucial roles in preventing mold establishment.

    When mold does appear, prompt cleaning with appropriate solutions removes the existing growth. For recurring or extensive mold problems, investigating and addressing the underlying moisture source is essential for long-term resolution.

    With proper attention to prevention, early intervention, and occasional maintenance, concrete surfaces can remain mold-free and maintain both their appearance and structural integrity for many years.

    Can Mold Grow on Concrete Surfaces FAQs

    Is mold on concrete dangerous to my health?

    Mold on concrete can potentially affect health, especially for people with allergies, asthma, or compromised immune systems. While brief exposure to small amounts of mold is generally not a serious concern for healthy individuals, prolonged exposure to extensive mold growth can cause allergic reactions, respiratory symptoms, and irritation of the eyes, skin, nose, and throat, with some mold types (like Stachybotrys or “black mold”) potentially causing more serious health issues.

    Why does the concrete in my basement keep growing mold despite cleaning?

    Basement concrete repeatedly grows mold despite cleaning because you’re addressing the symptom (visible mold) rather than the underlying cause (persistent moisture). Common sources of this ongoing moisture include high groundwater pressure against foundation walls, condensation from warm humid air contacting cool concrete surfaces, unresolved plumbing leaks, or inadequate ventilation and dehumidification, and solving the problem requires identifying and addressing these specific moisture sources rather than just cleaning the mold.

    Can sealing my concrete completely prevent mold growth?

    Sealing concrete significantly reduces mold growth risk by decreasing water absorption, but doesn’t completely prevent it since mold can still grow on the sealer’s surface if organic matter accumulates and moisture remains present for extended periods. For maximum mold prevention, use a high-quality concrete sealer with antimicrobial properties, ensure proper drainage and ventilation, maintain regular cleaning to remove organic material, control humidity levels, and reapply sealers according to manufacturer recommendations as they wear down over time.

  • Can weather cause long-term damage to concrete?

    Can weather cause long-term damage to concrete?

    Yes, weather can cause significant long-term damage to concrete. Temperature fluctuations, moisture, freezing and thawing cycles, and extreme heat all affect concrete durability. Over time, these weather conditions can lead to cracking, spalling, scaling, and structural weakening if the concrete isn’t properly formulated, installed, and maintained.

    How Different Weather Conditions Affect Concrete

    Weather impacts concrete in various ways throughout the year. Each condition creates unique challenges for concrete durability.

    an infographic showing  the effects of temperature fluctuations via snow, ice and heat damaging concrete, followed by disposal in a Zap Dumpster and recycling for re-use

    Freeze-Thaw Cycles

    The freeze-thaw cycle is one of the most destructive weather patterns for concrete, especially in Fayetteville and similar regions with fluctuating winter temperatures.

    When water penetrates concrete and freezes, it expands approximately 9% in volume. This expansion creates internal pressure within the concrete. As temperatures rise again, the ice melts, allowing more water to penetrate deeper into any new cracks. When temperatures drop again, the freeze-thaw cycle repeats, gradually breaking apart the concrete from within.

    Concrete can experience hundreds of freeze-thaw cycles during its lifetime. Research from the Federal Highway Administration has shown that even high-quality concrete can begin to show damage after as few as 50 severe freeze-thaw cycles if not properly designed with air entrainment (tiny air bubbles that provide room for expanding ice).

    According to the U.S. Department of Transportation’s research on concrete durability, properly air-entrained concrete can withstand hundreds or even thousands of freeze-thaw cycles without significant damage.

    Rainfall and Moisture Exposure

    Water is both essential for concrete curing and potentially damaging to mature concrete. Rainfall and humidity affect concrete in several ways:

    1. Chemical reactions – Rainwater, especially acid rain, can slowly dissolve the calcium hydroxide in concrete, weakening its structure.
    2. Rebar corrosion – Moisture that penetrates to reinforcing steel causes rust, which expands and cracks surrounding concrete.
    3. Alkali-silica reaction – Moisture can trigger chemical reactions between alkalis in cement and certain types of aggregates, forming a gel that expands and cracks concrete.
    4. Erosion – Heavy rain and water flow gradually wear away concrete surfaces, especially where concrete quality is poor.

    Areas with high annual rainfall generally see more concrete deterioration than arid regions, unless the concrete is properly sealed and maintained.

    Extreme Heat and Thermal Expansion

    High temperatures affect concrete in ways that aren’t always immediately visible but can cause long-term damage:

    1. Thermal expansion – Concrete expands when heated and contracts when cooled. Without proper expansion joints, this movement causes stress and cracking.
    2. Accelerated curing – Extremely hot weather during concrete placement can cause too-rapid evaporation, leading to shrinkage cracks.
    3. Internal steam pressure – When moisture trapped in concrete is rapidly heated, it can create internal steam pressure that damages concrete from within.
    4. Drying shrinkage – Heat accelerates water evaporation, which can lead to excessive shrinkage and cracking if not properly controlled.

    In regions like Arizona and Nevada, where summer temperatures routinely exceed 100°F, special concrete formulations and installation practices are necessary to prevent heat-related damage.

    Wind Erosion and Sand Abrasion

    In coastal areas or regions with frequent high winds, concrete faces another weather challenge:

    1. Surface abrasion – Wind-driven sand and particles wear away concrete surfaces over time.
    2. Accelerated drying – Wind increases the evaporation rate during curing, potentially causing shrinkage cracks.
    3. Salt spray – In coastal areas, wind carries salt-laden moisture that corrodes reinforcement and damages concrete.

    While less dramatic than freeze-thaw damage, wind effects can significantly reduce concrete service life, particularly in exposed structures.

    Recognizing Weather-Related Concrete Damage

    Weather damage follows identifiable patterns that help distinguish it from other types of concrete problems.

    Common Signs of Weather Damage in Concrete

    Different weather conditions create characteristic damage patterns:

    Weather ConditionDamage PatternAppearanceLocation
    Freeze-ThawScaling, spallingFlaking surface, exposed aggregateHorizontal surfaces, corners
    Heavy RainErosion, leachingRough texture, white depositsAreas with water flow
    Extreme HeatMap crackingInterconnected cracks like a mapLarge flat surfaces
    Rapid Temperature ChangeLinear cracksStraight cracks often in patternsThroughout concrete
    Wind ErosionSurface wearSmooth, worn appearanceExposed corners, edges

    Understanding these patterns helps identify underlying causes and appropriate solutions. As detailed in the article about what spalling is and how it’s fixed, recognizing specific damage types is crucial for proper repair.

    Using Weather Damage to Diagnose Concrete Problems

    Weather-related concrete damage offers clues about concrete quality and installation issues:

    1. Early scaling in freeze-thaw conditions often indicates inadequate air entrainment during mixing.
    2. Isolated areas of rain erosion may point to inconsistent concrete mixing or finishing.
    3. Pattern cracking from heat frequently reveals improper joint placement or spacing.
    4. Excessive damage from normal weather conditions suggests fundamental problems with concrete mix design or placement.

    When the concrete specialists at AR Concrete Fayetteville evaluate damaged concrete, these weather damage patterns help determine whether simple repairs will suffice or if more extensive interventions are needed.

    Weather-Resistant Concrete Design

    Modern concrete technology offers many solutions to prevent weather-related damage.

    Concrete Mix Design for Weather Resilience

    The composition of concrete significantly impacts its weather resistance:

    1. Air entrainment – Microscopic air bubbles (typically 4-7% by volume) provide space for freezing water to expand without damaging the concrete.
    2. Water-cement ratio – Lower water content creates denser, less permeable concrete that resists moisture penetration.
    3. Supplementary cementitious materials – Additives like fly ash, silica fume, and slag cement can improve durability.
    4. Aggregate selection – Non-reactive, properly sized aggregates improve concrete performance in all weather conditions.
    5. Chemical admixtures – Water reducers, superplasticizers, and corrosion inhibitors enhance weather resistance.

    The right mix design for local weather conditions can more than double concrete service life in harsh environments.

    Construction Practices for Durable Concrete

    How concrete is placed and finished greatly affects its weather resistance:

    1. Proper consolidation – Thorough vibration eliminates air pockets that can collect water.
    2. Adequate curing – Maintaining moisture and temperature during the critical early curing period creates stronger concrete.
    3. Appropriate finishing – Avoiding overworking the surface prevents weakening the concrete’s protective “skin.”
    4. Proper joint design – Correctly placed control joints manage cracking from temperature fluctuations.
    5. Sufficient concrete cover – Providing adequate concrete cover over reinforcement prevents weather-induced corrosion.

    Professional concrete contractors understand these principles and adjust their practices based on weather conditions during installation.

    Protecting Existing Concrete from Weather Damage

    For concrete already in place, several protective strategies can extend its life despite weather challenges.

    Concrete Sealers and Protective Treatments

    Surface treatments provide an additional defense against weather:

    Sealer TypeWeather ProtectionVisibilityReapplication IntervalBest Applications
    Penetrating Silane/SiloxaneExcellent water/salt protectionInvisible5-10 yearsDriveways, sidewalks, exposed concrete
    AcrylicGood UV/water protectionVisible gloss or satin1-3 yearsDecorative concrete, patios
    EpoxyExcellent chemical/abrasion protectionHigh gloss3-5 yearsGarage floors, industrial applications
    PolyurethaneSuperior UV/abrasion resistanceGloss to matte2-5 yearsHigh-traffic areas, pool decks
    Integral CrystallineWaterproofing throughout concreteInvisibleOne-time applicationFoundations, water-exposed structures

    Selecting the right sealer for local weather conditions and specific concrete applications significantly enhances durability. In Fayetteville, where freeze-thaw cycles are common, penetrating sealers that allow water vapor transmission while blocking liquid water entry are particularly effective.

    Maintenance Strategies for Different Climates

    Regular maintenance adapted to local climate challenges extends concrete life:

    Cold Climate Maintenance

    1. Regular sealing – Apply penetrating sealers before winter to prevent water infiltration.
    2. Proper drainage – Ensure water doesn’t pool on concrete surfaces where it can freeze.
    3. Careful snow removal – Use plastic shovels instead of metal to prevent surface damage.
    4. Limited de-icing chemicals – Choose concrete-safe de-icers and use sparingly.
    5. Spring inspections – Check for winter damage and make prompt repairs.

    Hot Climate Maintenance

    1. Reflective sealers – Use coatings that reflect heat to reduce thermal stress.
    2. Control joint maintenance – Ensure expansion joints are clean and functional.
    3. Moisture management – Periodically rinse salt accumulation from concrete in coastal areas.
    4. Shade provision – Where possible, reduce direct sun exposure to minimize heating.
    5. Regular cleaning – Remove abrasive particles that accelerate weather damage.

    Wet Climate Maintenance

    1. Waterproof sealers – Apply high-quality water repellents regularly.
    2. Drainage improvements – Ensure water flows away from concrete structures.
    3. Mold prevention – Clean concrete surfaces to prevent organic growth in shaded areas.
    4. Gutter maintenance – Keep water control systems functioning properly to direct water away from concrete.
    5. Crack monitoring – Inspect regularly for new cracks that could allow water penetration.

    Long-Term Weather Impact Assessment

    Understanding how weather affects concrete over decades helps with planning and maintenance decisions.

    Predicting Concrete Service Life Based on Climate

    Weather exposure is a key factor in concrete lifespan predictions:

    1. Moderate climates – Properly designed and maintained concrete can last 50-100 years with minimal deterioration.
    2. Severe freeze-thaw zones – Service life may be reduced to 25-50 years without specialized mix designs and regular maintenance.
    3. Coastal environments – Salt exposure may limit concrete life to 15-40 years without corrosion protection systems.
    4. Extreme heat regions – Thermal cycling can reduce expected service life to 30-60 years without specific design considerations.

    Modern building codes and standards increasingly incorporate climate-specific durability requirements to ensure structures meet expected service lives despite local weather challenges.

    Climate Change Considerations for Concrete Structures

    Changing climate patterns create new challenges for concrete durability:

    1. Increased freeze-thaw cycles in some regions as winter temperatures fluctuate more frequently around freezing.
    2. More intense precipitation events that increase erosion and moisture exposure.
    3. Rising sea levels expanding the zones affected by salt exposure.
    4. Higher maximum temperatures increasing thermal expansion stress.

    According to research from the National Institute of Standards and Technology, climate change effects may reduce the service life of some concrete structures by 10-20% unless adaptation measures are implemented.

    Forward-thinking concrete design now includes climate resilience features that anticipate these changing conditions.

    Conclusion

    Weather absolutely causes long-term damage to concrete, with effects ranging from surface deterioration to structural failure. Freeze-thaw cycles, rainfall, extreme temperatures, and wind all create unique deterioration patterns that accumulate over years and decades.

    The good news is that modern concrete technology offers effective solutions. Properly designed concrete mixes, professional installation practices, appropriate protective treatments, and regular maintenance can all dramatically extend concrete life even in challenging climates.

    Understanding your local weather patterns is the first step in protecting concrete investments. By recognizing how specific weather conditions affect concrete and implementing appropriate protective strategies, property owners can significantly extend the functional and aesthetic life of their concrete structures despite ongoing weather exposure.

    The concrete repair experts at AR Concrete Fayetteville understand these weather-related challenges and can help with both preventive measures and restoration of weather-damaged concrete surfaces.

    Can Weather Cause Long-Term Damage to Concrete FAQs

    What type of weather is most damaging to concrete?

    Freeze-thaw cycles are typically the most damaging weather pattern for concrete because water penetrates tiny cracks, freezes and expands by about 9%, breaks apart the concrete structure from within, and then thaws to allow more water penetration deeper into the new cracks. This cyclical process is particularly destructive in regions like the Midwest and Northeast United States where temperatures frequently fluctuate above and below freezing during winter months.

    How can I tell if my concrete damage is from weather or another cause?

    Weather damage typically shows distinctive patterns: freeze-thaw damage appears as scaling or flaking of the surface; heat damage creates map-like cracking patterns; moisture damage often shows as discoloration or efflorescence (white powdery deposits); and wind erosion causes gradual wearing away of corners and edges. These patterns usually affect exposed areas first, whereas damage from other causes like settlement, improper mixing, or chemical exposure typically follows different patterns or appears in specific locations regardless of exposure.

    Is it normal for concrete to crack due to weather changes?

    Some minor cracking due to weather changes is normal in concrete as it expands and contracts with temperature fluctuations. Hairline cracks (less than 1/16 inch wide) that don’t grow significantly are generally considered within normal limits for most concrete installations. However, wider cracks, multiple intersecting cracks, or cracks that continue to widen over time indicate more serious weather damage that should be addressed promptly to prevent accelerated deterioration of the concrete structure.

  • What is spalling and how is it fixed? DIY & Professional Methods

    What is spalling and how is it fixed? DIY & Professional Methods

    Spalling is concrete surface damage where pieces flake, chip, or break away from the main structure. It’s caused by freeze-thaw cycles, poor installation, water damage, or chemical exposure. Fixing spalled concrete involves removing damaged material, applying a bonding agent, and resurfacing with appropriate repair materials. The repair method depends on the damage depth and extent.

    Understanding Concrete Spalling

    Concrete spalling is a common problem that affects driveways, sidewalks, foundations, and other concrete surfaces. Recognizing what it is and why it happens is the first step toward effective repairs.

    What Exactly Is Spalling?

    Spalling is the visible deterioration of a concrete surface where fragments of the material break away, creating a rough, pitted appearance. It typically begins as small flakes or chips but can progress to larger chunks breaking off and deeper degradation if left untreated.

    The damage usually starts at the surface and works its way deeper into the concrete. Early spalling might appear as:

    • Small flakes of concrete coming loose
    • Shallow pits or divots in the surface
    • Areas where the top layer has peeled away
    • Exposed aggregate (the stones in the concrete mix)

    As spalling progresses, the damage becomes more severe with larger pieces detaching and deeper pitting. Advanced spalling can compromise the structural integrity of concrete elements, especially in load-bearing applications.

    grinding to prepare spalled concrete for repair

    Common Causes of Concrete Spalling

    Several factors can cause concrete to spall. Understanding these helps prevent future issues and determines the best repair approach.

    Freeze-Thaw Cycles

    The most common cause of spalling in colder climates is freeze-thaw damage. This occurs when:

    1. Water penetrates the concrete surface
    2. Temperatures drop below freezing
    3. The water expands as it turns to ice
    4. This expansion creates internal pressure
    5. Repeated cycles gradually break away the surface

    Concrete in Fayetteville and similar climates with fluctuating temperatures is particularly vulnerable to this type of damage.

    Poor Installation Practices

    Installation problems that often lead to spalling include:

    • Using too much water in the concrete mix
    • Overworking or overfinishing the surface
    • Adding water during finishing (known as “blessing” the concrete)
    • Inadequate curing time or methods
    • Finishing while bleed water is still present

    These mistakes create weaker surface concrete that’s more prone to spalling later.

    Insufficient Concrete Cover Over Reinforcement

    When steel reinforcement (rebar) is placed too close to the concrete surface:

    1. Moisture reaches the steel more easily
    2. The steel rusts and expands
    3. The expanding rust creates pressure
    4. This pressure forces off the concrete cover

    This common issue in older structures can cause extensive spalling that requires structural repair.

    Chemical Exposure

    Certain chemicals accelerate concrete degradation:

    • De-icing salts (especially common on driveways and sidewalks)
    • Pool chemicals
    • Fertilizers
    • Acid rain
    • Industrial chemicals

    Chemical damage often causes a distinctive pattern of spalling that may require specialized repair approaches.

    As explored in the article about tree roots causing concrete damage, environmental factors play a major role in concrete deterioration, and spalling is no exception.

    Evaluating Spalling Severity

    Not all spalling requires the same treatment. Assessing the damage helps determine the appropriate repair method.

    Determining Spalling Depth and Extent

    Concrete spalling can be categorized by its depth and how much area it affects:

    Severity LevelDepthCoverageAppearanceRecommended Repair
    Light< 1/8 inchIsolated areasSurface flaking, minor pittingSurface treatment or coating
    Moderate1/8 – 1/2 inchUp to 30% of surfaceNoticeable pitting, exposed aggregateConcrete resurfacing
    Severe> 1/2 inch>30% of surfaceDeep pitting, large areas affectedFull-depth repair or replacement
    StructuralVariesExposes reinforcementVisible rebar, compromised strengthProfessional structural repair

    To accurately assess spalling depth:

    1. Clean the area thoroughly
    2. Use a small ruler or depth gauge to measure the deepest pits
    3. Determine what percentage of the surface is affected
    4. Check if reinforcement is visible or close to being exposed

    This assessment helps determine whether DIY repairs are appropriate or if professional intervention is needed.

    When Spalling Indicates Serious Problems

    In some cases, spalling points to underlying issues that require professional assessment:

    1. Reinforcement corrosion – When spalling exposes rusted rebar, structural integrity may be compromised.
    2. Widespread damage – Extensive spalling across large areas suggests fundamental problems with the concrete.
    3. Progressive deterioration – Spalling that continues to worsen despite surface repairs indicates deeper issues.
    4. Foundation spalling – Damage to structural foundation elements always warrants professional evaluation.
    5. Commercial concrete – Spalling in commercial or public structures typically requires engineered repair solutions.

    In these situations, consulting with our concrete repair specialists at AR Concrete Fayetteville ensures proper assessment and repair.

    DIY Repair Methods for Light to Moderate Spalling

    For light to moderate spalling without structural concerns, several DIY repair approaches can be effective.

    Surface Preparation

    Proper preparation is the most critical step for successful spalling repair:

    1. Remove loose material – Chip away any loose or flaking concrete using a chisel and hammer.
    2. Clean thoroughly – Use a pressure washer or stiff brush to remove all dust, dirt, and debris.
    3. Treat stains – Remove oil, grease, or other contaminants with appropriate cleaners.
    4. Check for soundness – Tap the concrete with a hammer; a hollow sound indicates more extensive damage beneath the surface.
    5. Create a rough profile – Slightly roughen smooth areas around the spalled section to improve bonding.
    6. Address any visible reinforcement – If rebar is exposed, remove rust with a wire brush and apply a rust converter.

    Thorough preparation ensures the repair material bonds properly with the existing concrete.

    Choosing the Right Repair Product

    Several products are available for repairing spalled concrete, each with specific applications:

    1. Polymer-modified cement patching compounds – Good for repairs from feather edge to 1/2 inch deep.
    2. Concrete resurfacer – Ideal for thin applications over larger areas (typically 1/16 to 1/4 inch).
    3. Epoxy mortar – Provides excellent durability for high-traffic areas or chemical exposure.
    4. Vinyl concrete patching compound – Works well for shallow repairs up to 1/4 inch deep.
    5. Sand/cement mixes – Suitable for deeper repairs but require proper proportioning and mixing.

    The National Research Council’s Guide to Concrete Repair emphasizes that matching the repair material to the application is critical for long-lasting results.

    Application Techniques for DIY Repairs

    For best results when repairing spalled concrete:

    1. Apply bonding agent – Brush a concrete bonding adhesive onto the prepared surface to improve adhesion.
    2. Mix according to instructions – Follow manufacturer directions precisely for water ratios and mixing time.
    3. Work in appropriate conditions – Apply repairs when temperatures are between 50-85°F (10-29°C) and no rain is expected for 24 hours.
    4. Apply in thin layers – For deeper repairs, apply multiple thin layers rather than one thick layer.
    5. Compact thoroughly – Press the repair material firmly into the prepared area to eliminate air pockets.
    6. Create proper texture – Match the surrounding concrete texture for a more uniform appearance.
    7. Cure properly – Keep the repair damp for several days by misting with water and covering with plastic.

    These techniques significantly improve the durability and appearance of DIY spalling repairs.

    Professional Repair Options for Severe Spalling

    When spalling is severe, covers large areas, or affects structural elements, professional repair methods provide better results.

    Concrete Resurfacing

    For widespread surface spalling without structural damage, concrete resurfacing is often the most cost-effective solution:

    1. Surface preparation – Professionals use specialized equipment like shot blasters or diamond grinders to prepare the surface.
    2. Crack and joint treatment – Existing cracks and joints are properly addressed before resurfacing.
    3. Primer application – A high-quality primer ensures proper bonding.
    4. Overlay installation – A thin layer (typically 1/8 to 1/4 inch) of specialized overlay material is applied.
    5. Finishing – The new surface can be finished with various textures and even decorative treatments.

    Resurfacing can extend concrete life by 10-15 years when properly installed.

    resurfacing the spalled concrete

    Partial Depth Repairs

    For localized but deeper spalling damage:

    1. Removal of damaged concrete – Specialists use concrete saws and chipping hammers to remove all damaged material to sound concrete.
    2. Edge preparation – Repair edges are cut at slight angles to help lock in the repair material.
    3. Reinforcement treatment – Any exposed reinforcement is cleaned and treated with protective coatings.
    4. Specialized repair materials – High-performance materials with properties matched to the existing concrete are used.
    5. Curing controls – Professional-grade curing compounds and techniques ensure optimal strength development.

    These repairs integrate better with existing concrete and provide longer service life than typical DIY approaches.

    Full-Depth Replacement

    In cases of severe spalling that reaches deep into the concrete:

    1. Complete removal – The damaged section is cut out entirely.
    2. Base preparation – The underlying base material is examined and improved if necessary.
    3. Reinforcement installation – New reinforcement is tied to existing reinforcement where appropriate.
    4. High-performance concrete – Concrete with special additives for durability is used.
    5. Proper joints – Control joints are installed to manage future cracking.

    Full-depth replacement provides a completely new concrete section with the longest potential service life.

    Preventing Future Spalling

    After repairing spalled concrete, several strategies help prevent recurrence.

    Concrete Sealers and Protective Treatments

    Applying the right sealer is one of the most effective ways to prevent spalling:

    Sealer TypeBest ForApplication FrequencyProsCons
    Penetrating Silane/SiloxaneHorizontal exterior surfacesEvery 5-10 yearsBreathable, doesn’t change appearanceNo filling of existing cracks
    AcrylicDecorative concrete, light trafficEvery 1-3 yearsEnhances color, UV resistantWears faster than other types
    EpoxyGarage floors, high trafficEvery 3-5 yearsVery durable, chemical resistantNot breathable, can yellow in sunlight
    PolyurethaneSealing over epoxy, UV exposureEvery 2-5 yearsExcellent abrasion resistanceRequires careful surface prep
    Lithium SilicateIndustrial floors, densifying concreteOnce (with occasional maintenance)Hardens concrete, increases durabilityNot a standalone water repellent

    Choosing the right sealer depends on the concrete’s location, usage, and exposure conditions.

    Drainage Improvements to Reduce Water Exposure

    Since water is a primary cause of spalling, improving drainage around concrete surfaces helps prevent damage:

    1. Proper slope – Ensure concrete surfaces slope away from buildings (minimum 1/4 inch per foot).
    2. Gutter extensions – Direct downspouts away from concrete elements.
    3. French drains – Install drainage systems in areas with persistent water issues.
    4. Permeable borders – Create gravel borders around concrete to improve drainage at edges.
    5. Joint sealing – Ensure control and expansion joints are properly sealed to prevent water infiltration.

    These improvements significantly reduce the concrete’s exposure to moisture, addressing one of the main causes of spalling.

    Winter Maintenance Practices

    In Fayetteville and similar climates with freezing temperatures, winter maintenance practices greatly affect concrete durability:

    1. Limit de-icing chemicals – Use sand or non-chemical traction materials when possible.
    2. Choose concrete-friendly de-icers – If chemicals must be used, choose calcium magnesium acetate or other concrete-safe options.
    3. Prompt snow removal – Remove snow before it melts and refreezes.
    4. Apply sealers before winter – Ensure concrete is sealed before the first freeze.
    5. Avoid metal shovels – Use plastic or rubber-edged snow removal tools to prevent surface damage.

    These practices help minimize freeze-thaw damage, one of the leading causes of concrete spalling.

    Long-Term Concrete Maintenance

    Preventing spalling is easier and less expensive than repairing it. A comprehensive maintenance approach helps extend concrete life.

    Regular Inspection and Early Intervention

    Establishing a routine inspection schedule helps catch problems early:

    1. Seasonal inspections – Check concrete thoroughly each spring and fall.
    2. Document changes – Keep photos or notes to track any developing issues.
    3. Look for early warning signs – Minor scaling, small cracks, or dark spots often precede spalling.
    4. Address minor issues immediately – Seal small cracks and low spots before they worsen.
    5. Check drainage patterns – Ensure water continues to drain properly away from concrete.

    Early intervention on minor problems prevents them from developing into more serious spalling.

    Professional Maintenance Services

    For valuable concrete assets, professional maintenance services provide the highest level of protection:

    1. Professional cleaning – Specialized equipment removes contaminants without damaging concrete.
    2. Crack injection – High-tech epoxy or urethane injection stabilizes cracks before they cause spalling.
    3. Joint renewal – Professional replacement of deteriorated joint materials.
    4. Performance coating systems – Advanced multi-layer protective systems for high-value concrete.
    5. Cathodic protection – For critical infrastructure, advanced systems can protect reinforcement from corrosion.

    The concrete specialists at AR Concrete Fayetteville offer maintenance programs that help prevent spalling and other concrete deterioration issues.

    Conclusion

    Concrete spalling is a common problem where the surface flakes, chips, or breaks away due to freeze-thaw cycles, poor installation, water damage, or chemical exposure. While unsightly, its importance goes beyond appearance—spalling that’s left untreated often leads to more serious structural problems.

    For light to moderate spalling, DIY repairs can be effective when proper preparation, appropriate materials, and correct application techniques are used. More severe or widespread spalling typically requires professional intervention with specialized equipment and materials.

    Prevention is always the best approach, with concrete sealers, drainage improvements, and appropriate winter maintenance practices significantly reducing spalling risk. Regular inspections and addressing minor issues promptly can prevent the need for more extensive repairs later.

    Understanding what causes spalling and how to address it properly helps property owners make informed decisions about concrete maintenance and repairs, ultimately extending the life and preserving the value of concrete structures.

    What is Spalling and How Is It Fixed FAQs

    Is concrete spalling just a cosmetic issue or is it a structural concern?

    Concrete spalling begins as a cosmetic issue but can become a structural concern if left untreated, as the continued flaking away of surface material eventually exposes reinforcement steel to moisture and oxygen, causing corrosion that undermines structural integrity. The severity depends on the depth, extent, and location of the spalling, with damage to load-bearing elements like columns, beams, and structural slabs presenting greater risks than damage to non-structural surfaces like patios or walkways.

    How can I tell if my concrete spalling needs professional repair instead of a DIY fix?

    Your concrete spalling needs professional repair rather than DIY if it’s deeper than 1/2 inch, covers more than 30% of the surface area, exposes reinforcement steel (rebar), continues to worsen despite previous repair attempts, affects structural elements like foundation walls or support columns, or is accompanied by significant cracking or settlement. Professional assessment is particularly important for commercial properties, public structures, or any concrete that bears significant loads.

    Does concrete sealer actually prevent spalling?

    Yes, quality concrete sealer effectively prevents spalling by creating a protective barrier that blocks water, de-icing chemicals, and other harmful substances from penetrating the concrete surface. Research by the Portland Cement Association shows that properly sealed concrete can have up to 50% greater resistance to freeze-thaw damage, which is a primary cause of spalling, but effectiveness depends on using the right type of sealer for your specific situation, proper application, and regular reapplication according to the manufacturer’s recommended maintenance schedule.

  • Can tree roots cause damage to concrete slabs?

    Can tree roots cause damage to concrete slabs?

    Yes, tree roots can cause significant damage to concrete slabs. As roots grow, they exert pressure that can lift, crack, and break concrete surfaces. The severity depends on tree species, distance, soil conditions, and concrete thickness. Understanding how roots damage concrete helps you make informed decisions about tree placement and concrete protection.

    How Tree Roots Interact With Concrete

    Tree roots and concrete have a complicated relationship. Understanding how they interact helps explain why damage occurs.

    Root Growth Patterns and Behavior

    Tree roots grow wherever conditions provide water, oxygen, and nutrients. Contrary to popular belief, most tree roots grow horizontally rather than deep into the ground. In fact, approximately 90% of a tree’s roots are found in the top 18 inches of soil.

    Roots naturally grow toward sources of water and nutrients. The area beneath concrete slabs often attracts roots because:

    • Moisture condenses under concrete
    • Temperatures remain more stable
    • Nutrients collect at concrete edges
    • Water pools beneath uneven slabs
    tree roots lifting the concrete sidewalk

    Tree roots don’t “seek out” concrete to damage it. Rather, they simply grow toward favorable conditions, which often happen to be near or under human-built structures.

    When roots encounter obstacles like concrete, they don’t stop growing. Instead, they follow the path of least resistance, often along the underside of the concrete. As roots thicken with age, they exert more pressure.

    Types of Concrete Damage Caused by Roots

    Tree roots can damage concrete in several distinct ways:

    Damage TypeDescriptionCommon LocationsSeverity
    Lifting/HeavingRoots physically push concrete upwardSidewalks, driveways, patiosModerate to severe
    CrackingPressure from roots creates cracksThin slabs, edges of concreteModerate
    SettlementRoots absorb water, causing soil shrinkageAround foundations, pool decksModerate
    Edge DamageRoots grow against concrete edgesSidewalks, driveway bordersMild to moderate
    Void CreationRoots decompose, leaving voids under concreteOlder concrete installationsMild to severe

    As explained in the guide about patching chipped concrete steps, understanding the cause of concrete damage is essential for effective repairs.

    Tree Species Most Likely to Damage Concrete

    Not all trees pose the same risk to concrete. The potential for damage varies significantly by species.

    High-Risk Tree Species

    Some trees are notorious for their aggressive root systems and should be planted well away from concrete surfaces:

    1. Poplar (Populus species) – Extremely aggressive surface roots that travel far from the tree
    2. Willow (Salix species) – Invasive water-seeking roots that can extend 100+ feet
    3. Silver Maple (Acer saccharinum) – Dense, shallow root systems that readily lift concrete
    4. American Elm (Ulmus americana) – Extensive surface roots that can spread twice the tree’s height
    5. Oak (Quercus species) – Particularly red and pin oaks have strong, expansive root systems
    6. Sweetgum (Liquidambar styraciflua) – Aggressive surface roots that become woody and strong
    7. Sycamore (Platanus occidentalis) – Powerful roots that can displace concrete easily

    According to the U.S. Forest Service Urban Tree Risk Management Guide, these species account for a disproportionate amount of hardscape damage in urban areas.

    Lower-Risk Tree Options

    If you need to plant trees near concrete, these species typically cause fewer problems:

    1. Japanese Maple (Acer palmatum) – Smaller, less aggressive root system
    2. Dogwood (Cornus species) – Relatively shallow but not particularly aggressive roots
    3. Redbud (Cercis canadensis) – Moderately sized root system that rarely damages concrete
    4. Serviceberry (Amelanchier species) – Well-behaved roots that rarely cause issues
    5. Crape Myrtle (Lagerstroemia species) – Small root system relative to tree size
    6. American Hornbeam (Carpinus caroliniana) – Slower growing with less invasive roots

    These trees tend to have smaller, less aggressive root systems or grow more slowly, giving concrete less stress over time.

    Factors That Influence Root Damage Severity

    Several key factors determine how likely trees are to damage nearby concrete.

    Distance Between Trees and Concrete

    The distance between a tree and concrete is perhaps the most critical factor in preventing damage. As a general rule:

    • Large trees (60+ feet at maturity) – Plant at least 20 feet from concrete structures
    • Medium trees (30-60 feet at maturity) – Plant at least 15 feet from concrete
    • Small trees (under 30 feet at maturity) – Plant at least 8-10 feet from concrete

    Unfortunately, many properties don’t have enough space to accommodate these distances. In urban and suburban settings, trees are often planted much closer to concrete, increasing damage risk.

    Soil Conditions and Water Availability

    Soil characteristics significantly affect how tree roots grow and interact with concrete:

    1. Clay soils – Roots tend to stay shallower and spread wider, increasing concrete damage risk
    2. Sandy soils – Roots may grow deeper, potentially reducing concrete issues
    3. Compacted soils – Force roots to grow more shallowly, increasing concrete damage
    4. Drought conditions – Cause roots to search more aggressively for water, potentially under concrete
    5. Poor drainage – Attracts roots to areas where water collects under concrete

    Soil that provides easy root penetration with good water and nutrient availability reduces the likelihood that roots will concentrate under concrete slabs.

    Concrete Installation Quality

    The quality of the concrete installation itself affects vulnerability to root damage:

    1. Thickness – Thicker slabs (5+ inches) resist lifting better than thin ones
    2. Reinforcement – Concrete with proper rebar or wire mesh withstands more root pressure
    3. Base preparation – Properly compacted base material reduces voids where roots can grow
    4. Edge detail – Thickened edges (monolithic edges) resist root intrusion better
    5. Expansion joints – Proper joints can absorb some pressure without cracking

    Professional concrete contractors like AR Concrete Fayetteville understand these factors and can install concrete that better resists root damage.

    Preventing Root Damage to Concrete

    Several strategies can help prevent tree roots from damaging concrete surfaces.

    Root Barriers and Deflectors

    Root barriers are physical or chemical systems designed to redirect tree roots away from concrete:

    1. Physical barriers – Typically plastic or metal sheets installed vertically in the soil between trees and concrete
    2. Chemical barriers – Soil treatments that discourage root growth in specific directions
    3. Air-pruning containers – Special planting containers that cause roots to self-prune when they reach the edge

    Research from the U.S. Department of Agriculture’s Urban Tree Foundation shows that properly installed root barriers can reduce concrete damage by up to 80% over a 20-year period.

    For existing trees, barriers can be installed by trenching between the tree and concrete, though this must be done carefully to avoid damaging critical roots.

    Strategic Concrete Design and Installation

    When installing new concrete near existing trees, several design modifications can help:

    1. Elevated design – Raising concrete slightly above grade with proper support can provide space for roots
    2. Thickened edges – Creating thicker concrete at the perimeter increases resistance to root lifting
    3. Flexible paving options – Materials like rubber paving or permeable pavers flex better than rigid concrete
    4. Suspended slabs – In critical areas, concrete can be designed with support systems that leave space for roots underneath
    5. Integrated tree pits – Designed spaces within concrete areas that accommodate tree growth

    These approaches may cost more initially but can prevent expensive damage and repairs later.

    Regular Maintenance and Monitoring

    Ongoing maintenance helps catch and address root issues before major damage occurs:

    1. Regular inspections – Check for early signs of concrete lifting or cracking
    2. Judicious root pruning – Carefully removing problem roots (best done by professionals)
    3. Deep watering – Encouraging roots to grow downward rather than laterally
    4. Mulching tree bases – Providing water and nutrients where you want roots to stay
    5. Proper tree selection – Replacing problem trees with less aggressive species when necessary

    Early intervention can often manage root issues before concrete replacement becomes necessary.

    Solutions for Existing Root Damage

    When roots have already damaged concrete, several repair options exist.

    Concrete Repair Options

    For concrete already affected by tree roots, repair choices depend on damage severity:

    1. Grinding – For minor lifting (less than 3/4 inch), concrete edges can sometimes be ground down to eliminate trip hazards
    2. Mud jacking – Injecting material under settled concrete to restore proper level
    3. Partial slab replacement – Removing and replacing only damaged sections
    4. Bridging damaged areas – Creating new concrete sections that span over problematic roots
    5. Complete replacement with root-friendly design – Starting fresh with better protection

    The concrete specialists at AR Concrete Fayetteville can assess root-damaged concrete and recommend the most cost-effective repair approach.

    Tree Management Solutions

    Addressing the tree itself might be part of the solution:

    1. Professional root pruning – Carefully removing problem roots (requires expert assessment)
    2. Root barriers after repair – Installing barriers during concrete repair to prevent future damage
    3. Tree removal – In severe cases where the tree continually damages concrete
    4. Canopy reduction – Reducing the tree’s size can sometimes slow root growth
    5. Tree replacement – Removing problematic trees and replacing with better-behaved species

    According to research published in the Journal of Arboriculture, proper root pruning by certified arborists can extend pavement life without significantly harming mature trees when done correctly.

    Making Informed Decisions About Trees and Concrete

    When planning landscapes, driveways, or other concrete features, informed decisions help prevent future conflicts.

    Balancing Tree Benefits and Damage Risks

    Trees provide numerous benefits that should be weighed against potential concrete damage:

    1. Energy savings – Trees can reduce air conditioning costs by 20-50%
    2. Property value – Mature trees can increase property values by 5-20%
    3. Mental health benefits – Trees reduce stress and improve wellbeing
    4. Environmental benefits – Trees improve air quality, reduce stormwater runoff, and provide wildlife habitat

    In many cases, the benefits of trees outweigh the occasional concrete repair, especially with proper planning and species selection.

    When to Choose Trees vs. Concrete

    Sometimes the best solution is choosing one over the other:

    1. Alternative paving materials – In some areas, permeable pavers, gravel, or mulch may work instead of concrete
    2. Alternative tree locations – Adjusting where trees are planted to provide adequate distance from concrete
    3. Smaller tree species – Choosing appropriately sized trees for limited spaces
    4. Raised planters – Containing tree roots in areas with extensive hardscaping

    With creative design, both trees and concrete can coexist in most landscapes.

    Conclusion

    Yes, tree roots can and do cause damage to concrete slabs, primarily through lifting, cracking, and creating voids beneath concrete surfaces. The severity depends on tree species, distance from concrete, soil conditions, and concrete installation quality.

    Preventing damage requires thoughtful planning: choosing appropriate tree species, maintaining adequate distance between trees and concrete, installing root barriers, and designing concrete to better accommodate root growth. For existing damage, repair options range from grinding and mudjacking to partial or complete replacement.

    While tree roots can be problematic for concrete, the value trees bring to properties and communities often outweighs these challenges. With proper planning, installation, and maintenance, trees and concrete can coexist with minimal conflicts, creating more sustainable and beautiful environments.

    Can Tree Roots Cause Damage to Concrete Slabs FAQs

    How close can trees be planted to concrete without causing damage?

    As a general rule, trees should be planted at a distance from concrete equal to at least half their mature canopy spread, with large trees (over 60 feet tall at maturity) planted at least 20 feet from concrete structures, medium trees (30-60 feet) at least 15 feet away, and small trees (under 30 feet) at least 8-10 feet away to minimize the risk of root damage.

    Can I save my concrete without removing the tree causing the damage?

    Yes, in many cases you can save both the concrete and the tree by installing root barriers during concrete repair, having a certified arborist carefully prune problematic roots, improving drainage away from the concrete, directing irrigation away from the concrete’s edge, or rebuilding the concrete with design modifications like thickened edges or reinforcement that better resist root pressure.

    How quickly can tree roots damage concrete after planting a new tree?

    Tree roots typically don’t cause noticeable damage to concrete within the first 5-10 years after planting, but fast-growing species like poplars, willows, and silver maples can begin causing damage within 8-10 years, while slower-growing species like oaks might take 20+ years before their roots become problematic, with damage speed depending on growth rate, soil conditions, moisture availability, and the concrete’s quality and thickness.

  • What’s the best way to patch chipped concrete steps?

    What’s the best way to patch chipped concrete steps?

    The best way to patch chipped concrete steps involves cleaning the damaged area, applying a bonding agent, using the right patching material, and allowing proper curing time. Different types of damage require specific repair approaches. With the proper materials and techniques, you can restore both the appearance and safety of your concrete steps.

    Understanding Concrete Step Damage

    Before starting repairs, it’s important to understand what caused the damage and how extensive it is. This helps you choose the right repair method.

    Common Causes of Concrete Step Damage

    Concrete steps can become chipped or damaged for several reasons:

    1. Freeze-thaw cycles – Water seeps into tiny cracks, freezes and expands, then breaks off pieces of concrete
    2. Impact damage – Heavy objects dropped on steps or repeated stress from usage
    3. Age and wear – Older concrete naturally becomes more brittle and prone to chipping
    4. Poor installation – Improper mixing or finishing techniques during original construction
    5. De-icing chemicals – Salt and chemical ice melters can damage concrete surfaces

    Understanding what caused the damage helps prevent future problems after your repair. For instance, if freeze-thaw cycles caused your chips, you’ll want to seal the steps after repair to prevent water infiltration.

    Assessing Damage Severity

    Not all step damage requires the same approach. This table helps determine the appropriate repair method based on damage type:

    Damage TypeDescriptionBest Repair Approach
    Surface ChipsSmall chips less than 1/4″ deepSkim coat or thin patch
    Corner BreaksBroken edges and cornersForm and patch with concrete repair mortar
    Deep ChipsDamage deeper than 1/4″Two-layer patch with concrete adhesive
    Structural CracksCracks that go through the stepMay require professional repair
    Widespread DamageMultiple chips and cracksConsider overlay or replacement

    For minor to moderate damage, DIY repairs can be effective. However, as noted in articles about identifying structural issues in concrete, steps with severe structural damage may require professional assessment and repair from concrete specialists like AR Concrete Fayetteville.

    Materials Needed for Concrete Step Repair

    Gathering the right materials before starting your repair project ensures better results. The specific materials needed depend on the repair type.

    Essential Repair Materials

    concrete step repair

    For most concrete step repairs, you’ll need:

    • Concrete cleaner or degreaser – To prepare the surface
    • Wire brush – For removing loose material
    • Chisel and hammer – For shaping the repair area
    • Concrete bonding adhesive – Helps new concrete bond to old
    • Concrete repair mortar – For most patching jobs
    • Vinyl concrete patcher – For thin surface repairs
    • Concrete color pigment (optional) – To match existing concrete color
    • Concrete sealer – To protect the repair afterwards
    • Mixing bucket and trowel – For preparing and applying materials
    • Safety equipment – Gloves, eye protection, and dust mask

    Using the right materials significantly improves both the appearance and durability of your repair.

    Choosing the Right Patching Product

    Several types of concrete patching products exist, each with specific uses:

    Patching ProductBest ForWorking TimeCuring Time
    Vinyl Concrete PatcherSurface chips, thin repairs10-20 minutesWalk on: 24 hours
    Polymer-Modified Repair MortarDeeper chips, edges20-30 minutesWalk on: 24-48 hours
    Hydraulic CementActively leaking cracks3-5 minutesSets in 5-10 minutes
    Epoxy Concrete PatchHigh-traffic areas30+ minutes8-12 hours
    Sand Mix ConcreteLarge, deep repairs30-60 minutes24-48 hours before use

    According to the U.S. General Services Administration’s Concrete Repair Guide, matching the repair material to the specific type of damage is critical for long-lasting repairs. Their research shows that using the wrong patching material can reduce repair lifespan by 50% or more.

    Step-by-Step Repair Process

    Following a systematic approach ensures the best results when patching concrete steps.

    Surface Preparation

    Proper preparation is the most critical step for a successful repair:

    1. Remove loose material – Use a wire brush and chisel to remove all loose or crumbling concrete.
    2. Undercut the edges – Create a slight undercut (angled inward) around the repair area to help lock the patch in place.
    3. Clean thoroughly – Remove all dust and debris. A shop vacuum works well for this.
    4. Degrease if necessary – If the steps have oil or grease stains, use a concrete degreaser before patching.
    5. Dampen the area – Lightly wet the repair area with water before applying the patch. The concrete should be damp but not have standing water.

    This preparation ensures the patching material bonds properly with the existing concrete.

    Applying Bonding Agent and Patch

    Once the surface is prepared:

    1. Apply bonding adhesive – Brush a concrete bonding agent onto the damp surface of the repair area. This creates a strong connection between old and new concrete.
    2. Mix the patching material – Follow manufacturer instructions for the specific product you’re using. Generally, you want a thick consistency that holds its shape.
    3. Apply in layers for deep repairs – For chips deeper than 1/2 inch, apply the patch in layers, allowing each layer to set partially before adding the next.
    4. Pack firmly – Press the patching material firmly into the repair area to eliminate air pockets.
    5. Overfill slightly – Add slightly more material than needed, as most patches shrink somewhat as they dry.
    6. Level and texture – Use a trowel to level the patch with the surrounding concrete. Try to match the texture of your existing steps.

    For corner or edge repairs, you may need to create a form using wood or heavy cardboard to hold the patching material in place while it sets.

    Proper Curing and Finishing

    After applying the patch:

    1. Cover if needed – In hot, sunny, or windy conditions, cover the repair with plastic to prevent premature drying.
    2. Mist regularly – Keep the patch damp by misting with water several times a day for the first 48 hours.
    3. Allow full curing – Follow product instructions for curing time, typically 24-48 hours before walking on the steps.
    4. Apply sealer – Once fully cured (usually after 7 days), apply a concrete sealer to protect your repair.

    Proper curing is essential for strength development. Patches that dry too quickly develop weaker bonds and may fail prematurely.

    Advanced Techniques for Better Results

    Several professional techniques can improve the appearance and durability of your step repairs.

    Color Matching for Invisible Repairs

    Fresh concrete patches often don’t match the color of older concrete. To create a more seamless repair:

    1. Add concrete pigment – Mix concrete colorant into your patching material to match the existing color.
    2. Consider integral color – Some patch products allow you to add color throughout the mix.
    3. Test on a small area – Always test your colored mix on a small, inconspicuous area first.
    4. Account for darkening – Remember that most concrete patches appear darker when wet and lighten as they cure.
    5. Apply concrete stain after curing – As an alternative, you can apply concrete stain to the entire step after the patch has fully cured to create a uniform appearance.

    Color matching takes practice but significantly improves the final appearance of your repair.

    Creating Durable Edges and Corners

    Step edges and corners receive the most wear and are most prone to damage. Special techniques help create more durable repairs in these areas:

    1. Use stronger material – Consider using an epoxy-based concrete patch for edges and corners.
    2. Add reinforcement – For deeper repairs, consider embedding small pieces of galvanized wire mesh into the patch for extra strength.
    3. Round edges slightly – Creating a slightly rounded edge (rather than a sharp 90-degree corner) reduces the likelihood of future chipping.
    4. Build forms – Use small wooden forms to create clean, straight edges on corners.

    These techniques help ensure your repaired edges and corners remain intact longer than the original concrete.

    Preventing Future Damage

    After completing your repair, taking steps to prevent future damage will extend the life of your concrete steps.

    Seasonal Maintenance Tips

    Proper maintenance helps prevent future chips and damage:

    1. Seal regularly – Apply concrete sealer every 1-2 years to prevent water penetration.
    2. Clear snow carefully – Use plastic snow shovels rather than metal ones.
    3. Limit de-icing chemicals – Use sand or cat litter instead of salt when possible.
    4. Repair small chips promptly – Address minor damage before it becomes major.
    5. Clean spills quickly – Oil, grease, and some chemicals can damage concrete if left too long.

    Regular inspection and maintenance prevent small problems from becoming large, expensive repairs.

    Professional Coating Options

    For badly damaged steps that don’t require full replacement, professional concrete coating systems offer durable solutions:

    1. Polymer overlays – Thin but extremely durable coatings that bond to existing concrete.
    2. Microtopping – Cement-based overlay that can completely resurface worn steps.
    3. Stamped overlays – Can add pattern and texture while covering minor damage.

    These professional systems, available through contractors like AR Concrete Fayetteville, provide longer-lasting protection than simple patching for steps with widespread surface damage.

    Conclusion

    Patching chipped concrete steps effectively requires proper assessment, preparation, application, and curing. By choosing the right repair materials for your specific damage type and following professional techniques, you can create repairs that are both attractive and durable.

    For minor chips and surface damage, DIY repairs using the methods described can provide excellent results. For structural damage or extensively deteriorated steps, consulting with professional concrete repair specialists ensures the safest and most durable outcome.

    Remember that proper preparation is the key to a successful repair. Taking time to clean and prepare the damaged area properly, using a bonding agent, and ensuring proper curing will make the difference between a patch that fails within months and one that lasts for years.

    What’s the Best Way to Patch Chipped Concrete Steps FAQs

    How long should I wait before using my newly patched concrete steps?

    You should wait at least 24 hours before light foot traffic on newly patched concrete steps, and ideally 48-72 hours for normal use. For repairs made with standard concrete patching materials, full strength typically develops after 7 days, so avoid dragging heavy objects across the repair or placing heavy items on the patched area during this curing period.

    Will my concrete patch match the color of my existing steps?

    Fresh concrete patches typically appear lighter than existing concrete and often don’t match exactly due to weathering and aging of the original concrete. To improve color matching, you can add concrete pigment to your patching mix, use a concrete stain after the patch has cured, or consider applying a concrete coating to the entire step surface to create a uniform appearance.

    Can I patch my concrete steps in cold weather?

    Patching concrete steps in temperatures below 50°F (10°C) is not recommended as the patch may not cure properly and could fail prematurely. If repairs must be made in cold weather, use a specialized cold-weather patching compound, protect the area from freezing with insulated blankets, and allow extra curing time before using the steps.

  • How do you identify structural concrete damage?

    How do you identify structural concrete damage?

    Identifying structural issues in concrete requires knowing what signs to look for. These include wide or patterned cracks, uneven or heaving surfaces, exposed rebar, and water damage. Catching these problems early helps determine whether simple repairs will suffice or if more significant intervention is needed.

    Understanding Structural vs. Non-Structural Concrete Issues

    Not all concrete problems indicate structural concerns. Learning to differentiate between cosmetic and structural issues saves time and money.

    What Makes a Concrete Problem “Structural”

    Structural concrete problems affect the ability of the concrete to safely support its intended load. These issues compromise the integrity, stability, or strength of the concrete element. Structural problems typically:

    • Worsen over time if not addressed
    • Affect the safety of the building or structure
    • Potentially lead to failure of the concrete element
    • May indicate deeper problems with the building or soil

    Non-structural or cosmetic issues, by contrast, primarily affect appearance without compromising safety or function. Understanding this difference helps prioritize repairs appropriately.

    Common Concrete Structural Elements

    Different concrete elements serve different structural purposes:

    Concrete ElementPrimary Structural RoleCommon Structural Issues
    Foundation WallsSupport entire building weight, resist soil pressureHorizontal cracks, bowing, water intrusion
    FootingsDistribute building weight to soilSettlement, cracking, rotation
    Columns/PillarsCarry vertical loads to footingsSpalling, rebar exposure, cracking
    BeamsSpan open areas, support floors/ceilingsSagging, shear cracks, deflection
    SlabsProvide flat surfaces, distribute loadsUneven settling, cracking, heaving
    Retaining WallsHold back soil, prevent erosionLeaning, bulging, drainage failures

    Problems in these elements are more likely to indicate significant structural concerns compared to purely decorative concrete elements.

    Major Warning Signs of Concrete Structural Problems

    Several key indicators suggest structural problems in concrete. Recognizing these signs early can prevent minor issues from becoming major failures.

    Crack Patterns That Indicate Structural Issues

    Not all cracks are created equal. Certain crack patterns strongly suggest structural problems:

    1. Stair-step cracks – These follow the mortar joints in a zigzag pattern and often indicate foundation settlement.
    2. Horizontal cracks in foundation walls – These may indicate excessive lateral pressure from soil, often worsened by water.
    3. Shear cracks – These diagonal cracks near support points of beams or columns show dangerous stress distribution.
    4. Wide cracks (more than 1/4 inch) – Wider cracks generally suggest more serious structural movement.
    5. Multiple intersecting cracks – A network of cracks often indicates widespread structural issues.

    The article about fixing sunken concrete provides additional context on how soil issues can create structural problems.

    Displacement and Movement Signs

    When concrete not only cracks but actually moves, structural concerns are likely:

    1. Uneven surfaces – Floors, driveways, or patios that are no longer level may indicate settlement or soil movement.
    2. Heaving – Concrete that rises up (often from frost or expanding soil) can damage the structure.
    3. Separation from adjacent structures – Gaps between concrete and other building elements suggest movement.
    4. Doors or windows that stick – When concrete foundation issues affect the frame of a building, doors and windows may no longer operate properly.
    5. Visible leaning or tilting – Concrete elements that are no longer plumb indicate structural movement.

    These movement signs often progress over time and should be monitored carefully.

    Material Deterioration Indicators

    The concrete material itself can show signs of structural problems:

    1. Spalling – When concrete flakes or chips away in chunks.
    2. Exposed rebar – When the steel reinforcement becomes visible through deteriorated concrete.
    3. Honeycombing – Voids in concrete where aggregate is visible and cement paste is missing.
    4. Crumbling or soft concrete – Concrete that can be scraped away or feels soft indicates serious deterioration.
    5. Efflorescence – White, powdery deposits that suggest water is moving through the concrete.

    Material issues often result from chemical damage, freeze-thaw cycles, or poor initial construction quality.

    Professional Assessment Methods

    Professional concrete contractors and structural engineers use several techniques to accurately evaluate concrete structural issues.

    Visual Inspection Techniques

    Professional visual inspections go beyond casual observation and include:

    1. Crack mapping – Documenting crack patterns, widths, and locations to understand the underlying problem.
    2. Moisture testing – Looking for signs of water infiltration, which often contributes to concrete problems.
    3. Level surveys – Using specialized equipment to measure slopes, settlement, and deflection.
    4. Documentation – Taking detailed photographs and measurements to track changes over time.

    A thorough visual inspection by experienced professionals can identify many structural issues without requiring more invasive testing.

    Non-Destructive Testing Methods

    Several advanced techniques allow professionals to assess concrete without damaging it:

    1. Ground Penetrating Radar (GPR) – Uses radio waves to locate rebar, voids, and thickness variations in concrete.
    2. Infrared thermography – Identifies temperature differences that may indicate voids, moisture, or deterioration.
    3. Impact-echo testing – Measures sound waves to find internal flaws, cracks, and delamination.
    4. Schmidt hammer tests – Measures concrete hardness to estimate strength.
    5. Ultrasonic pulse velocity testing – Uses sound waves to detect internal cracks and voids.

    These non-destructive methods provide valuable information about concrete conditions that aren’t visible to the naked eye.

    Core Sampling and Strength Testing

    When more definitive information is needed, core samples may be taken:

    1. Compression testing – Determines the actual strength of concrete cores.
    2. Carbonation testing – Measures how deeply CO₂ has penetrated the concrete, potentially causing reinforcement corrosion.
    3. Chloride content testing – Evaluates salt presence that may corrode reinforcing steel.
    4. Petrographic analysis – Examines concrete microstructure to identify deterioration mechanisms.

    While these methods create small holes that need repair, they provide the most accurate assessment of concrete condition.

    Common Structural Issues in Different Concrete Applications

    Different concrete applications tend to develop different types of structural problems. Understanding these patterns helps with diagnosis.

    Foundation and Basement Wall Problems

    Concrete foundations and basement walls frequently experience:

    1. Horizontal cracking – Often indicates excessive soil pressure and potential wall failure.
    2. Corner cracks – May indicate differential settlement of the foundation.
    3. Vertical cracks with displacement – Suggests serious foundation movement.
    4. Water seepage – Beyond just being a nuisance, ongoing water infiltration eventually becomes a structural issue.
    5. Wall rotation or bowing – Indicates soil pressure exceeding the wall’s design capacity.

    Foundation problems often affect the entire structure above and require prompt attention.

    Driveway, Patio, and Sidewalk Structural Issues

    Outdoor flat concrete surfaces frequently develop:

    1. Settlement cracks – Sections sinking due to soil issues.
    2. Frost heaving – Sections pushed upward by frozen ground.
    3. Washout damage – Where supporting soil has eroded.
    4. Overload cracking – From vehicles exceeding the concrete’s weight capacity.
    5. Joint deterioration – Where separate concrete sections meet and create vulnerability.

    While these may start as cosmetic issues, they can progress to true structural problems that create safety hazards.

    Structural Slab and Support Column Concerns

    In commercial buildings and larger structures, watch for:

    1. Slab cracking in patterns – May indicate problems with supporting beams or soil.
    2. Column spalling or cracking – Particularly serious as columns support substantial loads.
    3. Deflection or sagging – Where concrete is bending under load.
    4. Punching shear cracks – Around columns where they meet slabs.
    5. Expansion joint failures – Where movement accommodation systems have broken down.

    These issues in larger structures often require engineered solutions from structural specialists.

    DIY Assessment Guidelines

    Homeowners can perform basic assessments to determine when professional help is needed.

    Tools for Homeowner Inspections

    Several simple tools help homeowners evaluate concrete:

    1. Crack width gauge – Inexpensive plastic cards with graduated markings to measure crack widths.
    2. Level – To check for uneven settling or tilting.
    3. Moisture meter – To detect dampness in concrete, particularly in basements.
    4. Marking pen – To mark the ends of cracks and monitor their growth over time.
    5. Camera – To document conditions and compare changes over time.
    6. Flashlight – For oblique lighting that makes subtle cracks more visible.

    These basic tools allow for regular monitoring of concrete conditions.

    What to Look For and Document

    During regular inspections, homeowners should:

    1. Measure and record crack widths and lengths
    2. Look for new cracks or growth of existing ones
    3. Check for water staining or efflorescence
    4. Look for areas where concrete has become uneven
    5. Test for hollow-sounding areas by tapping with a hammer
    6. Note any concrete that crumbles easily when scraped

    Taking dated photographs creates a valuable record for tracking changes or discussing concerns with professionals.

    When to Call a Structural Engineer vs. a Concrete Contractor

    Understanding when to call different professionals saves time and money:

    Call a concrete contractor when:

    • Cracks are stable and appear superficial
    • Surface spalling or minor deterioration is present
    • Smaller flat work (driveways, patios) shows settlement
    • You need preventative maintenance or non-structural repairs

    Call a structural engineer when:

    • Foundation walls show horizontal cracking or bowing
    • Multiple large cracks form patterns throughout the structure
    • Floors have become noticeably uneven or sloped
    • Support columns or beams show distress
    • Previous repairs have failed repeatedly

    Structural engineers provide evaluation and design solutions, while concrete contractors implement repairs. For significant problems, you may need both—with the engineer designing a solution and the contractor executing it.

    Scientific Research on Concrete Structural Performance

    Modern research provides valuable insights into concrete structural behavior. A study published in the Journal of Performance of Constructed Facilities demonstrates that early detection of concrete structural issues significantly reduces repair costs and extends structure lifespan.

    Research has also shown that concrete deterioration typically follows predictable patterns, allowing for more accurate diagnosis of structural problems. Understanding these scientific principles helps professionals determine not just what’s happening now, but what will likely happen in the future without intervention.

    Conclusion

    Identifying structural issues in concrete requires attention to specific warning signs: significant crack patterns, displacement or movement, and material deterioration. Professional assessment methods ranging from visual inspection to advanced non-destructive testing can provide definitive diagnoses of concrete problems.

    Different concrete applications—from foundations to driveways to support columns—develop specific types of structural issues. Understanding these patterns helps in early identification. Homeowners can perform basic assessments, but serious structural concerns warrant professional evaluation by concrete specialists or structural engineers.

    Remember that concrete problems rarely improve on their own and typically worsen over time. Early detection and appropriate intervention are key to maintaining the safety, functionality, and value of concrete structures. The concrete experts at AR Concrete Fayetteville can help assess your concrete’s condition and recommend appropriate repairs before minor issues become major structural problems.

    How Do You Identify Structural Issues in Concrete FAQs

    What’s the difference between shrinkage cracks and structural cracks in concrete?

    Shrinkage cracks are typically thin (less than 1/16 inch wide), relatively straight, don’t extend through the full thickness of the concrete, and occur as the concrete cures and dries. Structural cracks are usually wider (more than 1/4 inch), may form patterns (stair-step, horizontal, or multiple intersecting), often extend through the full depth of the concrete, and continue to grow over time due to ongoing stress or movement.

    How quickly should I address a potential structural issue in my concrete foundation?

    You should address potential structural issues in your concrete foundation as soon as possible, ideally within 30-90 days of noticing the problem. Foundation issues rarely improve on their own and typically worsen over time, potentially affecting the entire structure above and leading to significantly more expensive repairs if left untreated.

    Can weather and seasonal changes cause temporary concrete issues that look structural but aren’t?

    Yes, weather and seasonal changes can cause temporary effects that mimic structural issues, particularly slight expansion and contraction of concrete and minor foundation movement in areas with expansive clay soils. However, these effects should be minimal and consistent season to season without worsening over time—if cracks continue to widen, gaps grow, or floors become increasingly uneven across seasons, these are signs of true structural problems rather than normal seasonal movement.

  • How do I fix sunken concrete around my home?

    How do I fix sunken concrete around my home?

    Fixing sunken concrete around your home requires identifying the cause of sinking and choosing the right repair method. Options include mudjacking, polyurethane foam injection, self-leveling compounds, or concrete replacement. The best solution depends on the size of the area, how much it has sunk, and what caused the problem in the first place.

    sunken concrete patio before and after repair

    Understanding Why Concrete Sinks

    Before fixing sunken concrete, it’s important to understand why it happened. This helps ensure your repair lasts and prevents future problems.

    Soil Erosion and Washout

    Water is concrete’s biggest enemy. When water washes away the soil under concrete, the slab loses support and sinks. Common causes include:

    • Downspouts dumping water next to the foundation
    • Poor drainage around concrete slabs
    • Plumbing leaks beneath concrete
    • Improper grading that directs water toward your home

    Fixing the drainage issue is just as important as fixing the sunken concrete. Otherwise, the same problem will likely happen again.

    Soil Compaction Problems

    When concrete is installed, the soil beneath should be properly compacted. If it isn’t, the soil naturally settles over time, taking the concrete down with it. This is especially common with:

    • New construction where backfill wasn’t properly compacted
    • Areas where trees were removed and the roots decomposed
    • Poorly prepared base materials under the concrete

    Soil compaction issues typically show up within the first few years after concrete installation.

    Shrinking Soils During Drought

    Some soils, especially clay-heavy soils, shrink substantially during dry periods. This shrinkage creates voids under concrete slabs, allowing them to sink or crack. Areas with dramatic wet-to-dry seasonal changes are particularly vulnerable to this problem.

    Once the clay soil gets wet again, it may expand—but rarely enough to lift the concrete back to its original position.

    Evaluating Sunken Concrete Conditions

    Not all sunken concrete needs the same solution. The right fix depends on several factors you should assess.

    How Much Has the Concrete Sunk?

    The degree of sinking helps determine the best repair approach:

    Amount of SinkingBest Repair ApproachTypical Cost Range
    1/4″ to 1″Self-leveling overlay or grinding$$
    1″ to 3″Mudjacking or poly foam lifting$$$
    Over 3″May require replacement$$$$
    Uneven/Multiple AreasProfessional lifting services$$$$

    For minor sinking that’s mainly a visual issue, simpler solutions may work. More significant sinking, especially where it creates tripping hazards or drainage problems, requires more comprehensive repairs.

    Is the Concrete Still in Good Condition?

    The condition of the concrete itself matters. Look for:

    • Major cracks or breaking
    • Spalling or flaking surface
    • Signs of freeze-thaw damage
    • Age of the concrete (over 25 years old?)

    If the concrete is severely damaged, lifting it may not be worthwhile. In these cases, replacement might be the better long-term investment.

    Is the Sinking Still Active?

    If your concrete continues to sink, there’s likely an ongoing issue that needs addressing. Monitor the area by:

    1. Measuring the gap and recording it
    2. Checking again in 3-6 months
    3. Looking for growing cracks or widening gaps

    Active sinking means you need to fix the underlying problem before repairing the concrete itself. As explained in the article about permanent concrete crack repair, addressing the root cause is essential for a lasting solution.

    Professional Methods to Fix Sunken Concrete

    Several professional methods exist to lift sunken concrete back into position. Each has advantages in specific situations.

    Mudjacking (Slabjacking)

    Mudjacking is a traditional method that has been used for decades. The process involves:

    1. Drilling holes (typically 1-2 inches in diameter) through the sunken concrete
    2. Pumping a mixture of cement, soil, and other materials under the slab
    3. The mixture fills voids and lifts the concrete back to the desired position
    4. Patching the holes when finished

    Mudjacking works well for larger areas and heavier concrete slabs. It’s typically less expensive than replacement but more invasive than newer methods like polyurethane foam injection.

    Polyurethane Foam Injection

    Polyurethane foam injection is a modern alternative to mudjacking that offers several advantages. The process includes:

    1. Drilling smaller holes (often just 5/8 inch) through the concrete
    2. Injecting expandable polyurethane foam under the slab
    3. The foam expands to fill voids and lift the concrete
    4. Patching the small holes when complete

    This method is cleaner, faster, and often provides a more precise lift than mudjacking. The polyurethane material is lightweight, so it doesn’t add much weight to potentially problematic soils. It also cures quickly, allowing immediate use of the concrete.

    Our experts at AR Concrete Fayetteville specialize in this modern concrete lifting technique.

    Concrete Replacement

    In some cases, replacement is the best option, especially when:

    • The concrete is severely damaged
    • Multiple repair attempts have failed
    • The sinking is extreme (more than 4-5 inches)
    • The concrete is very old and shows multiple issues

    Replacement involves:

    1. Breaking up and removing the old concrete
    2. Properly preparing the base with good drainage and compaction
    3. Installing reinforcement if needed
    4. Pouring new concrete with proper slope and thickness

    While replacement costs more initially, it provides a completely new surface with the longest expected lifespan.

    DIY Options for Minor Sunken Concrete Issues

    For smaller areas with minimal sinking, several DIY approaches might work. These are best for non-critical areas where precision isn’t essential.

    Self-Leveling Concrete Overlays

    Self-leveling concrete products can fill minor depressions and create a level surface over slightly sunken areas. The process typically involves:

    1. Thoroughly cleaning the existing concrete
    2. Applying a bonding agent
    3. Mixing and pouring the self-leveling product
    4. Allowing proper curing time

    This approach works best for sunken areas less than 1 inch deep and where the existing concrete is still in good condition. It’s more about creating a level surface than actually lifting the sunken concrete.

    Concrete Grinding for Minor Lips

    When one concrete slab is just slightly lower than an adjacent slab, creating a trip hazard, grinding down the higher side can be an effective solution. This doesn’t fix the sinking but eliminates the hazard by creating a smooth transition.

    Concrete grinding requires specialized equipment but can be rented from home improvement stores for DIY use.

    Partial Replacement of Small Sections

    For small sunken areas like a single sidewalk section, DIY replacement might be feasible:

    1. Break up and remove the sunken section
    2. Prepare the base with gravel and compact it thoroughly
    3. Form and pour new concrete with proper reinforcement
    4. Ensure proper slope for drainage
    5. Allow full curing before use

    This approach works well for isolated problems where the rest of the concrete is in good condition.

    Preventing Future Concrete Sinking

    After fixing sunken concrete, take steps to prevent the problem from happening again. Prevention is always less expensive than repairs.

    Improving Drainage Around Your Home

    Water management is crucial for preventing concrete sinking:

    1. Extend downspouts at least 5 feet from your foundation
    2. Grade soil to slope away from your home (about 1 inch per foot)
    3. Install French drains in problem areas
    4. Consider drain systems around concrete slabs
    5. Maintain gutters to prevent overflow

    Properly managing water around your home protects both your concrete and your foundation.

    Soil Stabilization Techniques

    In areas with problematic soils, stabilization techniques help prevent future sinking:

    • Injecting expanding materials to densify loose soils
    • Installing helical piers under critical structures
    • Using geotextile fabrics when installing new concrete
    • Proper compaction of any fill dirt

    For new concrete installations, proper soil preparation is essential for preventing future settlement issues.

    Regular Maintenance and Monitoring

    Stay ahead of problems with regular monitoring:

    1. Inspect concrete surfaces seasonally
    2. Look for new cracks or separation from adjacent structures
    3. Check for proper drainage after heavy rains
    4. Address small issues before they become major problems

    Early intervention can prevent minor sinking from becoming a major, expensive problem.

    Cost Comparison of Concrete Lifting Methods

    The cost of fixing sunken concrete varies widely depending on the method and the size of the area. This table provides a general comparison:

    Repair MethodTypical Cost Range (per 100 sq ft)ProsCons
    Mudjacking$500-$1,200Works on heavy slabs, Durable for 5-7 years, Less expensive than replacementLarge holes needed, Messy process, Heavy material adds weight to soil
    Polyurethane Foam$800-$2,000Small holes, Clean process, Quick curing, Lightweight, 8-10 year lifespanHigher initial cost, Not suitable for all soil types
    Self-Leveling Overlay$300-$600DIY-friendly, Good for minor depressionsSurface solution only, Doesn’t fix underlying issue
    Concrete Replacement$1,000-$3,000Complete solution, Longest lifespan, Can improve designMost expensive, Most disruptive, Longer completion time

    These prices are general estimates. The exact cost depends on your specific situation, accessibility, and local labor rates.

    When to Call a Professional

    While DIY fixes work for some scenarios, certain situations call for professional help:

    • Sinking near your home’s foundation
    • Significant sinking (more than 2 inches)
    • Concrete that continues to sink after repairs
    • Areas where previous repairs have failed
    • Trip hazards in high-traffic areas
    • Sinking that causes drainage toward your home

    Professionals have specialized equipment, materials, and expertise that DIY approaches can’t match. They can also identify and address underlying problems that might not be obvious to homeowners.

    According to the International Concrete Repair Institute, proper assessment by trained professionals is essential for determining the most effective long-term solution for concrete settlement issues.

    Conclusion

    Sunken concrete around your home is more than just an eyesore—it can create tripping hazards, drainage problems, and even affect your home’s value. The good news is that several effective repair options exist, from modern polyurethane foam injection to traditional mudjacking and replacement.

    For minor sinking in non-critical areas, DIY approaches might suffice. For more significant problems, especially near your home’s foundation or where safety is a concern, professional concrete lifting services provide the most reliable and lasting results.

    Remember that fixing the visible problem (the sunken concrete) is only part of the solution. Addressing the underlying cause—whether it’s drainage issues, soil problems, or poor initial installation—is essential for ensuring your repair lasts. The experts at AR Concrete Fayetteville can help you identify and fix both the sunken concrete and the conditions that caused it in the first place.

    How Do I Fix Sunken Concrete Around My Home FAQs

    How can I tell if my sunken concrete needs professional repair or if I can fix it myself?

    You should consider professional repair if your concrete has sunk more than 1-2 inches, if it’s creating safety hazards like tripping risks, if it’s affecting drainage toward your foundation, or if it’s part of a critical structure like steps or a driveway. DIY repairs might be sufficient for minor cosmetic settling in non-critical areas like a garden path, but professionals have the equipment and expertise for precise, lasting repairs in important areas.

    Will fixing my sunken concrete stop it from sinking again in the future?

    Fixing sunken concrete will only prevent future sinking if the underlying cause is also addressed. If the sinking was caused by poor drainage, soil erosion, or improperly compacted fill, these issues must be corrected alongside the concrete repair. Professional concrete lifting services typically include an assessment of why the sinking occurred and can recommend solutions to prevent recurrence.

    How soon can I use my concrete after it’s been lifted with polyurethane foam?

    Concrete lifted with polyurethane foam can typically be used within 15-30 minutes after the repair is completed, which is one of the major advantages of this method. The polyurethane material reaches 90% of its final strength within minutes of injection, allowing for almost immediate use of driveways, sidewalks, and patios, unlike mudjacking or replacement which may require 24 hours or more before the area can be used again.

  • Can cracked concrete be repaired permanently?

    Can cracked concrete be repaired permanently?

    Yes, cracked concrete can be repaired permanently in many cases, but it depends on several important factors. The cause of the crack, its size, location, and whether it’s still active (growing) all affect repair durability. With proper techniques and materials, most concrete cracks can be effectively repaired for the long term.

    Understanding Concrete Crack Permanence

    When we talk about “permanent” concrete repairs, we need to be realistic about what this means. Concrete is a durable but not indestructible material. Even the best repairs have limitations.

    What Makes a Concrete Repair “Permanent”

    A truly permanent concrete repair should:

    • Restore structural integrity
    • Prevent water infiltration
    • Stop crack progression
    • Bond completely with the existing concrete
    • Withstand the same forces that caused the original crack
    • Last for the remaining life of the concrete structure

    Most professional-grade concrete repairs can last 10+ years when properly applied, which many homeowners consider effectively permanent. However, if the underlying cause isn’t addressed, even the best repair may eventually fail.

    Factors That Determine Repair Longevity

    Several key factors determine whether a concrete crack repair will be permanent:

    1. Addressing the root cause – repairs that fix only the symptom (the crack) but not the cause often fail
    2. Proper preparation – thorough cleaning and preparation of the crack
    3. Appropriate materials – using the right repair products for the specific type of crack
    4. Correct application – following proper repair techniques
    5. Environmental conditions – repairs in extreme temperatures may not cure properly

    At AR Concrete Fayetteville our concrete repair specialists understand these factors and can determine the best approach for long-lasting repairs in your specific situation.

    Types of Cracks and Their Repair Permanence

    Different types of concrete cracks have different repair expectations. This table outlines common crack types and how permanent their repairs typically are:

    Crack TypeDescriptionRepair PermanenceBest Repair Method
    Hairline CracksVery thin surface cracks (less than 1/16″)HighCrack sealer or epoxy injection
    Shrinkage CracksPattern cracks from concrete curingHighPolymer-modified cement or epoxy
    Settlement CracksFrom soil movement below concreteMedium (unless cause addressed)Polyurethane or epoxy injection
    Structural CracksDeep cracks affecting integrityLow to MediumProfessional structural repair
    Heaving CracksFrom frost or tree roots lifting concreteLow (unless cause addressed)May require replacement
    SpallingSurface deterioration, not true cracksMedium to HighConcrete resurfacing

    As you can see from what causes cracks in concrete driveways, the cause of the crack significantly impacts how permanent a repair can be.

    Professional Repair Methods for Long-Term Results

    Professional concrete contractors use several advanced methods that provide much more durable repairs than typical DIY approaches.

    Epoxy Injection

    Epoxy injection is one of the most permanent concrete crack repair methods available. It works by:

    1. Sealing the surface of the crack
    2. Installing injection ports
    3. Injecting low-viscosity epoxy under pressure
    4. Forcing the epoxy through the entire depth of the crack
    5. Creating a bond often stronger than the original concrete

    Epoxy injection works exceptionally well for cracks in foundations and structural concrete. It restores up to 95% of the concrete’s original strength when properly applied. However, it requires specialized equipment and expertise to apply correctly.

    Polyurethane Foam Injection

    For cracks caused by soil settlement or voids beneath concrete, polyurethane foam injection provides an excellent long-term solution. This method:

    1. Uses expandable foam that fills voids beneath the concrete
    2. Lifts sunken sections back to proper position
    3. Stabilizes the base to prevent future settlement
    4. Seals against water infiltration

    Polyurethane injection addresses both the crack and its underlying cause, making it one of the most permanent repair options for settlement-related cracks.

    Stitching and Carbon Fiber Reinforcement

    For structural cracks in load-bearing concrete, stitching or carbon fiber reinforcement provides exceptional durability. These methods:

    1. Bridge the crack with metal “staples” or carbon fiber straps
    2. Distribute stress away from the crack
    3. Prevent crack movement and growth
    4. Add structural integrity to the concrete

    These advanced techniques are particularly effective for foundation walls and other structural concrete elements. With proper application, these repairs can last the remaining lifetime of the structure.

    Full-Depth Concrete Patching

    For severely damaged concrete areas, full-depth patching removes and replaces the damaged section. This approach:

    1. Removes all compromised concrete
    2. Prepares the base properly
    3. Installs reinforcement if needed
    4. Pours new concrete that bonds with the existing edges

    Full-depth patches, when properly installed, are essentially as permanent as new concrete and can last decades without issues.

    DIY Repair Options and Their Limitations

    Many homeowners attempt DIY concrete crack repairs, with mixed results. Understanding the limitations of DIY methods can help set realistic expectations.

    Store-Bought Concrete Crack Fillers

    Hardware stores sell various concrete crack repair products, including:

    • Vinyl concrete patching compound
    • Latex crack fillers
    • Hydraulic cement
    • Epoxy kits for small repairs

    These products can effectively repair minor, non-structural cracks and may last 2-5 years with proper application. However, they rarely provide truly permanent results, especially for larger or active cracks.

    Common DIY Repair Mistakes

    Several common mistakes reduce the longevity of DIY concrete repairs:

    1. Insufficient cleaning – dirt, loose concrete, and debris prevent proper bonding
    2. Filling too shallow – not filling the entire depth of the crack
    3. Wrong product for the job – using surface fillers for structural cracks
    4. Poor weather conditions – applying repairs in extreme temperatures or moisture
    5. Not addressing the underlying cause – especially important for settlement cracks

    Even the best products fail when improperly applied. Following manufacturer instructions exactly is crucial for maximizing repair life.

    When DIY Isn’t Enough

    For certain types of cracks, DIY repairs are unlikely to provide permanent results:

    • Cracks wider than 1/4 inch
    • Cracks that continue growing
    • Structural cracks in foundations or load-bearing concrete
    • Cracks from significant settlement
    • Cracks with one side higher than the other

    These situations require professional assessment and repair methods that address both the crack and its cause.

    Environmental Factors Affecting Repair Permanence

    The environment around your concrete significantly impacts how long repairs will last. Understanding these factors helps set realistic expectations.

    Climate and Weather Impacts

    Research has shown that climate plays a major role in concrete repair durability. According to a study in the Construction and Building Materials journal, freeze-thaw cycles are particularly damaging to concrete repairs.

    In Fayetteville’s climate with seasonal temperature variations, repairs need to:

    • Accommodate thermal expansion and contraction
    • Resist moisture penetration
    • Withstand UV exposure
    • Handle occasional freezing temperatures

    Using repair materials specifically designed for your local climate significantly improves longevity.

    Soil Conditions and Drainage

    The soil beneath and around concrete has a major impact on repair permanence. Issues like:

    • Expansive clay soils
    • Poor drainage
    • Erosion
    • Tree root intrusion

    can all compromise even the best repairs over time. Addressing drainage and soil stability is essential for truly permanent concrete crack repairs.

    Making Concrete Repairs Last Longer

    Several strategies can help extend the life of concrete crack repairs, making them effectively permanent.

    Proper Surface Preparation

    The single most important factor in repair durability is proper surface preparation. This includes:

    1. Widening the crack slightly to create a solid bonding surface
    2. Cleaning thoroughly to remove all dust, debris, and loose concrete
    3. Ensuring the concrete is dry (unless using a repair product designed for wet conditions)
    4. Applying appropriate bonding agents when recommended

    Professional concrete contractors like AR Concrete Fayetteville spend significant time on preparation because they know it’s the foundation of a lasting repair.

    Choosing the Right Repair Materials

    Different cracks require different repair materials:

    • Structural cracks need high-strength epoxy or polyurethane
    • Surface cracks can use polymer-modified cement patching compounds
    • Actively leaking cracks require specialized hydraulic cement
    • Wide cracks may need reinforced repairs

    Using the appropriate material for the specific crack type dramatically improves repair longevity.

    Post-Repair Protection and Maintenance

    After completing repairs, several steps help ensure longevity:

    1. Applying a quality concrete sealer
    2. Ensuring proper drainage away from the repaired area
    3. Regular cleaning to prevent chemical damage
    4. Addressing new cracks promptly before they worsen
    5. Avoiding de-icing salts near repairs

    This ongoing maintenance helps concrete repairs last for many years, often for the remaining life of the concrete structure.

    Conclusion

    Can cracked concrete be repaired permanently? In most cases, yes—with the right techniques, appropriate materials, and by addressing the underlying causes. While no concrete repair is truly “permanent” in the sense of lasting forever, professional repairs can restore both function and appearance for decades.

    For minor, stable cracks, even DIY repairs can provide many years of service when properly applied. For structural cracks or those caused by ongoing issues like settlement, professional repair methods from experienced contractors like AR Concrete Fayetteville offer the most durable solutions.

    The key to successful long-term concrete repair is correctly diagnosing the cause of the crack, choosing the appropriate repair method, ensuring thorough preparation, and protecting the repair afterward. When all these factors align, concrete crack repairs can indeed be effectively permanent.

    Can Cracked Concrete Be Repaired Permanently FAQs

    How can I tell if a crack in my concrete is just cosmetic or a serious structural issue?

    Cosmetic cracks are typically hairline-thin (less than 1/16 inch wide), don’t grow over time, and have both sides at the same level. Structural cracks are usually wider than 1/4 inch, may be growing, often have one side higher than the other, or appear in patterns throughout the concrete, and these cracks require professional assessment as they may indicate serious underlying problems.

    What is the most permanent method for repairing wide cracks in a concrete driveway?

    The most permanent repair method for wide cracks (over 1/4 inch) in a concrete driveway is full-depth patching, which involves cutting out the damaged section, preparing the base properly, adding reinforcement if needed, and pouring new concrete that bonds to the existing edges. This approach effectively replaces the damaged area with new concrete that, when properly installed, can last as long as the original driveway.

    How long should a professional concrete crack repair last before needing maintenance?

    A properly executed professional concrete crack repair should last at least 5-10 years before requiring any maintenance, with many high-quality repairs lasting 15-20 years or more. Factors affecting longevity include the repair method used, environmental conditions, whether the underlying cause was addressed, concrete usage (vehicular traffic vs. pedestrian), and the quality of materials used in the repair process.

  • What causes cracks in concrete driveways and how can they be fixed?

    What causes cracks in concrete driveways and how can they be fixed?

    Concrete driveways crack for several reasons, including weather changes, heavy loads, poor installation, or problems with the soil underneath. Each type of crack has different causes and requires specific repair methods. Understanding why your driveway cracked helps determine the best way to fix it.

    Common Causes of Concrete Driveway Cracks

    Concrete is very strong but not completely flexible. This makes it prone to cracking under certain conditions. Knowing why cracks happen can help you prevent future problems.

    Shrinkage Cracks

    shrinkage cracks

    When concrete dries and hardens, it naturally shrinks a little bit. This shrinking can cause small, thin cracks on the surface. These cracks usually show up within the first few days after the concrete is poured.

    Shrinkage cracks are typically hairline-thin and don’t usually grow bigger over time. They’re more common when concrete dries too quickly in hot, windy weather. While they might look worrying, these thin cracks rarely affect the strength of your driveway.

    Freeze-Thaw Damage

    Water expands when it freezes. When water gets into tiny spaces in concrete and then freezes, it puts pressure on the concrete from the inside. This repeated freezing and thawing can create cracks and make existing ones worse.

    In Fayetteville and other areas with cold winters, freeze-thaw damage is a major cause of concrete problems. Driveways that weren’t designed with the right air entrainment (tiny air bubbles that give water room to expand) are especially vulnerable to this type of damage.

    Heavy Loads and Impact Damage

    Concrete driveways are designed for passenger vehicles, not heavy trucks or equipment. When too much weight is placed on a concrete driveway, it can crack. Similarly, dropping heavy objects on concrete can cause impact damage.

    Areas where heavy vehicles regularly park or drive can develop cracks over time. This is especially true at the edges of driveways, which are weaker than the center areas.

    Poor Installation Practices

    failed corner joint

    Many driveway cracks trace back to mistakes made during installation. Common installation problems include:

    • Concrete mix with too much water
    • Not enough control joints (planned spaces where the concrete can crack safely)
    • Inadequate base preparation
    • Improper finishing techniques
    • Pouring concrete in very hot or cold weather

    Properly installed concrete by experienced professionals like AR Concrete Fayetteville is much less likely to develop serious cracks.

    Soil Movement and Settlement

    The ground beneath your driveway isn’t always stable. Soil can settle, expand, or wash away over time. When the support under your driveway changes, cracks often follow.

    Soil problems are especially common in areas with clay soils that shrink during drought and expand when wet. Tree roots growing under driveways can also lift sections of concrete, causing cracks where the raised section meets the rest of the driveway.

    Types of Driveway Cracks and Their Severity

    Not all cracks are equal. Some are just cosmetic issues, while others signal serious problems. This table helps you understand what you’re dealing with:

    Crack TypeAppearanceTypical CausesSeverity Level
    Hairline CracksVery thin (less than 1/16 inch), shallowNormal shrinkage during curingLow – mostly cosmetic
    Shrinkage Cracks1/16 to 1/8 inch wide, pattern-likeRapid drying, poor curing practicesLow to Medium
    Settlement Cracks1/8 to 1/4 inch wide, often uneven edgesSoil movement, poor base preparationMedium
    Structural Cracks1/4 inch or wider, often deepOverloading, major soil issues, freeze-thawHigh
    SpallingSurface flaking, not a typical crackFreeze-thaw cycles, poor finishingMedium
    D-CracksD-shaped cracks near joints and edgesFreeze-thaw damage, moisture problemsMedium to High

    As you can see from how to tell if your concrete needs to be repaired or replaced, the width and pattern of cracks can tell you a lot about their causes and seriousness.

    Professional Repair Options for Cracked Driveways

    Depending on the type and severity of cracks in your driveway, several professional repair methods might be appropriate. Here are the most common options.

    Crack Filling and Sealing

    For narrow cracks less than 1/4 inch wide, filling and sealing is often enough. This process involves:

    1. Cleaning the crack thoroughly
    2. Applying a concrete crack filler or sealant
    3. Smoothing the surface
    4. Allowing proper curing time

    This method is relatively inexpensive and works well for minor cracks. It’s most effective when done before water can penetrate and cause more damage. For best results, crack sealing should be done in dry weather when cracks are at their widest.

    Concrete Patching

    For larger cracks and small damaged areas, concrete patching can restore both function and appearance. The process typically includes:

    1. Removing loose concrete and cleaning the area
    2. Applying a bonding agent
    3. Filling with a patching compound
    4. Texturing to match the surrounding concrete
    5. Proper curing with moisture control

    Patches work best for isolated damage areas rather than widespread cracking. While they can restore structural integrity, patches may look different from the original concrete unless carefully color-matched and textured.

    Concrete Resurfacing

    When a driveway has multiple cracks or widespread surface damage, resurfacing might be the best option. This involves applying a thin layer of new concrete over the existing driveway.

    Resurfacing can:

    • Cover minor cracks and surface imperfections
    • Renew the appearance of old, stained concrete
    • Add years of life to a driveway
    • Cost less than full replacement

    For resurfacing to work, the underlying concrete must be structurally sound. Major cracks need to be repaired first, and the existing concrete can’t be sinking or heaving.

    Full or Partial Replacement

    For severely damaged driveways with multiple deep cracks, sinking sections, or major deterioration, replacement is often the most cost-effective long-term solution. Replacement might involve:

    1. Removing the old concrete
    2. Fixing any base or drainage issues
    3. Installing proper reinforcement
    4. Pouring new concrete with appropriate control joints

    While replacement costs more initially, it provides a completely new surface with the longest lifespan. Sometimes only damaged sections need replacement, which can reduce costs while fixing the worst problems.

    DIY Repair Options for Minor Cracks

    For small, non-structural cracks, homeowners can often make repairs themselves. These fixes won’t be as durable as professional repairs but can help prevent further damage.

    When DIY Repairs Are Appropriate

    DIY repairs work best for:

    • Hairline cracks less than 1/8 inch wide
    • Surface-level damage that doesn’t affect driving
    • Isolated cracks rather than patterns of damage
    • Situations where you’re just buying time before a more permanent fix

    For anything more serious, professional repair will likely be more cost-effective in the long run.

    Step-by-Step DIY Crack Filling

    If you want to tackle small cracks yourself, here’s a basic process:

    1. Clean the crack thoroughly with a wire brush and remove loose material
    2. Rinse and let dry completely
    3. Apply concrete crack filler according to product instructions (usually with a caulking gun)
    4. Smooth the surface and remove excess
    5. Allow proper curing time before driving on the repaired area

    Look for products specifically designed for concrete driveways, as they’ll hold up better under vehicle traffic than general-purpose fillers.

    Preventing Future Driveway Cracks

    Once you’ve repaired cracks, you’ll want to prevent new ones from forming. Several preventive measures can help extend your driveway’s life.

    Proper Drainage Solutions

    Water is concrete’s enemy. Make sure your driveway has:

    • A slight slope away from your garage or home
    • No areas where water pools after rain
    • Good drainage around the edges
    • Sealing to prevent water infiltration

    Small adjustments to improve drainage can significantly extend your driveway’s life and prevent cracks.

    Regular Sealing and Maintenance

    Applying a concrete sealer every 2-5 years creates a protective barrier against water, chemicals, and freeze-thaw damage. A good maintenance routine includes:

    • Cleaning spills promptly, especially oil and chemicals
    • Avoiding de-icing salts in winter
    • Keeping heavy vehicles off residential driveways
    • Filling small cracks before they grow
    • Cleaning with appropriate methods that don’t damage the surface

    Regular professional inspections can catch problems early when they’re easier and cheaper to fix.

    Professional Installation Standards

    If you’re installing a new driveway or replacing an old one, proper installation is crucial for preventing future cracks. Professional concrete contractors like AR Concrete Fayetteville will:

    • Prepare a proper sub-base with adequate compaction
    • Use appropriate concrete mix with correct water ratio
    • Install reinforcement when needed
    • Create proper control joints
    • Ensure adequate thickness (4-6 inches for residential driveways)
    • Use proper finishing techniques
    • Provide appropriate curing conditions

    Research shows that professional installation following industry standards can more than double a driveway’s crack-free lifespan. According to the American Concrete Institute, proper installation is the single most important factor in preventing concrete cracks.

    Conclusion

    Concrete driveway cracks happen for many reasons—from normal shrinkage during curing to serious problems like soil movement or freeze-thaw damage. Understanding what caused your driveway cracks helps determine whether simple DIY repairs, professional patch work, resurfacing, or complete replacement is your best option.

    For minor cracks, timely repairs and good maintenance can extend your driveway’s life considerably. For more serious damage, professional assessment and repair from experienced contractors like AR Concrete Fayetteville provides the most durable solution. With proper care and timely attention to small problems, your concrete driveway can remain functional and attractive for decades.

    What Causes Cracks in Concrete Driveways and How Can They Be Fixed FAQs

    How soon after installation can a concrete driveway develop cracks?

    Concrete driveways can develop small shrinkage cracks within the first few days after installation as the concrete cures and naturally contracts. These early hairline cracks are usually not structural concerns, but cracks that appear within the first year might indicate installation problems like improper mix ratios or inadequate base preparation.

    Will cracks in my concrete driveway get worse over time if I don’t repair them?

    Yes, unrepaired concrete cracks typically worsen over time as water enters the cracks, freezes and expands in cold weather, and gradually erodes the base materials beneath your driveway. What starts as a small, cosmetic crack can grow wider and deeper, eventually leading to more serious structural issues that require expensive repairs or complete replacement.

    How can I tell if my driveway cracks are serious enough to need professional repair?

    Driveway cracks need professional repair if they are wider than 1/4 inch, show signs of one side being higher than the other, appear in patterns throughout the driveway, allow water to pool or drain improperly, or continue to grow despite DIY repair attempts. Multiple intersecting cracks or cracks that make your driveway feel unstable when driving over them always warrant professional assessment.