Author: AR Concrete

  • Is It Worth Sealing a Concrete Driveway Every Year?

    Is It Worth Sealing a Concrete Driveway Every Year?

    Key Takeaways

    • Annual sealing is not recommended – Sealing your concrete driveway every year can actually damage the surface and waste money.
    • Seal every 2-5 years instead – Most driveways in Fayetteville Arkansas only need resealing every 2 to 5 years depending on sealer type and climate conditions.
    • Watch for visual signs – Fading color, uneven water absorption, visible stains, and rough texture indicate it’s time to reseal.
    • Over-sealing causes problems – Too many sealer layers can create peeling, cracking, moisture trapping, and slippery surfaces.
    • Choose the right sealer – Acrylic sealers last 1-3 years, while penetrating sealers can last 10+ years with proper application.

    Article Summary

    No, sealing a concrete driveway every year is not worth it and can damage your surface. Most concrete driveways in Fayetteville Arkansas should be sealed every 2 to 5 years, depending on the sealer type, weather exposure, and traffic patterns. Annual sealing leads to buildup issues, trapped moisture, and wasted money.

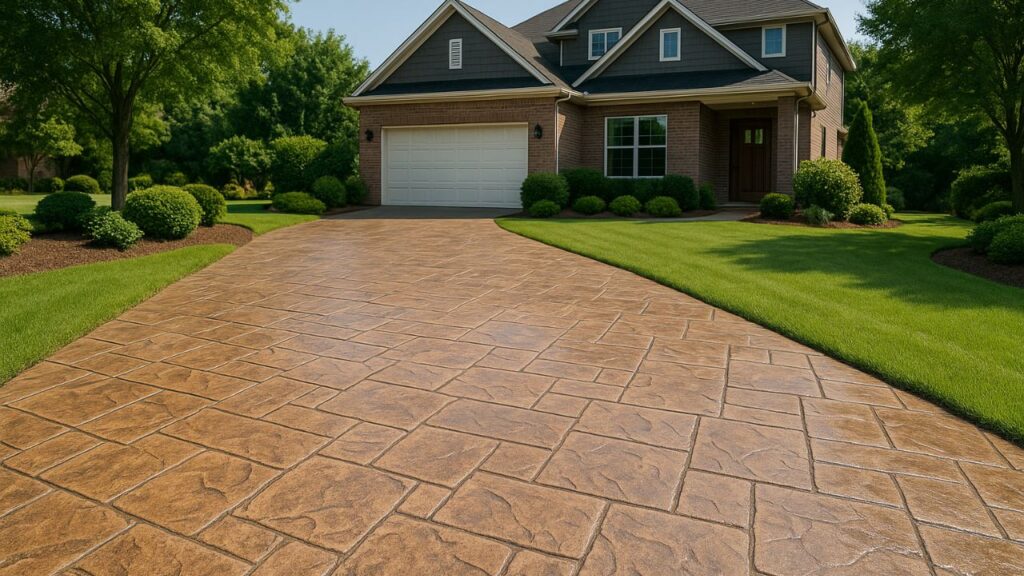
    Why Annual Concrete Driveway Sealing Is a Bad Idea

    Many homeowners in Fayetteville Arkansas believe that sealing their concrete driveway every year provides extra protection. This common misconception actually does more harm than good. When you apply sealer too frequently, multiple layers build up on the surface without the previous coat fully wearing away. This creates a thick film that begins to fail in several problematic ways.[1]

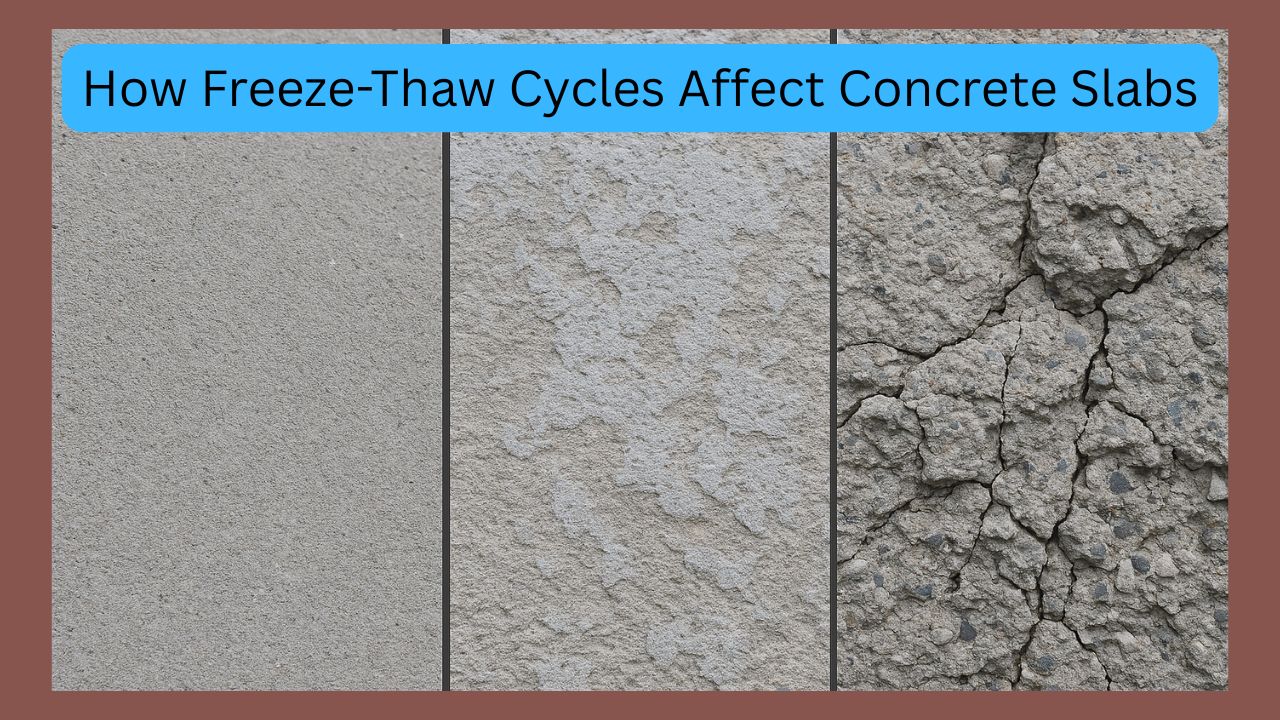
    Excessive sealing creates a breeding ground for structural problems. The layers don’t bond properly to each other, leading to peeling and flaking that makes your driveway look worse than if you had never sealed it at all. Arkansas’s temperature swings between hot summers and occasional freezing winters make this problem even more severe. When water seeps into the cracks between sealer layers and freezes, it expands and pushes the layers apart, creating a web of hairline cracks across your driveway surface.[2]

    Another major issue with annual sealing involves moisture management. Concrete is a porous material that naturally breathes, allowing moisture to move through it gradually. When you trap moisture beneath thick layers of sealer, you prevent this natural process. The trapped water has nowhere to go, so it sits inside your concrete, potentially leading to mold growth, mildew problems, and gradual weakening of the concrete structure itself.[3]

    The Financial Waste of Over-Sealing

    Consider the cost aspect for a moment. Quality concrete sealer products in Arkansas typically range from $30 to $150 per gallon in 2025, depending on the type and brand.[4] Acrylic sealers cost $30 to $75 per gallon, while epoxy and urethane products range from $40 to $150 per gallon. For an average two-car driveway of about 640 square feet, you’ll need approximately 3 to 5 gallons per application. Add in the labor costs if you’re hiring professionals (typically $1.20 to $1.75 per square foot), or the time investment if you’re doing it yourself, and annual sealing becomes an expensive habit with no added benefit.

    The preparation work alone takes considerable time. You need to thoroughly clean the driveway, remove any existing damaged sealer, wait for perfect weather conditions, and apply the product evenly. Doing this every year when it’s not needed means you’re spending money and time on a task that provides zero additional protection. Your previous sealer coat hasn’t even begun to wear away yet, so the new coat just sits on top without bonding properly.

    How Arkansas Weather Affects Sealing Frequency

    Fayetteville’s climate presents specific challenges for concrete surfaces. The area experiences humid summers with temperatures reaching into the 90s, combined with occasional winter freezes that can drop below 20°F. These temperature extremes cause concrete to expand and contract, which naturally affects sealer performance.[5]

    However, this doesn’t mean you need to seal more often. Instead, it means you should choose the right type of sealer for our climate and apply it at the correct intervals. Properly installed concrete driveways in Arkansas can withstand these conditions when sealed appropriately every few years rather than annually.

    Recommended Sealing Schedule for Fayetteville Arkansas Driveways

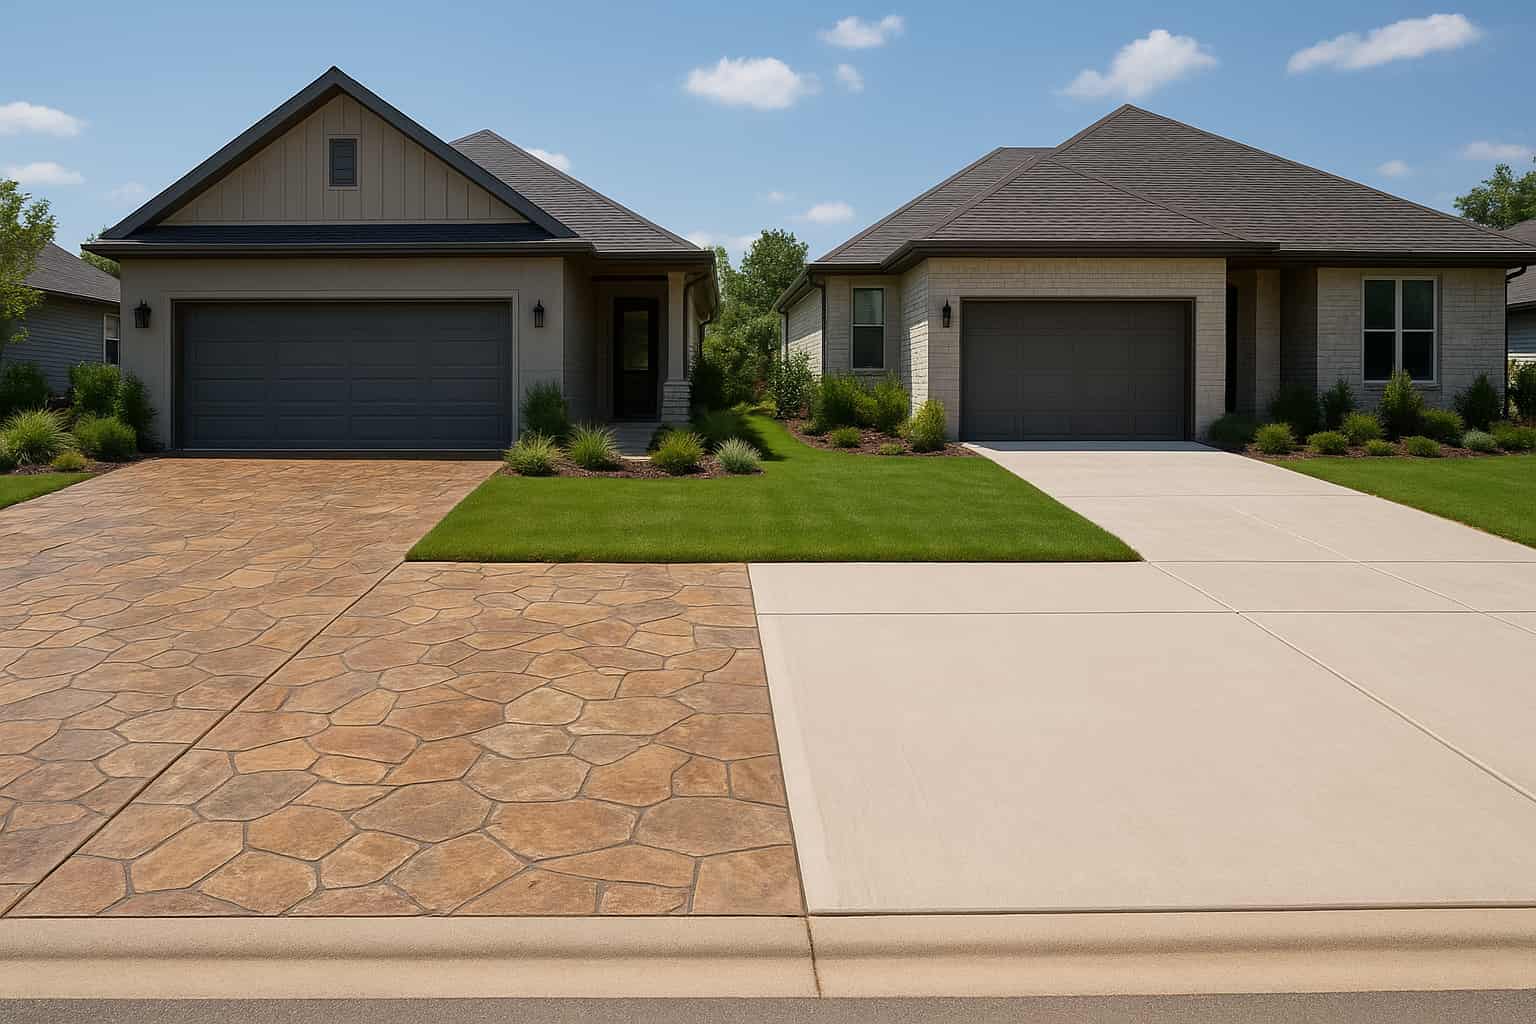
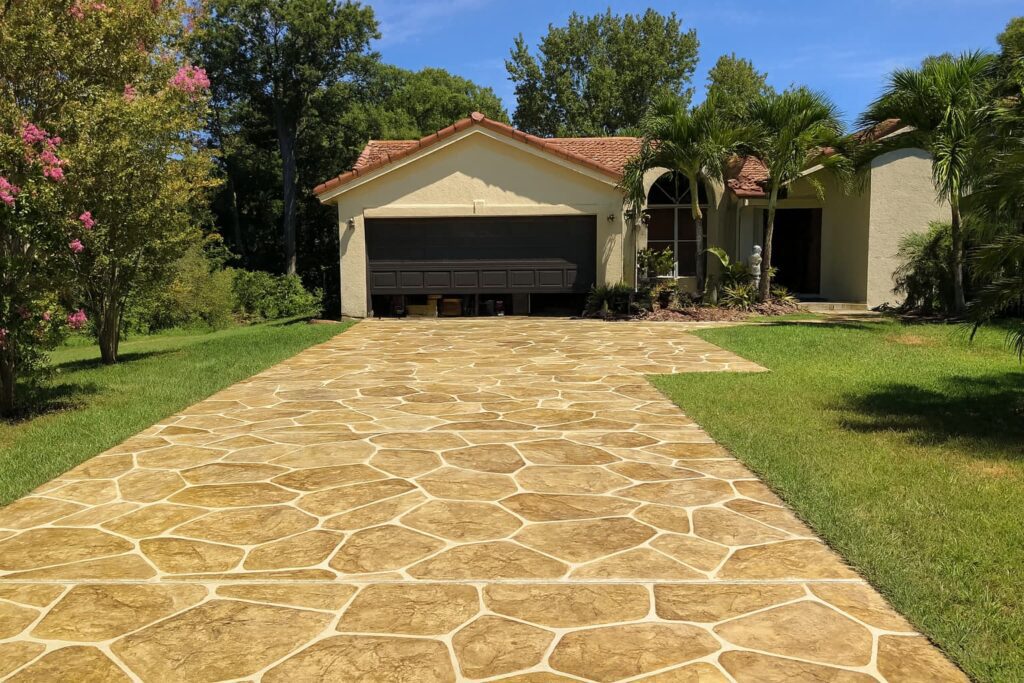
    The optimal sealing frequency for your concrete driveway depends on several factors, but the rule of thumb for homeowners in Fayetteville Arkansas is to seal every 2 to 5 years. This range gives you flexibility based on your specific situation while avoiding the problems that come with over-sealing.[6]

    Sealer TypeExpected LifespanBest ForArkansas Suitability
    Acrylic Sealer1-3 yearsDecorative surfaces, enhanced appearanceGood for low-traffic areas
    Epoxy Sealer5-10 yearsHigh-traffic driveways, chemical resistanceExcellent for Arkansas weather
    Urethane Sealer5-10 yearsUV resistance, durabilityExcellent for Arkansas weather
    Penetrating Sealer (Silicate)7-10+ yearsLong-term protection, chemical reactionBest for long-term value
    Penetrating Sealer (Silane-Siloxane)5-10 yearsWater repellency, breathableIdeal for freeze-thaw protection

    Understanding Different Sealer Types

    Acrylic sealers are popular because they’re budget-friendly and easy to apply. They create a glossy finish that enhances the appearance of decorative concrete. However, they wear away faster than other options, especially on driveways that see heavy vehicle traffic. In Fayetteville’s climate, expect to reseal with acrylic products every 2 to 3 years at most.[7]

    Epoxy and urethane sealers offer superior durability and protection. These products form a thick, protective barrier that resists oil stains, chemical damage, and wear from tires. They cost more upfront but last significantly longer, making them cost-effective over time. For Arkansas driveways, these sealers typically provide 5 to 7 years of protection before needing reapplication.[8]

    Penetrating sealers work differently from surface sealers. Instead of sitting on top of the concrete, they soak into the pores and react chemically with the concrete itself. Silicate sealers create a permanent densification that can last 10 years or more. Silane-siloxane sealers repel water while allowing the concrete to breathe, making them perfect for areas like Fayetteville where freeze-thaw cycles occur. These products typically last 7 to 10 years with a single application.[9]

    Factors That Influence Sealing Frequency

    Traffic patterns play a significant role in how often you need to reseal. A driveway with two cars coming and going daily will need more frequent sealing than one used by a single vehicle. Heavy trucks or RVs accelerate wear on both the concrete and the sealer. Similarly, if you park in the same spot every day, that area experiences concentrated wear and may show signs of sealer failure before other parts of your driveway.[10]

    Sun exposure matters more than many homeowners realize. Arkansas summers bring intense UV radiation that gradually breaks down sealer molecules, especially with acrylic and some epoxy products. Driveways with southern exposure or minimal shade will need sealing on the shorter end of the recommended timeframe. Conversely, driveways shaded by trees or buildings maintain their sealer longer but may face other challenges like leaf stains and algae growth.

    The quality of the previous sealing job directly impacts how long protection lasts. Properly cleaned and prepared surfaces allow sealer to bond correctly, extending its lifespan. Poor application technique, sealing over dirty concrete, or applying sealer in inappropriate weather conditions all lead to premature failure. When you work with experienced concrete professionals in Fayetteville, you get a quality seal job that maximizes protection duration.

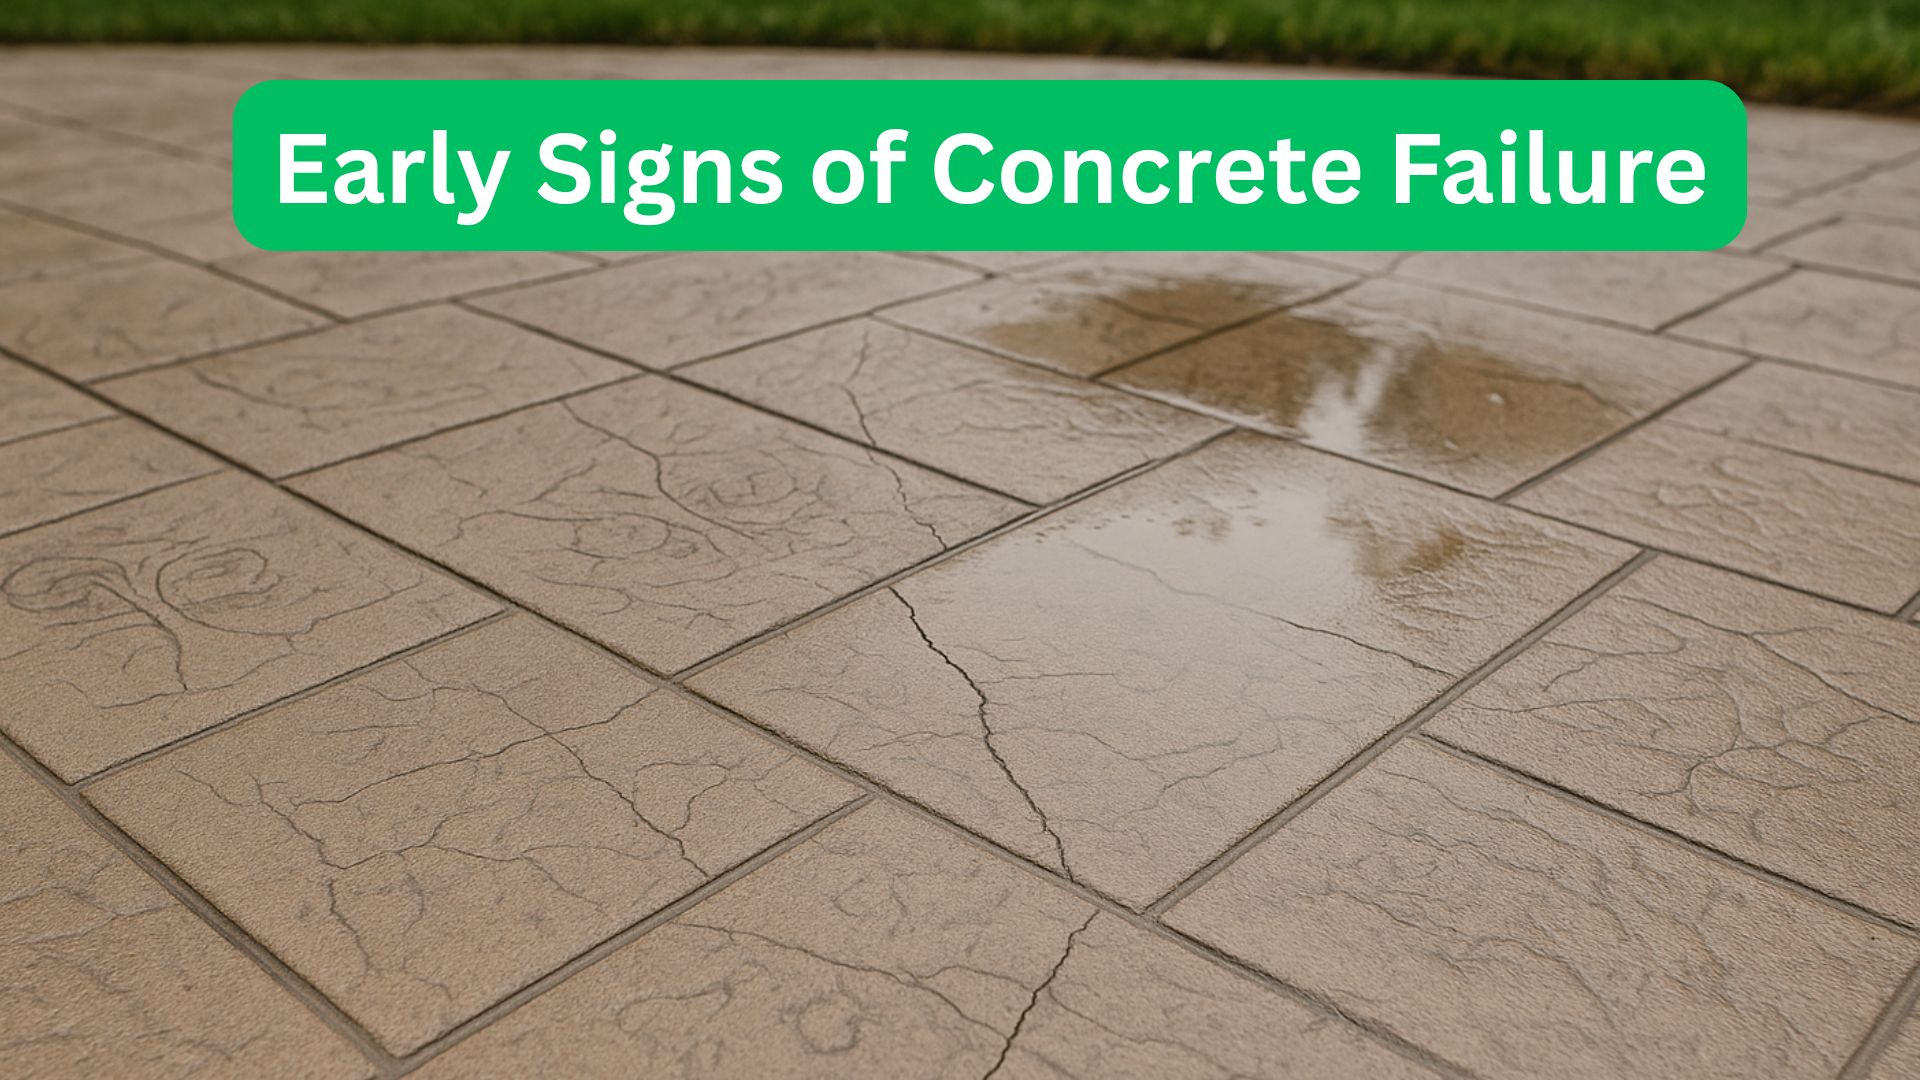
    Signs Your Concrete Driveway Needs Resealing

    Rather than following a rigid annual schedule, pay attention to visual and functional indicators that tell you when your driveway actually needs sealing. This approach ensures you reseal at the right time without wasting money or damaging your concrete with excessive product application.[11]

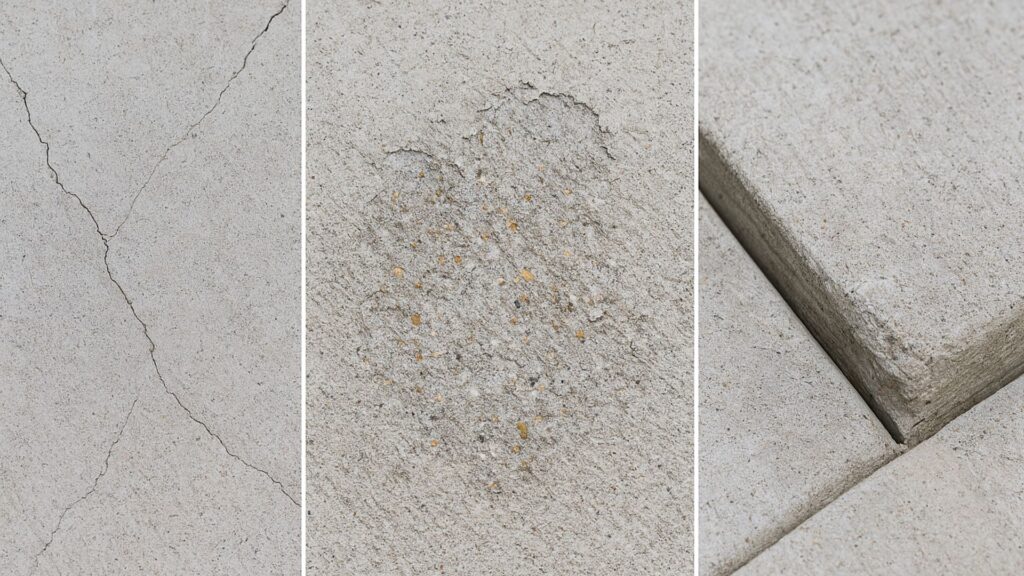
    Color Changes and Fading

    Fresh sealer gives concrete a rich, consistent color with either a glossy or matte finish depending on the product. As the sealer wears away, you’ll notice the concrete begins to look dull and chalky. The vibrant appearance fades to a flat, lifeless gray. This color change happens gradually, so you might not notice it day to day. Compare photos from when you first sealed the driveway to its current appearance to spot the difference.

    In Fayetteville, UV damage accelerates color fading on exposed driveways. You might notice some areas fading faster than others, particularly sections that face south or west and receive direct afternoon sun. This uneven fading indicates the sealer is breaking down and no longer providing uniform protection across your entire driveway surface.[12]

    Water Absorption Patterns

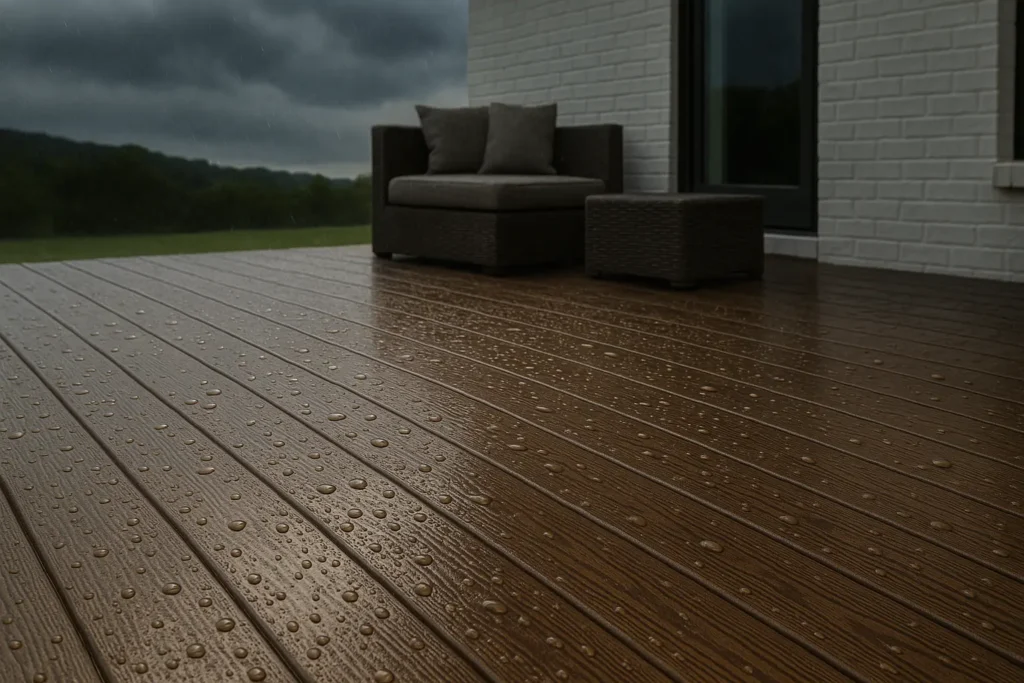
    A properly sealed concrete driveway repels water, causing it to bead up on the surface rather than soaking in immediately. After a rainstorm, check your driveway once the main water has run off. A well-sealed surface will dry quickly and evenly. If you notice some spots staying dark and wet while others dry faster, the sealer has worn away in those areas and water is penetrating the concrete.[13]

    The water absorption test provides clear evidence of sealer failure. Pour a cup of water on different sections of your driveway and watch what happens. Water should bead and run off for several minutes. If it soaks in within 30 seconds to a minute, that area needs resealing. This test works particularly well in Arkansas’s humid climate where moisture protection is essential for preventing freeze-thaw damage during winter months.

    Stain Visibility and Concrete Damage

    Sealers protect concrete from staining by creating a barrier between the porous concrete and potential stain sources like oil, grease, chemicals, and organic materials. When sealer wears away, these substances penetrate directly into the concrete, leaving visible marks that are difficult or impossible to remove.[14]

    Notice whether new stains appear on your driveway more easily than before. Oil drips from vehicles, leaf stains from trees, and rust marks from metal objects all indicate the protective barrier has failed. The concrete absorbs these materials, and no amount of scrubbing will remove them once they’ve soaked in. This is your driveway telling you it’s time for a fresh coat of sealer.

    Surface texture changes also signal sealer failure. Run your hand across the concrete (carefully, of course). A sealed surface feels smooth and slightly slick. When the sealer wears away, you’ll feel rough, gritty texture as you’re touching the exposed concrete aggregate. You might also notice small pits or surface scaling where the concrete itself has begun to deteriorate without sealer protection.

    The Science Behind Proper Sealing Intervals

    Understanding why 2 to 5 years is the right timeframe requires looking at how sealers work and what happens to them over time. Concrete sealer isn’t a permanent coating – it’s a sacrificial layer that gradually wears away as it does its job protecting the concrete underneath.[15]

    How Concrete Sealers Break Down

    All sealers degrade through a combination of physical wear and chemical breakdown. Vehicle tires grinding across the surface physically abrads the sealer film, literally rubbing it away molecule by molecule. This mechanical wear happens fastest in tire tracks and areas where you turn the steering wheel while stationary.

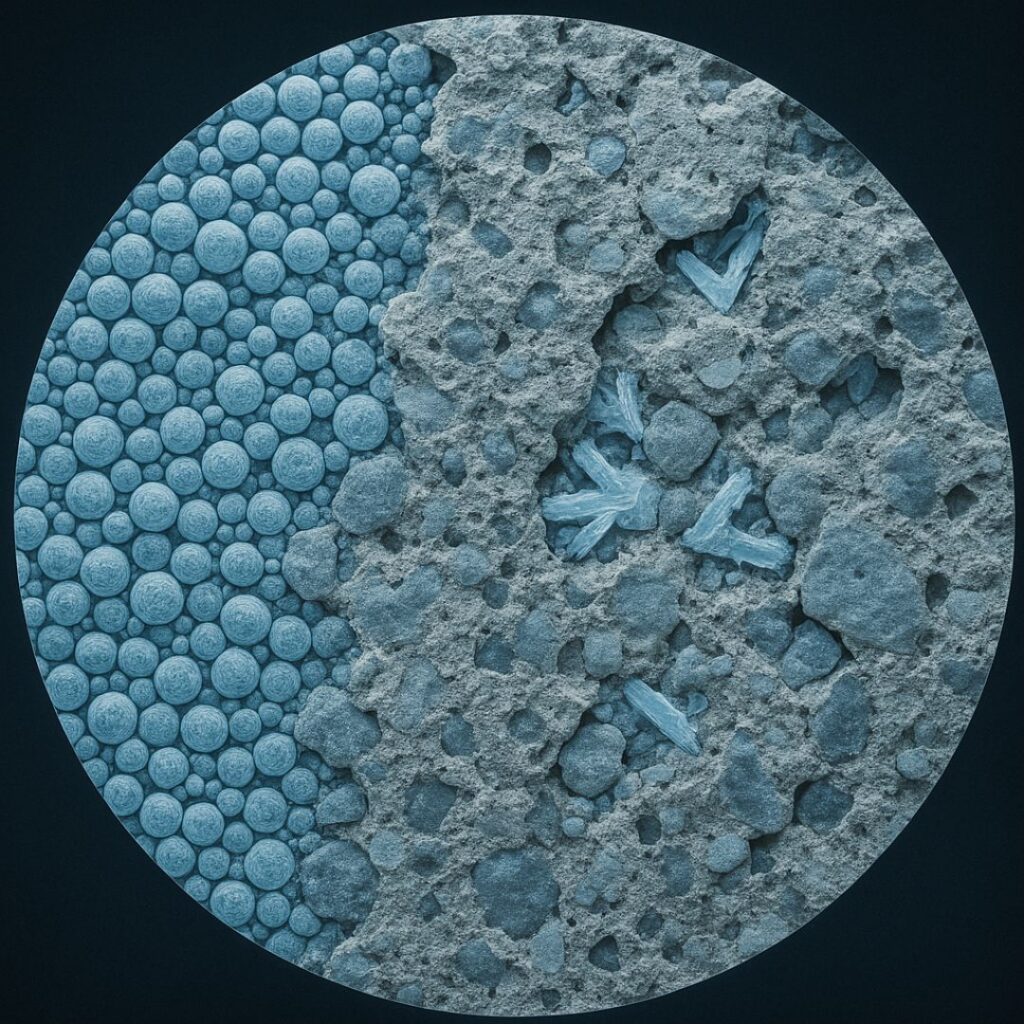
    Chemical breakdown occurs through several pathways. Ultraviolet radiation from the sun breaks molecular bonds in the sealer polymers, causing them to become brittle and weak. This is why southern-facing driveways often need sealing more frequently. Freeze-thaw cycles in Arkansas winters cause expansion and contraction that stresses the sealer film. De-icing chemicals used during occasional ice storms attack the sealer chemically, accelerating its breakdown.[16]

    Moisture is both friend and enemy to concrete sealers. The sealer must allow some moisture vapor transmission to prevent trapped water problems, but it must also repel liquid water to protect the concrete. This balance means sealers are designed to gradually become more permeable over time, naturally signaling when reapplication is needed.

    Why More Isn’t Better

    The molecular structure of sealers requires proper bonding to work effectively. When you apply new sealer over old sealer that hasn’t significantly worn away, the new coat doesn’t bond to the concrete – it bonds to the old sealer. This creates weak adhesion that leads to premature failure of both layers.[17]

    Think of it like painting a wall. You wouldn’t add a new coat of paint every month, because the new paint wouldn’t stick properly to the previous coat. The same principle applies to concrete sealers. Each product is formulated to bond with concrete, not with itself. Annual applications create a lasagna of poorly adhered layers that peel and fail together.

    Comparing Sealing Frequencies: Annual vs. Every 2-5 Years

    FactorAnnual SealingEvery 2-5 Years
    Cost Over 10 Years$5,000 – $9,500$1,800 – $4,000
    Surface ConditionPeeling, flaking, buildup problemsSmooth, protected, proper bonding
    Moisture ManagementTrapped moisture, mold riskProper breathing, healthy concrete
    Time Investment1-2 days annually1-2 days every few years
    AppearanceUneven, cloudy, possible yellowingClean, consistent, professional look
    Concrete LongevityMay reduce lifespan due to trapped moistureMaximizes concrete lifespan
    Winter SafetyCan become slippery with buildupMaintains appropriate traction

    Best Practices for Sealing Concrete Driveways in Arkansas

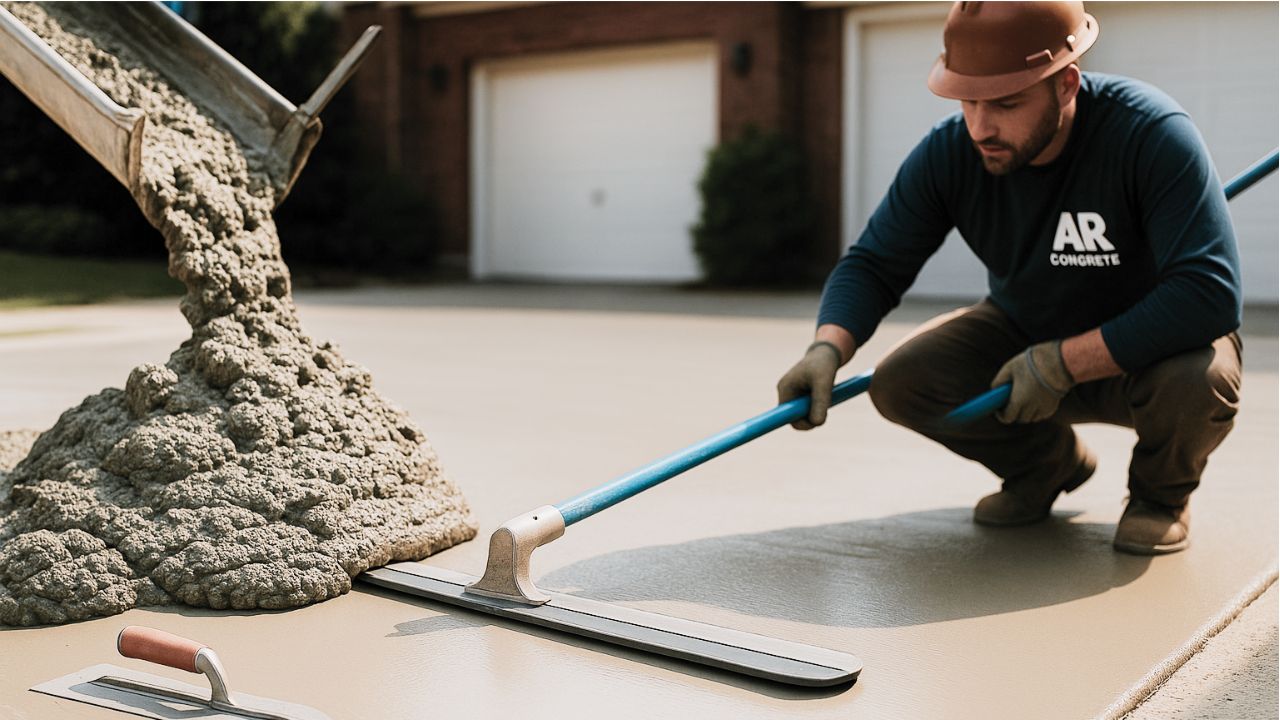
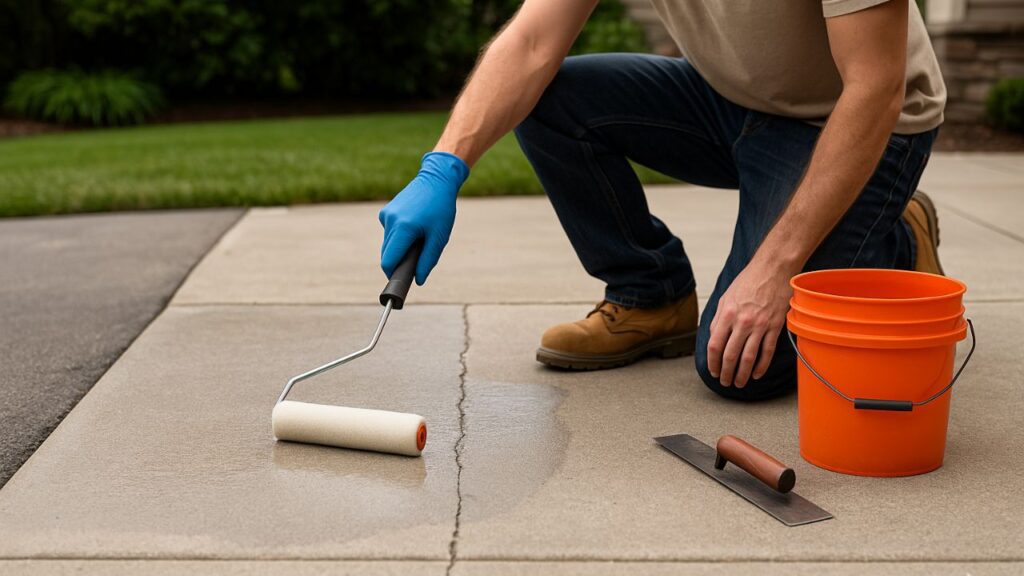
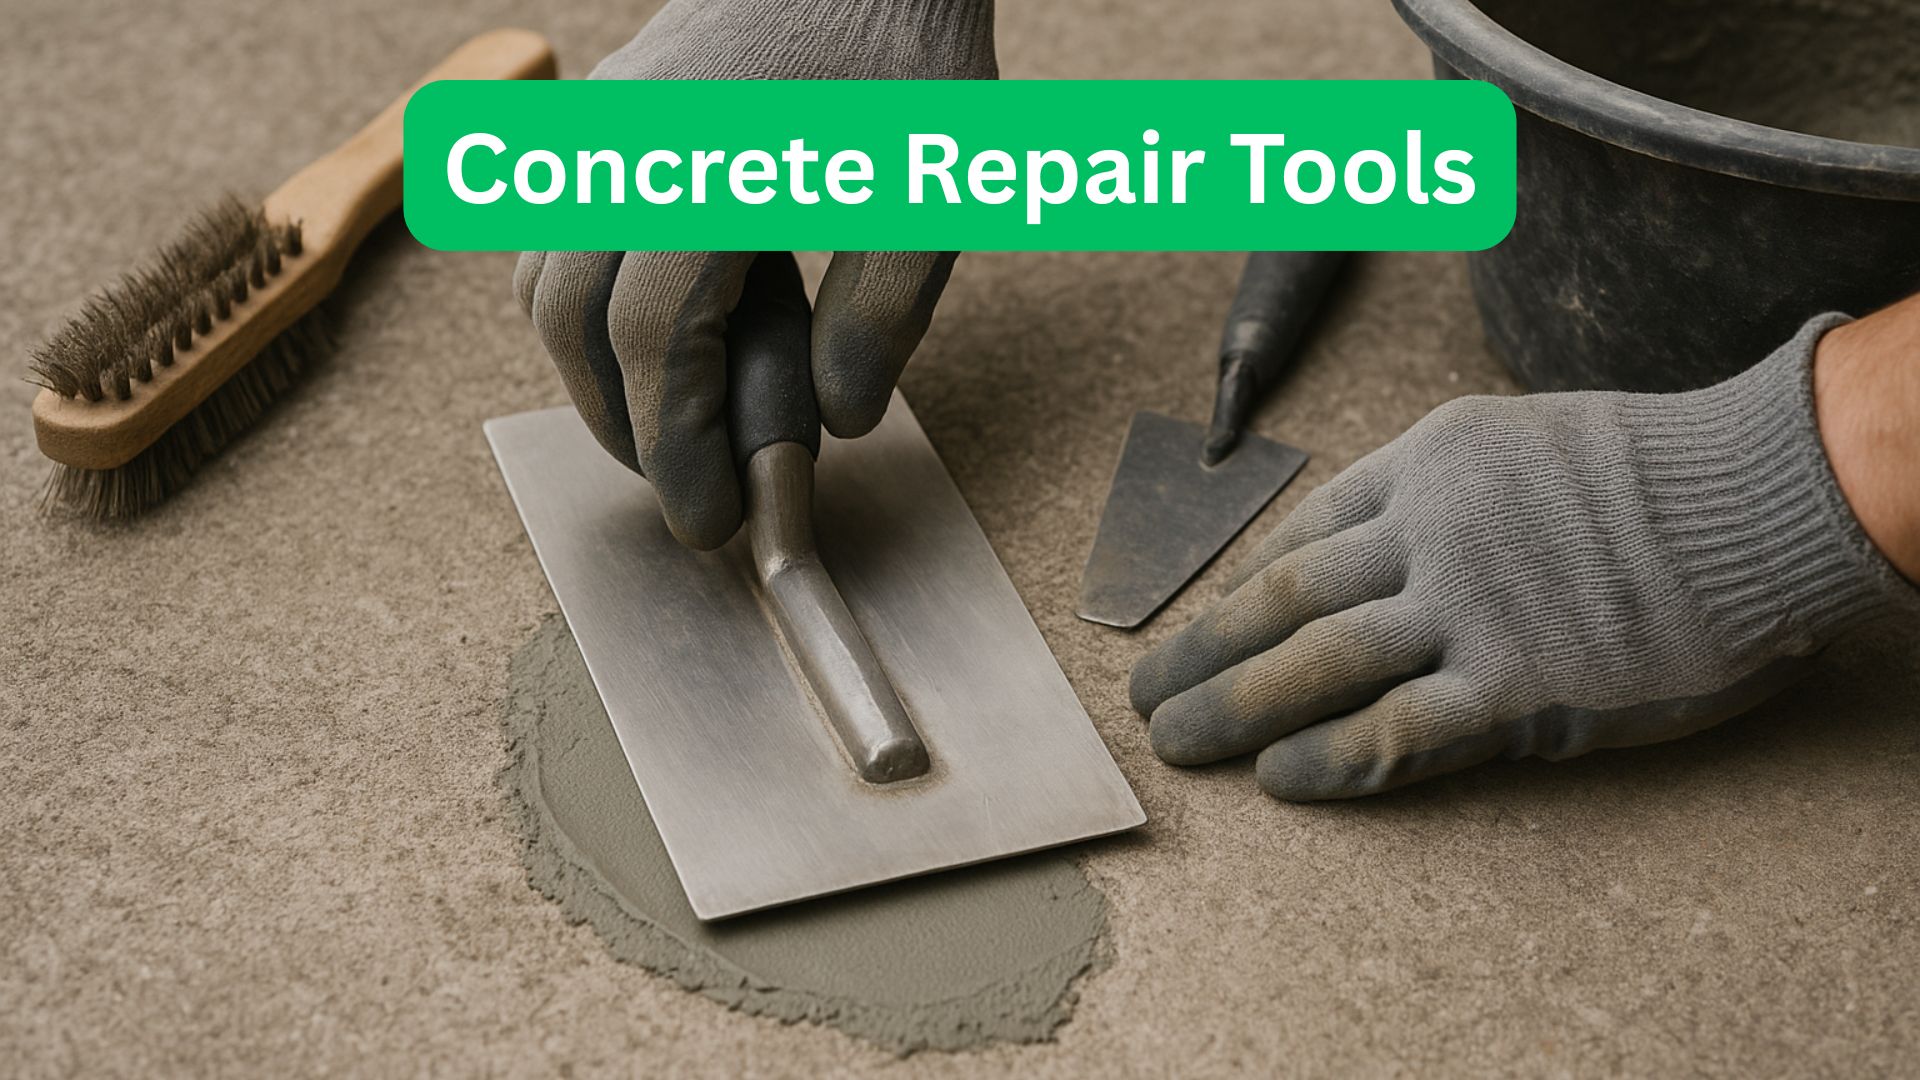
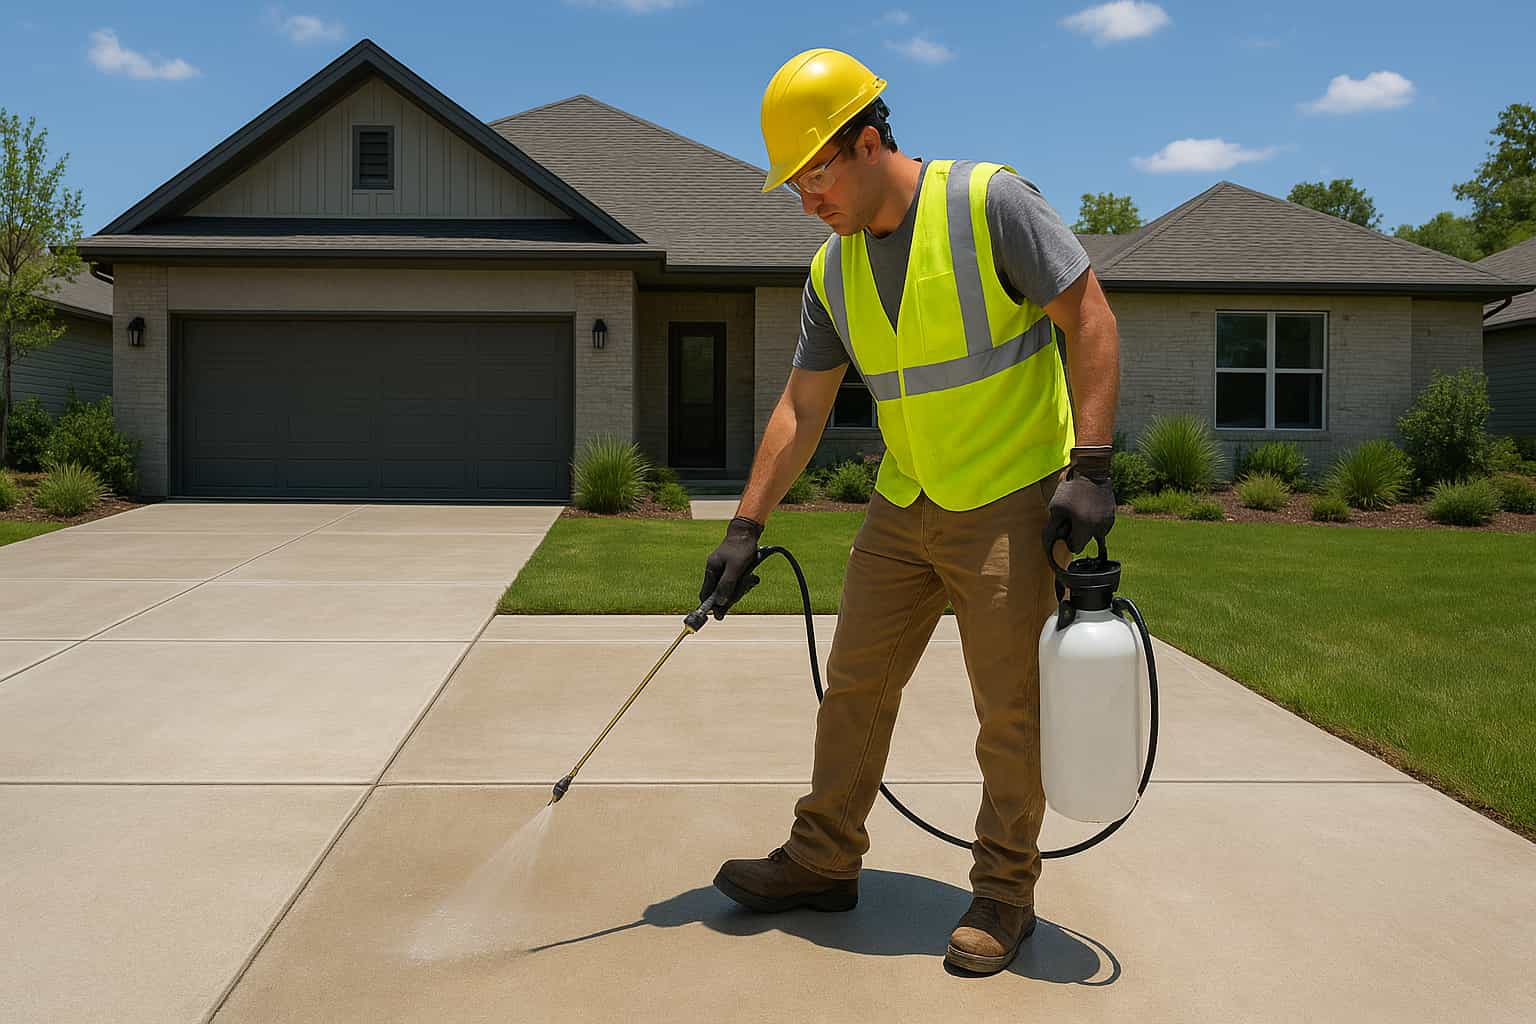
    When the time comes to reseal your driveway, following proper procedures ensures you get the maximum lifespan from your sealer investment. The preparation work matters just as much as the sealer itself, and cutting corners leads to premature failure and wasted money.[18]

    Proper Surface Preparation

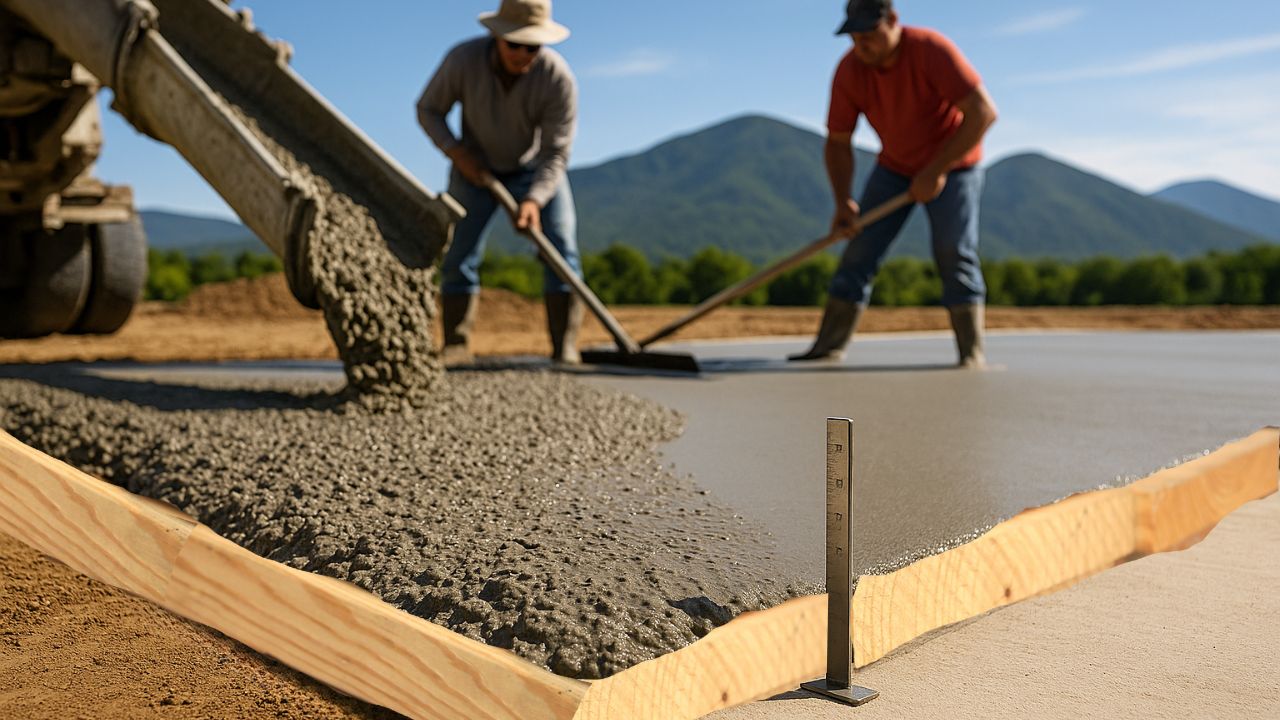
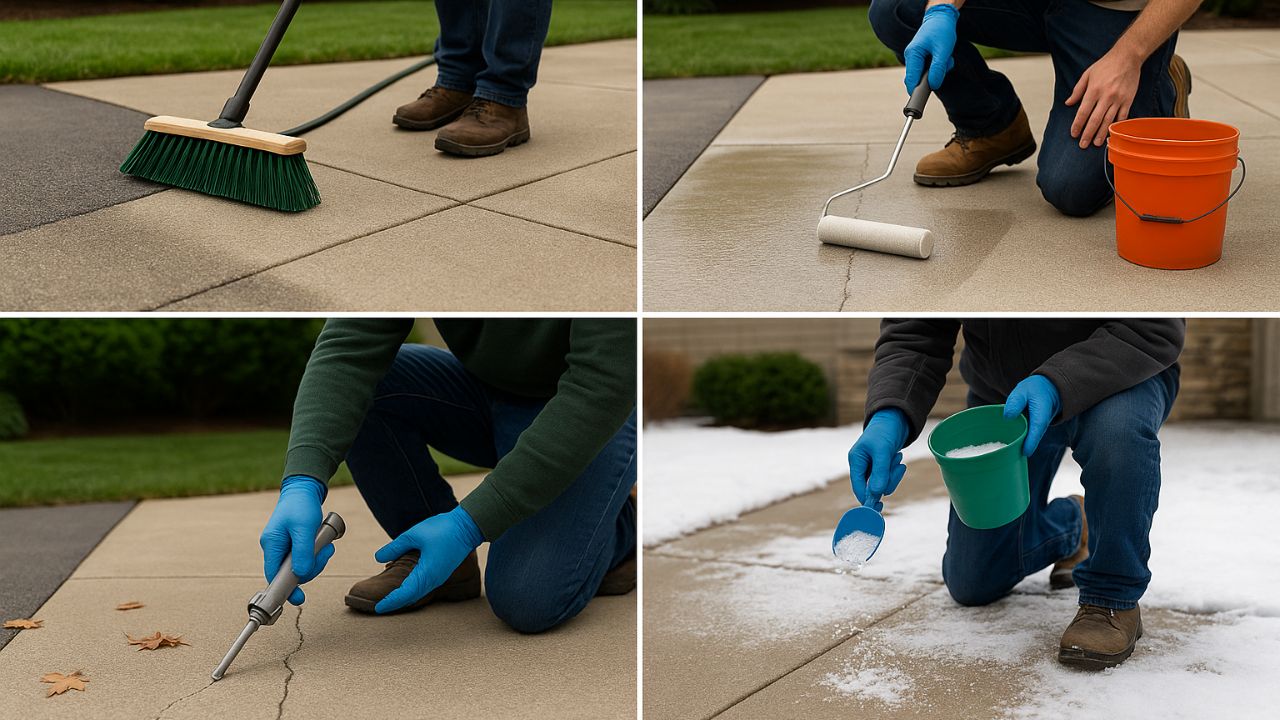
    Start by thoroughly cleaning the concrete surface. Power washing removes dirt, debris, oil stains, and any failing sealer from previous applications. In Fayetteville, spring and fall are ideal times for this work when temperatures are moderate and humidity is lower. Allow the concrete to dry completely for at least 24 hours after washing – moisture trapped under new sealer causes adhesion failures and cloudy appearance.

    Address any concrete repairs before sealing. Fill cracks with appropriate concrete crack filler, patch spalled areas, and ensure the surface is structurally sound. Sealer cannot fix damaged concrete – it only protects good concrete. Attempting to seal over damaged areas just masks problems temporarily while allowing them to worsen underneath.

    Test the concrete’s pH level if your driveway is relatively new. Concrete continues curing for months after installation, and newly cured concrete often has high alkalinity that can interfere with sealer adhesion. A simple pH test strip from any hardware store tells you if the concrete is ready. You want a pH between 6 and 9 for most sealers. If alkalinity is too high, treat it with an etching solution or wait longer before sealing.[19]

    Application Timing and Techniques

    Weather conditions during application significantly affect the outcome. Apply sealer when temperatures will remain between 50°F and 85°F for at least 24 hours. Fayetteville’s spring and fall seasons typically offer the best conditions. Avoid sealing if rain is forecast within 24 hours, as moisture will prevent proper curing.

    Thin coats work better than thick applications. Many homeowners make the mistake of applying sealer too heavily, thinking more is better. Heavy coats take longer to cure, may develop bubbles or a cloudy appearance, and don’t provide better protection than proper thin coats. Most manufacturers recommend two thin coats applied in opposite directions rather than one thick coat.

    Use the right applicator for your sealer type. Some products work best with a pump sprayer, while others need a roller or brush. Follow manufacturer instructions carefully. Work in sections to maintain a wet edge and avoid lap marks. Start at one end of the driveway and work systematically to avoid walking on freshly sealed areas.

    Maintenance Between Sealing Cycles

    Proper care between sealing extends your protection and keeps your driveway looking great longer. Sweep your driveway regularly to remove abrasive dirt and debris that can wear down sealer faster. Clean oil spills immediately with a degreaser – even sealed concrete can stain if oil sits on it long enough.

    Avoid using harsh chemicals or de-icing salts on sealed concrete. Arkansas doesn’t usually require heavy de-icing, but if you do need to handle ice, use sand for traction instead of chemical melters. These products attack the sealer and accelerate its breakdown, forcing you to reseal sooner than necessary.

    Power wash your driveway annually using a wide-angle tip and moderate pressure. This removes accumulated dirt and organic growth without damaging the sealer. It also gives you a chance to inspect the sealer condition and watch for signs that resealing time is approaching.

    Expert Insights on Concrete Driveway Sealing

    According to the Portland Cement Association, “Properly applied sealers can help prevent deterioration of concrete surfaces, keeping them in good condition for years. However, not all sealers perform equally, and improper application can do more harm than good.”[20] This underscores the importance of using the correct sealing schedule and technique rather than defaulting to annual applications.

    The American Concrete Institute notes that “Sealers should be reapplied when the surface shows signs of wear, not on a strict calendar schedule. Over-application of sealers can lead to delamination and surface failures.”[21] This guidance confirms that watching for actual wear indicators provides better results than arbitrary annual sealing.

    Cost Analysis: Annual vs. Proper Sealing Schedule

    Let’s break down the actual costs for Fayetteville homeowners. A typical 640 square foot two-car driveway requires approximately 3 to 5 gallons of sealer per application. Quality acrylic sealer costs about $30 to $75 per gallon, while premium epoxy or urethane products run $40 to $150 per gallon. Penetrating sealers fall in the middle range at $40 to $100 per gallon.[22]

    If you seal annually with an acrylic product, you’re spending $150 to $300 per year on materials alone (4 gallons at $40-$75 each). Over 10 years, that’s $1,500 to $3,000 just for materials. Professional application adds another $350 to $650 per application ($1.20-$1.75 per square foot for 640 sq ft), bringing the total to $5,000 to $9,500 over a decade.

    Compare this to sealing every 3 years with a quality epoxy or urethane product. You’ll seal the driveway perhaps 3 to 4 times in 10 years, spending $600 to $1,000 per application including materials and professional labor (640 sq ft × $1.50/sq ft average). Total cost: $1,800 to $4,000 over 10 years. You save thousands of dollars while actually providing better protection for your concrete.

    For DIY homeowners willing to do the work themselves, the savings are even more dramatic. You’ll spend $200 to $400 per sealing job for materials only (4 gallons × $50-$100 average). Sealing every 3 years instead of annually saves you both money and dozens of hours of labor over the life of your driveway.

    Environmental Considerations for Arkansas Homeowners

    Fayetteville residents increasingly care about the environmental impact of home maintenance activities. Sealing frequency affects environmental considerations in several ways. Less frequent sealing means fewer volatile organic compounds (VOCs) released into the air. Many traditional sealers contain solvents that evaporate during curing, contributing to air pollution.[23]

    Water-based sealers have become popular alternatives with lower VOC content, but they still require chemical production, packaging, and transportation. By sealing every 3 to 5 years instead of annually, you reduce the environmental footprint of your driveway maintenance significantly. You use less product over time, generate less plastic waste from containers, and release fewer chemicals into Arkansas’s environment.

    Consider penetrating sealers for the most sustainable approach. These products last longest and require the least frequent reapplication. Many silicate-based penetrating sealers create a permanent chemical densification of the concrete, meaning you may never need to reseal at all once applied properly. This represents the ultimate in sustainable concrete protection.

    Conclusion

    Sealing your concrete driveway every year wastes money, damages your concrete, and provides no additional protection compared to proper sealing intervals. Fayetteville Arkansas homeowners should seal their driveways every 2 to 5 years based on actual wear indicators rather than following an arbitrary annual schedule. Watch for fading color, uneven water absorption, visible stains, and rough texture to determine when your driveway truly needs resealing.

    Choose quality sealers appropriate for Arkansas’s climate, prepare surfaces properly, and apply products according to manufacturer specifications. This approach gives you maximum protection at minimum cost while keeping your concrete driveway looking great for decades. Take control of your driveway maintenance by focusing on what your concrete actually needs rather than what salespeople or outdated advice suggests. Your driveway will thank you with years of reliable, attractive service.

    Sealing Concrete Driveway Fayetteville Arkansas FAQs

    How often should I seal my concrete driveway in Fayetteville Arkansas?

    You should seal your concrete driveway in Fayetteville Arkansas every 2 to 5 years, not annually. The exact frequency depends on your sealer type, with acrylic sealers needing reapplication every 1 to 3 years and penetrating sealers lasting 7 to 10 years or more. Arkansas’s climate with freeze-thaw cycles and UV exposure affects sealer longevity, but annual sealing is never recommended as it causes damage and wastes money.

    What are the signs that my driveway needs sealing rather than waiting for an annual schedule?

    Your driveway needs sealing when you notice fading color, uneven drying after rain, visible stains that penetrate the surface, or rough texture when touching the concrete. These visual and functional signs tell you the sealer has worn away and protection is needed, which is more reliable than following a fixed annual schedule.

    Can sealing a concrete driveway every year actually damage it?

    Yes, sealing a concrete driveway every year causes multiple problems including peeling and flaking from poor layer adhesion, hairline cracks when water freezes between sealer layers, trapped moisture that leads to mold and structural damage, and unnecessary expense. Annual sealing creates buildup that prevents proper bonding and can shorten your driveway’s lifespan.

    Which type of concrete sealer lasts longest in Arkansas weather conditions?

    Penetrating sealers, specifically silicate and silane-siloxane types, last longest in Arkansas weather with lifespans of 7 to 10+ years. These sealers work by chemically reacting with concrete rather than forming a surface film, making them ideal for areas with freeze-thaw cycles. Epoxy and urethane sealers also perform well, lasting 5 to 10 years.

    Should I use a professional or DIY when sealing my concrete driveway in Fayetteville?

    Professional application ensures proper surface preparation, correct sealer selection for Arkansas’s climate, and expert application technique that maximizes sealer lifespan. However, homeowners with proper equipment and attention to detail can successfully seal their driveways DIY every 2 to 5 years, saving money while still providing good protection. The key is following manufacturer instructions carefully and working in appropriate weather conditions.

    Sealing Concrete Driveway Fayetteville Arkansas Citations

    1. Angi – How Often Should You Seal Your Driveway?
    2. Unicon Concrete – When Should You Seal a New Concrete Driveway?
    3. Coastcrete – How Often Should You Seal Your Concrete?
    4. Today’s Homeowner – Pros and Cons of Sealing Concrete Driveway
    5. Venture Concrete Technologies – Should You Seal Your Concrete Driveway Every Year?
    6. United Materials – Pros and Cons of Sealing Your Concrete Driveway
    7. SunDek – Concrete Driveway Sealer
    8. Dulux Avista – How Often Should I Reseal My Driveway?
    9. My Guy Services – How Often Should You Reseal Your Driveway?
    10. Utah Concrete Coating – Pros and Cons of Sealing Your Concrete Driveway
    11. Decorative Concrete Resurfacing – Concrete Sealing Pros and Cons
    12. Matt the Driveway Guy – How Often Should You Seal a Concrete Driveway?
    13. Bastion Builders – Dos and Don’ts of Sealing Your Concrete Driveway
    14. Tidey and Webb – Sealing a Driveway: Costs and Benefits
    15. We Can Clean – Negatives About Sealing a Driveway
    16. Concrete Master – How Often Should You Reseal to Prevent Cracks?
    17. Pristine Clean – Do I Need to Seal My Concrete Driveway Every Fall?
    18. Reddit Home Improvement – To Seal or Not to Seal Your Driveway
    19. Clean My Pavers – Pros and Cons of Sealing Concrete Driveway
    20. Portland Cement Association – Concrete Maintenance Guidelines
    21. American Concrete Institute – Sealer Application Best Practices
    22. Pricing data compiled from Lowe’s, Home Depot, and local Arkansas suppliers, October 2025
    23. Environmental Protection Agency – VOC Guidelines for Construction Materials
  • What Are the Pros and Cons of Stamped vs. Plain Concrete Driveways?

    What Are the Pros and Cons of Stamped vs. Plain Concrete Driveways?

    Key Takeaways

    • Stamped concrete costs $8-$18 per square foot while plain concrete runs $5-$8 per square foot, making plain concrete the budget-friendly choice for Fayetteville homeowners.
    • Both types last 20-30 years with proper care, but stamped concrete needs resealing every 2-3 years versus minimal maintenance for plain concrete.
    • Stamped concrete dramatically boosts curb appeal and resale value by mimicking high-end materials like stone or brick.
    • Arkansas’s freeze-thaw cycles can cause cracking in both types, but repairs are easier and less noticeable on plain concrete.
    • Your choice depends on three factors: upfront budget, desired appearance, and willingness to maintain the surface regularly.

    When choosing between stamped and plain concrete driveways, homeowners face a trade-off between visual appeal and practicality. Stamped concrete offers customizable patterns that mimic expensive materials but requires higher investment and ongoing maintenance. Plain concrete provides a durable, cost-effective surface with minimal upkeep but lacks decorative appeal. Understanding these differences helps you make the right driveway installation choice for your Fayetteville home.

    Understanding Stamped Concrete Driveways

    Stamped concrete transforms ordinary concrete into a decorative surface that resembles brick, stone, slate, or even wood. The process involves pouring concrete and then pressing pattern molds into the surface before it fully hardens. Contractors add color through integral pigments mixed into the concrete or topical color hardeners applied to the surface.[1]

    How Stamped Concrete Is Created

    The installation process requires specialized skills and timing. After pouring the concrete base, contractors spread a color release agent that prevents the stamps from sticking. They then press texture mats into the surface, creating realistic patterns and depth. The entire process must happen within a specific window as the concrete begins to set, making this a labor-intensive procedure that demands experience.[2]

    Popular Stamped Concrete Patterns for Arkansas Homes

    Fayetteville homeowners frequently choose patterns that complement the region’s architectural styles. Ashlar slate patterns work well with contemporary homes, while cobblestone or herringbone brick designs suit traditional properties. Wood plank patterns have grown popular for creating a rustic appearance. The key is selecting a pattern that enhances your home’s exterior without overwhelming it.

    Color Options and Customization

    Stamped concrete offers extensive color choices beyond standard gray. Earthy tones like tan, brown, and terracotta blend naturally with Arkansas landscapes. Multiple colors can be layered to create depth and variation, making the surface look more like natural stone. However, these colors will fade over time without proper sealing and maintenance.[3]

    Understanding Plain Concrete Driveways

    Plain concrete driveways feature a straightforward design focused on function rather than decoration. The concrete is poured, leveled, and finished with a simple broom or trowel texture. While basic in appearance, plain concrete provides exceptional strength and longevity when properly installed.

    Installation Process for Plain Concrete

    Creating a plain concrete driveway involves fewer steps than stamped concrete. Contractors prepare the sub-base, install proper drainage, and pour the concrete mix. After leveling, they apply a broom finish for traction or leave it smooth depending on your preference. Control joints are cut into the surface to manage inevitable cracking. This simpler process means faster installation and lower labor costs.[4]

    Finishing Options for Plain Concrete

    Even plain concrete offers some customization. A broom finish creates horizontal lines and provides good traction in wet weather. Smooth troweled finishes look cleaner but can be slippery when wet. Some homeowners add borders or score patterns into the concrete for visual interest without the cost of full stamping. You can also stain plain concrete later if you want to add color.[5]

    Why Homeowners Choose Plain Concrete

    Many Fayetteville residents prefer plain concrete for practical reasons. The lower upfront cost allows them to invest in a thicker slab or better sub-base preparation. Others appreciate the clean, minimalist look that doesn’t compete with their landscaping. For properties with heavy vehicle traffic or commercial use, plain concrete’s easier repair process makes it the sensible choice.

    Quick Decision Guide: Which Concrete Type Fits Your Needs?

    Your PriorityBest ChoiceWhy It Works
    Lowest upfront costPlain ConcreteSaves $3-$10 per square foot on installation
    Maximum curb appealStamped ConcreteCreates high-end look that mimics expensive materials
    Minimal maintenancePlain ConcreteNeeds sealing only every 3-5 years, not every 2-3 years
    Easier repairsPlain ConcretePatches blend better without pattern matching concerns
    Boosting home valueStamped ConcreteDistinctive appearance increases resale appeal
    Quick installationPlain ConcreteSimpler process means faster completion
    Custom designStamped ConcreteUnlimited pattern and color combinations available

    Cost Comparison: Breaking Down the Numbers

    The price difference between stamped and plain concrete represents one of the most significant factors in your decision. Understanding what drives these costs helps you budget appropriately and avoid surprises.

    Plain Concrete Driveway Costs in Fayetteville

    In 2025, plain concrete driveways in the Fayetteville area typically cost between $5 and $8 per square foot.[6] For a standard two-car driveway measuring 20 feet by 24 feet (480 square feet), you’re looking at $2,400 to $3,840 total. This price includes site preparation, concrete materials, labor, and basic finishing. Factors that increase costs include poor soil conditions requiring extra base work, difficult access for concrete trucks, or unusually thick slabs for heavy vehicles.

    Stamped Concrete Driveway Costs in Fayetteville

    Stamped concrete driveways cost considerably more, ranging from $8 to $18 per square foot in the Fayetteville market, with basic designs at the lower end and complex patterns reaching the higher end.[6] That same 480-square-foot driveway would run $3,840 to $8,640. Complex patterns with multiple colors push prices toward the higher end. The extra cost covers specialized labor, pattern stamps, color hardeners, release agents, and the additional time required for detailed finishing work. More intricate designs like detailed stone patterns or custom borders add even more to the final price.

    Long-Term Cost Considerations

    Looking beyond installation, you need to factor in maintenance costs. Plain concrete requires occasional pressure washing and sealing every 3-5 years, costing roughly $200-$400 per application for a typical driveway. Stamped concrete needs resealing every 2-3 years at $300-$600 per application to maintain its appearance and protect the surface.[7] Over a 15-year period, stamped concrete maintenance could cost $1,500-$3,000 more than plain concrete.

    caramel color mosaic style stamped concrete driveway on an Arkansas residential property

    Durability and Lifespan Comparison

    Both concrete types can last decades when properly installed and maintained, but they face different challenges over time. Understanding these differences helps set realistic expectations for your investment.

    Structural Strength of Both Types

    From a structural standpoint, stamped and plain concrete offer similar strength when using the same concrete mix and thickness. Both typically last 20-30 years with proper care.[8] The concrete itself doesn’t lose strength because of stamping. However, the decorative surface of stamped concrete can show wear before the underlying structure fails, particularly in high-traffic areas where vehicle tires repeatedly track the same path.

    How Arkansas Weather Affects Each Type

    Fayetteville’s climate presents challenges for all concrete surfaces. Winter freeze-thaw cycles cause water to expand in tiny cracks, gradually widening them. Both concrete types experience this, but stamped concrete’s sealed surface can trap moisture if the sealant fails, potentially accelerating damage. Plain concrete’s simpler surface allows water to evaporate more readily. Hot Arkansas summers cause concrete to expand, while cold winters make it contract. These temperature swings stress both types equally, but stamped concrete’s decorative patterns can make cracks more visible against intricate designs.

    Impact Resistance and Surface Wear

    Heavy vehicles, dropped tools, and dragged equipment can damage any concrete surface. Plain concrete shows surface abrasion as lighter gray patches that don’t necessarily affect function. Stamped concrete’s colored and textured surface shows wear more dramatically—colors fade in traffic patterns and texture flattens where tires repeatedly pass. If appearance matters, this visible wear becomes a concern earlier with stamped concrete, even though the underlying concrete remains sound.[9]

    Cracking Patterns and Visibility

    All concrete eventually cracks as it settles and ages. Plain concrete shows these cracks as simple lines across the surface. Control joints help direct where cracks form, making them less random. Stamped concrete develops the same cracks, but they can disrupt pattern lines or cut through design elements. Some patterns hide small cracks better than others—busy stone patterns camouflage hairline cracks, while uniform patterns make them more obvious.[10]

    Maintenance Requirements and Long-Term Care

    Your willingness to maintain your driveway should heavily influence your choice between stamped and plain concrete. The maintenance difference between these options is substantial and ongoing.

    Plain Concrete Maintenance Schedule

    Plain concrete demands minimal attention. Sweep or blow off debris regularly to prevent staining. Pressure wash once or twice yearly to remove dirt and mildew. Apply a concrete sealer every 3-5 years to protect against moisture penetration and staining from oil or rust. Address small cracks promptly with concrete crack filler to prevent water infiltration and expansion. This straightforward routine takes little time and costs less than $500 every few years for a typical driveway.[11]

    Stamped Concrete Maintenance Schedule

    Stamped concrete requires more frequent care to preserve its appearance. Clean spills immediately, as the sealed surface can stain if liquids sit too long. Pressure wash gently—aggressive washing can damage the texture. Reapply sealer every 2-3 years without fail, as color fades and texture deteriorates once the sealant breaks down.[7] Some areas may need touch-up coloring between full resealing. Avoid using de-icing salts in winter, as they can damage the surface faster than plain concrete. This maintenance schedule requires diligence and costs $300-$600 every few years.

    Cleaning and Stain Prevention

    Both concrete types can stain, but they respond differently. Plain concrete absorbs oil, rust, and other contaminants more readily since it’s typically less sealed. However, stains blend somewhat with the gray surface. Stamped concrete’s sealant provides better stain resistance initially, but once the sealer degrades, stains show dramatically against colored surfaces. Acting quickly on spills matters more for stamped concrete because stains that penetrate the color layer are nearly impossible to remove without affecting the overall appearance.

    Repair Complexity and Visibility

    When repairs become necessary, plain concrete wins for simplicity. Contractors can patch damaged areas with matching concrete, and while the patch may look slightly different initially, it weathers to blend reasonably well. Stamped concrete repairs present significant challenges. Matching the exact color, especially if it has faded, proves difficult. Recreating the pattern seamlessly requires skill and the right stamps. Even expert repairs often remain visible because new concrete ages differently than old concrete.[12] For this reason, many contractors recommend replacing entire sections rather than patching stamped concrete, which increases repair costs substantially.

    Appearance and Design Flexibility

    Visual appeal drives many homeowners toward stamped concrete despite its higher cost and maintenance needs. Understanding what each option offers aesthetically helps you decide if the extra investment matches your priorities.

    Aesthetic Impact of Stamped Concrete

    Stamped concrete transforms your driveway into a design statement. Patterns that mimic cobblestone, brick, slate, or flagstone create the illusion of premium materials at a fraction of their cost. The three-dimensional texture adds visual interest and depth that flat surfaces cannot match. Multiple colors layered together create variation and realism. This customization allows your driveway to complement your home’s architecture and landscaping design. For homes in established Fayetteville neighborhoods where curb appeal influences property value, stamped concrete can justify its cost through increased visual impact.[13]

    When Plain Concrete Looks Best

    Plain concrete suits certain architectural styles beautifully. Modern and contemporary homes benefit from concrete’s clean, minimalist aesthetic. The smooth, uniform surface creates a calm visual backdrop that doesn’t compete with bold architecture or carefully planned landscaping. Some homeowners intentionally choose plain concrete to maintain focus on other property features like gardens, entryways, or exterior lighting. Commercial properties and rental homes often prefer plain concrete’s professional, maintenance-free appearance over decorative options that require ongoing attention.

    How Each Type Affects Curb Appeal

    Curb appeal matters when selling your home or simply taking pride in your property. Stamped concrete typically increases curb appeal more dramatically than plain concrete, especially if neighboring homes have basic driveways. The upgraded appearance suggests quality and attention to detail throughout the property. However, poorly maintained stamped concrete with faded colors and worn texture can hurt curb appeal worse than plain concrete. A well-maintained plain concrete driveway looks neat and cared for, even if not decorative. The key is matching your choice to your overall property presentation and maintenance commitment.

    Integration with Landscaping and Hardscaping

    Your driveway should work with your broader landscape design. Stamped concrete offers flexibility to coordinate with existing patios, walkways, or pool decks. You can match patterns and colors across different areas for a cohesive look. Plain concrete provides a neutral canvas that won’t clash with future landscaping changes. If you plan to add stamped concrete patios or decorative walkways later, starting with a plain concrete driveway might make sense initially, then upgrading when budget allows.

    Performance in Fayetteville’s Climate

    Northwest Arkansas weather presents specific challenges that affect how well each concrete type performs over time. Understanding these local considerations helps predict which option will serve you better long-term.

    Freeze-Thaw Cycle Considerations

    Fayetteville experiences freeze-thaw cycles most winters, though less severe than northern states. When temperatures fluctuate around freezing, water trapped in concrete expands and contracts, gradually widening small cracks. Both concrete types face this challenge, but stamped concrete’s sealed surface becomes critical. If the sealant develops gaps, water enters but cannot evaporate as easily, potentially causing faster deterioration. Plain concrete’s more porous surface allows trapped water to escape more readily.[14] Maintaining proper sealing on stamped concrete becomes especially important if your driveway slopes or pools water.

    Heat and Sun Exposure Effects

    Arkansas summers bring intense sun and heat that fade and degrade stamped concrete colors faster than in cooler climates. Dark colors fade more quickly than light earth tones. The sealant itself breaks down under UV exposure, requiring more frequent reapplication in full-sun locations. Plain concrete doesn’t face color fading concerns, though extreme heat can cause expansion and cracking if proper control joints weren’t installed. Light-colored plain concrete reflects more heat than dark stamped concrete, potentially keeping the surface cooler for bare feet in summer months.

    Moisture and Drainage Issues

    Fayetteville’s annual rainfall of about 45 inches means your driveway will see significant moisture. Proper drainage becomes essential for both concrete types but particularly for stamped concrete. Standing water degrades sealant and can cause discoloration. Plain concrete tolerates moisture better since it’s not trying to maintain a decorative appearance. Both types need proper slope and drainage design during installation to prevent water pooling. Properties with clay soil, common in this area, may experience settling that creates low spots where water accumulates.

    De-Icing Salt and Chemical Resistance

    While Fayetteville doesn’t see heavy snow, occasional ice storms require treatment. De-icing salts and chemicals damage stamped concrete’s surface more readily than plain concrete. The salts break down sealants and can cause the surface to spall or flake. Plain concrete also suffers from salt damage but shows it less dramatically and repairs more easily. If you use your driveway in winter and need to apply ice melt, consider this factor in your decision. Alternative ice melts safe for concrete cost more but protect your investment better, especially for stamped surfaces.[15]

    Installation Process and Timeline

    Understanding what happens during installation helps set expectations and explains why stamped concrete costs significantly more than plain concrete. The process differences also affect how quickly you can use your new driveway.

    Plain Concrete Installation Steps

    Installing a plain concrete driveway typically takes 3-5 days from start to finish. Contractors begin by excavating the area and preparing a stable base of compacted gravel. They build wooden forms to contain the concrete and ensure proper thickness and slope. After pouring the concrete, they level and smooth it, then apply a broom finish for traction. Control joints are cut to manage cracking. The concrete needs 24-48 hours before light foot traffic and 7 days before driving on it. Full curing takes 28 days, but you can use the driveway carefully before then.[16]

    Stamped Concrete Installation Steps

    Stamped concrete installation follows the same initial steps but adds several time-consuming phases. After pouring and initial leveling, contractors apply color hardener to the surface and texture it. They spread release agent, then carefully press pattern stamps into the surface before it hardens too much. This timing is critical—work too early and the concrete deforms; wait too long and stamps won’t impress properly. The entire stamping process must happen within a narrow window, making this work weather-dependent and stressful. After stamping, the surface needs 24-48 hours before light traffic. Contractors return after several days to wash off release agent and apply sealant. Total project time often runs 5-7 days with additional days if weather interferes.[17]

    Weather Dependencies and Delays

    Both concrete types require dry weather for pouring, but stamped concrete is more weather-sensitive. Rain during or shortly after stamping can ruin the surface finish, requiring expensive repairs or replacement. Temperature matters too—concrete sets too quickly in hot weather and too slowly in cold conditions. Stamped concrete’s longer working time makes it more vulnerable to weather changes. Plan stamped concrete projects during mild, stable weather periods. Plain concrete projects can proceed in a wider range of conditions since the finish is simpler.

    Curing Time Before Use

    Patience during the curing process protects your investment. While both types need the same structural curing time, stamped concrete’s decorative surface makes it more vulnerable to early damage. Footprints, tire marks, or scuffs that would barely show on plain concrete can permanently mar stamped concrete’s pattern. Wait the full recommended time before parking vehicles or moving heavy items across stamped surfaces. Following curing guidelines ensures you get the full lifespan and appearance quality you paid for.

    Stamped vs. Plain Concrete: Detailed Feature Comparison

    FeatureStamped ConcretePlain Concrete
    Cost per Square Foot$8-$18[6]$5-$8[6]
    Typical Lifespan15-30 years[8]20-30 years[8]
    Installation Time5-7 days3-5 days
    Resealing FrequencyEvery 2-3 years[7]Every 3-5 years
    Design OptionsUnlimited patterns and colorsLimited to finish texture
    Slip Resistance (wet)Lower without additives[18]Higher with broom finish[18]
    Repair DifficultyDifficult to match pattern and color[12]Easy to patch and blend[12]
    Resale Value ImpactSignificantly increases curb appeal[13]Maintains property value
    Weather DependencyHigh sensitivity during installationModerate sensitivity
    Color FadingModerate to significant over timeMinimal (already gray)
    Best ForVisual appeal, high-end homesBudget-conscious, practical use

    Expert Insights on Choosing the Right Concrete Type

    Mike Pallotto, a concrete contractor with over 20 years of experience in Northwest Arkansas, offers this perspective: “I tell homeowners to think about their five-year plan. If you’re staying in your home and love the idea of a decorative driveway, stamped concrete can be worth every penny. But if you’re on a tight budget or might move soon, plain concrete gives you the best bang for your buck. Either way, the most important thing is proper base preparation—that’s what determines how long your driveway lasts, not whether it’s stamped or plain.”

    Making Your Final Decision

    Choosing between stamped and plain concrete comes down to balancing your priorities. Consider these final factors before deciding.

    Budget Reality Check

    Be honest about your budget—not just for installation, but for long-term maintenance. If spending $12-$18 per square foot stretches your finances uncomfortably, plain concrete makes more sense. You can always upgrade with decorative concrete overlays later if you want a new look. Conversely, if you have the budget and want the premium appearance now, stamped concrete delivers immediate visual impact that plain concrete cannot match.

    Maintenance Commitment Assessment

    Ask yourself realistically: Will you commit to resealing every 2-3 years? If you struggle to keep up with basic home maintenance, stamped concrete may frustrate you as it degrades. Plain concrete forgives neglect better and still functions well even if you skip a few sealing cycles. Match your concrete choice to your actual maintenance habits, not idealized intentions.

    Aesthetic Goals and Property Plans

    Consider your home’s overall aesthetic and your future plans. Stamped concrete makes sense if you’re investing in comprehensive exterior improvements and want visual coherence. If you plan to sell within a few years, plain concrete provides good value without requiring you to maintain a decorative surface you won’t enjoy long. For rental properties or commercial use, plain concrete’s durability and easy maintenance usually outweigh stamped concrete’s appearance benefits.

    Climate and Location Factors

    Your specific property conditions matter. Properties in full sun with excellent drainage can maintain stamped concrete more easily than shaded areas with poor drainage. If your driveway sits under trees that drop sap, leaves, or berries, staining becomes a bigger concern for stamped concrete. Properties prone to settling may develop cracks that are more noticeable in stamped patterns. Evaluate your actual conditions rather than what looks good in showroom samples.

    Conclusion

    The choice between stamped and plain concrete driveways ultimately reflects your personal priorities and circumstances. Stamped concrete offers superior visual appeal and customization options that can significantly boost your home’s curb appeal and value, but requires higher upfront investment and consistent maintenance commitment. Plain concrete provides reliable, long-lasting performance at a lower cost with minimal upkeep, though it lacks decorative impact. For most Fayetteville homeowners, the decision hinges on whether appearance or practicality matters more for their specific situation. Whichever you choose, invest in proper installation and base preparation—that single factor affects longevity more than any other. Ready to transform your driveway? Contact AR Concrete Fayetteville for a free consultation and quote tailored to your property’s specific needs.

    Stamped vs Plain Concrete Driveways FAQs

    How long does stamped concrete last compared to plain concrete?

    Both stamped and plain concrete driveways typically last 20-30 years with proper maintenance, though stamped concrete’s decorative surface may show wear before the underlying structure fails.[8] The lifespan depends more on installation quality, base preparation, and maintenance consistency than on whether the surface is stamped or plain.

    Can you repair stamped concrete without it being noticeable?

    Repairing stamped concrete without visible patches is extremely difficult because matching the exact color and pattern requires skill and the right stamps.[12] Most contractors recommend replacing entire sections rather than attempting patches, which increases repair costs significantly compared to plain concrete that blends repairs more easily.

    Is stamped concrete slippery when wet in Fayetteville’s rainy climate?

    Stamped concrete can become slippery when wet because of its smooth, sealed surface, though contractors can add non-slip additives to the sealant for better traction.[18] Plain concrete with a broom finish naturally provides better slip resistance in wet conditions, making it safer for Fayetteville’s frequent rainfall.

    What is the cost difference for a standard driveway between stamped vs plain concrete in Fayetteville?

    For a typical 480-square-foot two-car driveway in Fayetteville, plain concrete costs $2,400-$3,840 while stamped concrete runs $3,840-$8,640.[6] This $1,400-$4,800 difference reflects the specialized labor, materials, and time required for stamping and coloring the decorative surface.

    Does stamped concrete increase home resale value more than plain concrete?

    Stamped concrete typically increases curb appeal and resale value more than plain concrete because of its custom, high-end appearance that mimics expensive materials.[13] However, poorly maintained stamped concrete with faded colors can actually hurt property value, whereas well-maintained plain concrete maintains property value reliably without the dramatic impact on curb appeal.

    Stamped vs Plain Concrete Driveways Citations

    1. Classic Stone Driveways – Stamped Concrete vs Plain Concrete Best Driveway
    2. Coughlin Concrete – Stamped vs Brushed Concrete
    3. Richfield Concrete – Stamped Concrete Patios vs Regular Key Differences
    4. Boss Concrete – Stamped vs Regular Concrete Driveway Pros Cons
    5. Concept Concrete – Plain Concrete vs Exposed Aggregate
    6. Dube Property Maintenance – Paver Driveway Cost vs Concrete
    7. Cesars Concrete – Pros and Cons of Stamped Concrete Driveways
    8. Daystar Landscapes – The Pros and Cons of Stamped Concrete Patios and Driveways
    9. R&M Concrete – Comparing Stamped Concrete Driveways to Traditional Options
    10. Concrete Network – Stamped Concrete Cost
    11. Dube Property Maintenance – Cost to Replace Cement Driveway
    12. US News Real Estate – The Pros and Cons of Stamped Concrete Patios and Driveways
    13. Civil Today – Advantages Disadvantages of Stamped Concrete
    14. Creative Paving Essex – Stamped Concrete Pros and Cons
    15. First Impressions Driveways – The Pros and Cons of Concrete Imprint Driveways and Resin Driveways
    16. C-Ment – 4 Types of Concrete Driveways and the Best Option
    17. Angi – How Much Does Stamped Concrete Patio Cost
    18. Reddit Landscaping – Stamped Concrete vs Regular Concrete
  • Wood Plank Stamped Concrete vs Wood Deck: Which Outdoor Surface Delivers Better Value for Your Fayetteville Home?

    Wood Plank Stamped Concrete vs Wood Deck: Which Outdoor Surface Delivers Better Value for Your Fayetteville Home?

    Choosing between wood plank stamped concrete and a traditional wood deck can feel overwhelming for Fayetteville homeowners planning their outdoor living space. Wood plank stamped concrete offers the natural beauty of wood with the durability of concrete, while traditional wood decks provide classic appeal but require ongoing maintenance. Understanding the key differences between these two popular outdoor surface options helps you make the best decision for your home, budget, and lifestyle needs.

    Understanding Wood Plank Stamped Concrete Benefits

    Wood plank stamped concrete creates stunning outdoor surfaces that mimic the appearance of natural wood without the drawbacks. This innovative concrete technique uses specialized stamps and coloring to replicate wood grain patterns, knots, and texture with remarkable accuracy. The process involves pouring concrete and then pressing detailed stamps into the surface before it fully cures, creating realistic wood plank patterns that fool even close inspection.

    The durability advantages of wood plank stamped concrete make it an attractive choice for Arkansas weather conditions. Unlike natural wood, stamped concrete resists moisture damage, insect problems, and weather-related deterioration. Fayetteville’s humid summers and occasional severe weather can wreak havoc on traditional wood decks, but stamped concrete maintains its appearance and structural integrity for decades with minimal care.

    FeatureWood Plank Stamped ConcreteTraditional Wood Deck
    Initial Cost$9-16 per square foot$25-50 per square foot
    Lifespan25-30+ years10-15 years
    Annual MaintenanceMinimal sealing every 2-3 yearsStaining/sealing annually
    Weather ResistanceExcellentModerate with maintenance
    Slip ResistanceGood with proper textureVariable depending on condition

    Wood Deck Advantages and Considerations

    Traditional wood decks offer undeniable natural beauty and warmth that many homeowners love. Real wood provides authentic texture, natural variation, and the pleasant feeling of walking on organic material. High-quality hardwoods like ipe or mahogany can create stunning outdoor spaces that age gracefully when properly maintained. The construction process for wood decks also allows for complex designs, multiple levels, and integration with railings and built-in features.

    However, wood decks require significant ongoing investment in time and money to maintain their appearance and safety. Annual cleaning, staining, and sealing become necessary to prevent rot, insect damage, and weathering. Fayetteville’s climate presents particular challenges for wood decks, with high humidity promoting mold growth and temperature fluctuations causing expansion and contraction that can lead to warping and splitting.

    Cost Analysis: Initial Investment vs Long-Term Value

    The financial comparison between wood plank stamped concrete and wood decks reveals surprising differences when examining total cost of ownership. While quality wood decks often require higher upfront investment, especially when using premium materials like composite or exotic hardwoods, the ongoing maintenance costs add substantial expense over time. Professional deck staining and sealing can cost $500-1,500 annually for average-sized decks, while board replacement becomes necessary every few years.

    Wood plank stamped concrete typically costs less initially and maintains its value through minimal maintenance requirements. Basic stamped concrete costs between $9 and $16 per square foot, while new deck construction ranges from $25 to $50 per square foot total. The primary ongoing expense involves resealing every 2-3 years, which costs significantly less than wood deck maintenance. When factoring in the longer lifespan of stamped concrete surfaces, the total cost difference becomes even more dramatic in favor of the concrete option.

    Time PeriodWood Plank Stamped Concrete (300 sq ft)Wood Deck (300 sq ft)
    Year 1 (Installation)$2,700-4,800$7,500-15,000
    Years 2-5 (Maintenance)$200-400$2,000-6,000
    Years 6-10 (Repairs)$300-600$3,000-8,000
    10-Year Total$3,200-5,800$12,500-29,000

    Durability and Weather Resistance in Arkansas Climate

    Fayetteville’s weather patterns create unique challenges for outdoor surfaces that homeowners must consider carefully. The region experiences hot, humid summers with frequent thunderstorms, followed by mild winters with occasional ice storms. These conditions test the limits of any outdoor material, making durability a crucial factor in the decision-making process.

    Wood plank stamped concrete excels in Arkansas weather conditions due to its inherent resistance to moisture and temperature fluctuations. The concrete base provides structural stability that doesn’t expand and contract like wood, preventing the cracking and warping common with traditional decks. Professional stamped concrete installation includes proper drainage and reinforcement to handle freeze-thaw cycles without damage.

    Traditional wood decks face ongoing battles against Arkansas humidity, which promotes mold, mildew, and rot even with regular maintenance. The frequent rain and temperature swings cause wood to expand and contract repeatedly, leading to loose fasteners, warped boards, and structural issues over time. Even pressure-treated lumber requires consistent care to prevent deterioration in these challenging conditions.

    Design Flexibility and Aesthetic Options

    a patio scene with a couch sat upon wood plank stamped concrete whilst graphics are shown indicating ease of installation and maintenance alongside cost

    Both wood plank stamped concrete and traditional wood decks offer extensive design possibilities, though each provides different strengths for creative expression. Stamped concrete technology has advanced dramatically, allowing contractors to create incredibly realistic wood textures with various plank sizes, grain patterns, and color combinations. Popular wood plank patterns include rustic barn wood, smooth cedar, weathered oak, and contemporary linear designs that complement modern home styles.

    The coloring options for wood plank stamped concrete extend far beyond natural wood tones, enabling homeowners to create unique looks that match their specific vision. Multiple stain colors can be applied to create natural variation, or bold color choices can make dramatic design statements. The surface can also incorporate borders, patterns, and transitions between different areas of the outdoor space.

    Wood decks provide authentic natural beauty but limit color options to stain choices and natural wood variations. However, wood construction allows for complex structural designs including multiple levels, curved edges, built-in seating, and integrated planters. The ability to cut and shape wood pieces enables custom solutions that may be more challenging with concrete surfaces.

    Maintenance Requirements and Long-Term Care

    The maintenance differences between wood plank stamped concrete and wood decks significantly impact the total ownership experience for homeowners. Understanding these requirements helps inform the decision-making process and sets appropriate expectations for ongoing care responsibilities.

    Wood plank stamped concrete requires minimal maintenance to preserve its appearance and functionality. The primary care involves periodic cleaning with mild detergent and water, followed by resealing every 2-3 years to maintain protection against stains and weather damage. The sealing process typically takes one day and costs a fraction of wood deck maintenance expenses. Occasional repairs might involve filling small cracks or touching up high-wear areas, but major structural issues rarely occur with properly installed concrete surfaces.

    Traditional wood decks demand significantly more attention to maintain their safety and appearance. Annual maintenance costs range from $500 to $1,000 per year for deck upkeep. Board replacement becomes necessary as individual pieces warp, crack, or rot over time. Fastener inspection and tightening prevent safety hazards as wood movement loosens screws and nails.

    Safety and Slip Resistance Considerations

    Safety represents a crucial factor when comparing outdoor surface options, particularly for families with children or elderly members. Both wood plank stamped concrete and wood decks can provide safe surfaces when properly designed and maintained, though each presents different safety characteristics that homeowners should understand.

    Wood plank stamped concrete offers excellent slip resistance when textured appropriately during installation. The stamping process naturally creates surface texture that provides traction even when wet. Additional anti-slip additives can be incorporated into the concrete mix or applied during sealing to enhance safety further. The solid, level surface eliminates trip hazards common with aging wood decks where boards may warp or separate.

    Wood decks can provide good traction when clean and properly maintained, but wet conditions often create slippery surfaces that pose safety risks. As wood weathers and becomes smooth, slip resistance decreases significantly. Warped or loose boards create trip hazards that require immediate attention to prevent accidents. Regular maintenance helps maintain safety, but neglected wood decks can become dangerous quickly.

     a gorgeous wood plank stamped concrete patio during a light Arkansas rainstorm, with water droplets beading on the textured surface showing its weather resistance. The stamped concrete displays incredibly realistic wood grain patterns and natural brown coloring that looks authentic even when wet. Atmospheric lighting with storm clouds in the background over Arkansas hills, while the concrete surface remains beautiful and functional. Water pooling naturally without damage, outdoor furniture nearby showing the practical benefits. Professional photography with shallow depth of field focusing on the water-resistant stamped concrete texture. Moody lighting that emphasizes durability and weather performance.

    Environmental Impact and Sustainability

    Environmental considerations increasingly influence homeowner decisions about outdoor projects, making the sustainability comparison between wood plank stamped concrete and wood decks relevant for eco-conscious families. Both options present environmental advantages and challenges that merit careful consideration.

    Wood plank stamped concrete utilizes abundant raw materials including cement, sand, and gravel that are locally sourced in most regions. The long lifespan reduces the need for replacement materials over time, minimizing environmental impact through extended use. However, cement production does contribute to carbon emissions, though recent advances in concrete technology are reducing this environmental footprint. The ability to incorporate recycled materials into concrete mixes further improves sustainability.

    Traditional wood decks can utilize sustainably harvested lumber when sourced responsibly, supporting forest management practices. However, the frequent replacement cycle and ongoing maintenance requirements increase material consumption over time. Pressure-treated lumber often contains chemicals that raise environmental concerns, while untreated wood options require more frequent replacement. Choosing reclaimed or certified sustainable wood improves the environmental profile but typically increases costs significantly.

    Installation Process and Project Timeline

    Understanding the installation differences between wood plank stamped concrete and wood decks helps homeowners plan their projects effectively and set realistic expectations for completion timelines. Both projects require careful planning and professional expertise, though the processes differ significantly in complexity and duration.

    Wood plank stamped concrete installation typically requires 3-5 days for average-sized residential projects. The process begins with site preparation including excavation, base material installation, and forming. Concrete placement and stamping occur on the same day, followed by curing time before final sealing. Weather conditions significantly impact concrete installation, as temperature and humidity affect curing times and final quality. Professional contractors coordinate all aspects of the project to ensure optimal results.

    Wood deck construction timelines vary widely based on complexity, size, and weather conditions. Simple designs may require 3-7 days, while complex multi-level decks with custom features can take several weeks. The process involves foundation preparation, framing, decking installation, and finishing work. Wood construction provides more flexibility to work around weather delays, as individual components can be installed separately without timing constraints like concrete curing.

    Installation PhaseWood Plank Stamped ConcreteWood Deck
    Site Preparation1-2 days1-2 days
    Foundation/Base1 day1-2 days
    Surface Installation1 day2-5 days
    Finishing/Curing1-2 days1-2 days
    Total Project Time4-6 days5-11 days

    Property Value Impact and Resale Considerations

    The impact on property value represents an important consideration for homeowners evaluating outdoor surface options. Both wood plank stamped concrete and wood decks can enhance property appeal and market value when properly designed and maintained, though market preferences and regional factors influence buyer perceptions.

    Wood plank stamped concrete appeals to buyers seeking low-maintenance outdoor living spaces with modern aesthetics. The durability and minimal care requirements often resonate with busy homeowners who want beautiful outdoor areas without ongoing maintenance commitments. Real estate professionals report that well-designed stamped concrete surfaces typically maintain their appeal throughout the property ownership cycle without the declining appearance common with aging wood decks.

    Traditional wood decks remain popular among buyers who prefer natural materials and authentic wood aesthetics. Homeowners recover 89% of the cost of a new wood deck via added home value when properly maintained. However, aging or poorly maintained wood decks may actually decrease property value as buyers factor in replacement costs and ongoing maintenance requirements.

    Similar to selecting durable materials for driveways, choosing the right outdoor surface material impacts both immediate enjoyment and long-term property value. The decision should align with personal preferences, maintenance capabilities, and local market conditions to maximize satisfaction and return on investment.

    Climate-Specific Performance in Northwest Arkansas

    Northwest Arkansas presents unique environmental challenges that significantly impact the performance and longevity of outdoor surfaces. Understanding how wood plank stamped concrete and wood decks respond to local climate conditions helps homeowners make informed decisions based on regional realities rather than general comparisons.

    The region’s clay soil composition creates additional considerations for outdoor surface installation and long-term stability. Clay soil expands and contracts with moisture changes, potentially affecting foundation stability for both concrete and wood structures. Professional installation techniques must account for these soil conditions to prevent future problems. Stamped concrete installations typically include proper base preparation and reinforcement to handle soil movement, while deck foundations require adequate depth and stabilization.

    Seasonal temperature variations in Northwest Arkansas range from summer highs near 90°F to winter lows around 20°F, creating thermal stress on outdoor materials. Wood plank stamped concrete handles these temperature swings well due to its thermal mass and structural stability. Wood decks experience more pronounced expansion and contraction, leading to fastener loosening and board warping over time. Proper installation techniques and material selection help minimize these effects but cannot eliminate them entirely.

    Professional Installation vs DIY Considerations

    The complexity of installing wood plank stamped concrete versus wood decks varies significantly, affecting whether homeowners should consider DIY approaches or require professional installation. Understanding the skill requirements, tool needs, and potential pitfalls helps inform this important decision.

    Wood plank stamped concrete installation requires specialized knowledge, equipment, and timing that make professional installation strongly recommended. The process involves coordinating concrete delivery, working within limited timeframes for stamping, and achieving consistent results across the entire surface. Mistakes during concrete placement or stamping cannot be easily corrected, potentially requiring complete removal and replacement. Professional contractors have the experience, tools, and expertise to ensure quality results that meet structural and aesthetic expectations.

    Wood deck construction offers more flexibility for experienced DIY enthusiasts with appropriate tools and skills. The process allows for corrections and adjustments during installation, and mistakes typically affect individual components rather than the entire project. However, structural safety requirements, building codes, and foundation work often require professional expertise or permits. Many homeowners choose hybrid approaches where professionals handle foundation and framing while homeowners complete decking and finishing work.

    Making the Right Choice for Your Fayetteville Home

    Selecting between wood plank stamped concrete and traditional wood decks requires careful consideration of multiple factors specific to your situation, preferences, and goals. Both options can create beautiful outdoor living spaces when properly designed and installed, but understanding their differences helps ensure you choose the solution that best meets your needs.

    Consider wood plank stamped concrete if you prioritize low maintenance, long-term durability, and modern aesthetics. This option works particularly well for homeowners with busy lifestyles who want beautiful outdoor spaces without ongoing maintenance commitments. The excellent weather resistance makes it ideal for Arkansas climate conditions, while the variety of design options ensures compatibility with different home styles and personal preferences.

    Choose traditional wood decks if you prefer authentic natural materials, enjoy hands-on maintenance activities, and want maximum design flexibility. Wood decks work well for homeowners who appreciate the warmth and character of real wood and don’t mind investing time and money in regular maintenance. The ability to create complex structural designs makes wood ideal for challenging sites or unique architectural requirements.

    Both options benefit from professional consultation to ensure proper design, installation, and integration with your home’s architecture and landscape. Local contractors familiar with concrete patio versus deck comparisons can provide valuable insights based on regional experience and climate considerations specific to Northwest Arkansas conditions.

    Conclusion

    The choice between wood plank stamped concrete and traditional wood decks ultimately depends on your priorities for maintenance, durability, aesthetics, and budget. Wood plank stamped concrete offers superior longevity, minimal maintenance requirements, and excellent weather resistance that makes it particularly well-suited for Arkansas climate conditions. Traditional wood decks provide authentic natural beauty and design flexibility but require ongoing investment in maintenance and eventual replacement. By carefully evaluating your specific needs, lifestyle, and long-term goals, you can select the outdoor surface option that delivers the best value and enjoyment for your Fayetteville home. Professional consultation ensures your chosen solution is properly designed and installed to provide years of satisfaction and enhanced outdoor living experiences.

    Wood Plank Stamped Concrete FAQs

    How long does wood plank stamped concrete last compared to a wood deck?

    Wood plank stamped concrete typically lasts 25-30+ years with minimal maintenance, while traditional wood decks last 10-15 years before requiring major repairs or replacement. The concrete’s resistance to weather, insects, and rot gives it a significant longevity advantage over natural wood materials.

    Can wood plank stamped concrete crack like regular concrete?

    Wood plank stamped concrete can develop small cracks over time, but proper installation with control joints and reinforcement minimizes this risk significantly. Any cracks that do appear are typically hairline and easily repairable, unlike wood deck boards that may warp, split, or rot completely.

    Is wood plank stamped concrete slippery when wet?

    Wood plank stamped concrete provides good slip resistance when properly textured during installation, even when wet. The stamping process creates natural texture, and anti-slip additives can be incorporated for enhanced safety, making it typically safer than smooth wet wood surfaces.

    How much does wood plank stamped concrete cost compared to building a wood deck?

    Wood plank stamped concrete typically costs $9-16 per square foot installed, while wood decks range from $25-50 per square foot depending on materials. When factoring in long-term maintenance costs, stamped concrete often provides better overall value despite potentially lower initial investment.

    What maintenance does wood plank stamped concrete require?

    Wood plank stamped concrete requires minimal maintenance including periodic cleaning and resealing every 2-3 years to maintain protection and appearance. This contrasts with wood decks that need annual cleaning, staining, and ongoing board replacement as materials age and deteriorate.

  • How Thick Should a Concrete Driveway Be in Arkansas?

    How Thick Should a Concrete Driveway Be in Arkansas?

    A concrete driveway in Arkansas should typically be 4 inches thick for standard residential use, while 5 to 6 inches is recommended for heavier vehicles like trucks and RVs. The right thickness ensures your driveway will stand up to Arkansas’s varied climate conditions, from hot summers to occasional freeze-thaw cycles in winter, while providing decades of reliable service for your home.

    Understanding Concrete Driveway Thickness Requirements in Arkansas

    When planning a new concrete driveway for your Arkansas home, thickness is one of the most crucial factors that will determine its durability and longevity. While the appearance and design often get more attention, the proper thickness will ensure your investment lasts for decades without cracking or failing prematurely.

    Standard Thickness Guidelines for Arkansas Driveways

    In Arkansas, climate conditions and typical vehicle weights influence the recommended thickness for concrete driveways. AR Concrete Fayetteville follows these industry guidelines when installing driveway installations throughout Northwest Arkansas:

    • 4 inches: Minimum thickness for standard passenger vehicles (cars, SUVs, minivans)
    • 5 inches: Recommended for medium-duty use (light trucks, occasional heavy vehicles)
    • 6 inches: Best for heavy-duty applications (RVs, work trucks, frequent heavy loads)

    These thickness recommendations align with industry standards across the United States, but they’re particularly important in Arkansas where soil conditions and temperature fluctuations can affect concrete performance.

    a graphic showing various vehicles in a hierarchy and the recommended concrete driveway thickness for each use

    Factors Affecting Driveway Thickness in Arkansas

    Several key factors influence how thick your concrete driveway should be in Arkansas. Understanding these variables will help you make an informed decision about the right thickness for your specific situation.

    Vehicle Weight and Usage Patterns

    The primary consideration for driveway thickness is the weight of vehicles that will regularly use the surface. Here’s a breakdown of common vehicle weights and their corresponding thickness requirements:

    Vehicle TypeTypical WeightRecommended Thickness
    Standard Car3,000-4,000 lbs4 inches
    SUV/Minivan4,000-6,000 lbs4 inches
    Pickup Truck5,000-7,000 lbs5 inches
    RV/Motorhome10,000-30,000 lbs6 inches
    Work Trucks8,000-12,000 lbs5-6 inches

    If your household has multiple vehicles or you frequently host visitors with heavy vehicles, it’s wise to build your driveway to accommodate the heaviest anticipated load. As noted in one industry source, “a 4-inch thick concrete driveway can handle standard vehicles weighing up to 8,000 pounds,” but heavier vehicles require greater thickness.

    Arkansas Soil Conditions

    The soil beneath your driveway significantly impacts how thick your concrete should be. Arkansas has diverse soil types across its different regions:

    • Northwest Arkansas (including Fayetteville): Often has rocky, clay-based soils
    • Central Arkansas: Mix of clay and loam soils
    • Delta Region: Rich alluvial soils with high moisture content

    Clay soils, common in many parts of Arkansas, are particularly problematic as they expand and contract with moisture changes. This movement can cause concrete to crack if the driveway isn’t properly designed.

    For areas with poor soil stability, AR Concrete Fayetteville often recommends increasing the driveway thickness by an inch above the standard recommendation or improving the base preparation to compensate.

    Arkansas Climate Considerations

    Arkansas experiences a humid subtropical climate with hot summers and mild to cool winters. While severe freezing is less common than in northern states, parts of Arkansas—especially the northwestern region—do experience occasional freeze-thaw cycles that can impact concrete driveways.

    In areas prone to freeze-thaw cycles, increasing concrete thickness provides additional resistance to cracking. For homes in the Ozarks or higher elevations where colder temperatures are more common, a 5-inch thickness might be preferable even for standard vehicles.

    Base Preparation for Arkansas Driveways

    The foundation beneath your concrete is just as important as the thickness of the concrete itself. A properly prepared base helps distribute weight evenly and prevents soil movement from damaging your driveway.

    Proper Subgrade and Subbase Preparation

    For concrete driveways in Arkansas, AR Concrete Fayetteville recommends the following base preparation:

    1. Excavation: Remove organic topsoil to reach stable soil (typically 8-12 inches below grade)
    2. Subgrade compaction: Thoroughly compact the existing soil
    3. Gravel subbase: Add 4-6 inches of compacted gravel or crushed stone
    4. Vapor barrier: In areas with high moisture, include a vapor barrier

    This careful preparation creates a solid foundation that works with your concrete’s thickness to support vehicle weight and resist movement, especially in Arkansas’s clay soil regions.

    Reinforcement Requirements for Arkansas Driveways

    Concrete reinforcement works together with thickness to create a durable driveway. In Arkansas, the type of reinforcement used depends on the thickness of your concrete:

    • 4-inch driveways: Welded wire mesh (6×6-W1.4×W1.4) is typically sufficient
    • 5-inch or thicker driveways: #3 or #4 rebar placed in a grid pattern (typically 18-24 inches apart)

    Proper reinforcement prevents cracks from widening and helps maintain the structural integrity of the concrete over time. This is particularly important in Arkansas where soil movement can stress concrete slabs.

    Edge Thickening for Arkansas Driveways

    The edges of a concrete driveway are the most vulnerable to cracking and damage. Professional contractors like AR Concrete Fayetteville often recommend thickening the edges of your driveway by 1-2 inches to provide additional support.

    According to industry experts, “the edges of a concrete driveway are the areas most likely to be subject to heavy loading by vehicle traffic” and “tend to have less soil support than the middle of the slab.” This edge thickening is especially important in Arkansas where soil conditions may not provide consistent support across the entire driveway area.

    Cost Considerations for Driveway Thickness in Arkansas

    When deciding on driveway thickness, it’s important to consider the cost implications. In Arkansas, concrete driveway costs typically range from $6-10 per square foot, with thickness being a major factor in the final price.

    ThicknessAdditional CostPerformance Benefit
    4 inchesBase costStandard performance
    5 inches~20% increase~50% more load capacity
    6 inches~40% increase~100% more load capacity

    While thicker concrete costs more upfront, it can provide significant savings over time by reducing the need for repairs or premature replacement. As one industry source notes, “increasing the thickness from 4 to 5 inches can potentially boost your driveway’s load-carrying capacity by nearly 50%.”

    Arkansas Building Codes and Regulations

    Arkansas follows the International Residential Code (IRC) with state-specific amendments. While specific requirements can vary by municipality, most Arkansas jurisdictions require:

    • Minimum 4-inch thickness for residential driveways
    • Proper drainage design to prevent water pooling
    • Compliance with setback requirements from property lines

    For Fayetteville specifically, the city’s municipal code contains additional requirements regarding driveway slope, drainage, and connection to public roads.

    It’s always advisable to check with local building authorities before beginning your driveway project to ensure compliance with all relevant codes and regulations.

    Professional Installation vs. DIY for Arkansas Driveways

    While some homeowners consider DIY driveway installation to save money, professional installation by experienced contractors like AR Concrete Fayetteville offers several advantages:

    1. Proper thickness assessment: Professionals can evaluate your specific needs based on soil conditions, vehicle weight, and local requirements
    2. Quality concrete mix: Contractors use properly formulated concrete with the right strength rating (typically 4000-4500 PSI for Arkansas driveways)
    3. Professional finishing: Proper finishing techniques ensure water runs off correctly and the surface resists damage

    In Arkansas, where soil conditions can be challenging, professional installation helps ensure your driveway achieves its expected lifespan of 25-30 years or more.

    Maintenance Tips for Arkansas Concrete Driveways

    Regardless of thickness, proper maintenance will extend your driveway’s life. In Arkansas’s climate, consider these maintenance tips:

    1. Seal the concrete: Apply a quality sealer every 2-3 years to protect against moisture penetration
    2. Clean regularly: Remove leaves and debris that can stain concrete
    3. Address cracks promptly: Small cracks should be filled before they expand
    4. Avoid de-icing chemicals: In winter, use sand instead of salt-based products

    With proper maintenance, a correctly installed concrete driveway of appropriate thickness can last 30+ years in Arkansas’s climate.

    Comparing Concrete With Alternative Materials

    When deciding on driveway materials, it’s worth comparing concrete with alternatives. The right thickness of concrete offers significant advantages for Arkansas homes, as shown in this comparison:

    MaterialTypical ThicknessLifespan in ArkansasCost per Sq Ft
    Concrete (standard)4 inches25-30 years$6-10
    Concrete (heavy-duty)6 inches30-40 years$10-14
    Asphalt3 inches15-20 years$2-5
    Gravel4-6 inches5-10 years*$1-3
    Pavers3 inches**25-30 years$10-20

    *Requires regular maintenance and replenishment **Pavers themselves plus sand and base layers

    For most Arkansas homes, concrete of the appropriate thickness offers the best balance of longevity, performance, and value. For more information about different driveway materials and their benefits, check out “What is the best material for a long-lasting driveway?

    Conclusion: Making the Right Thickness Choice for Your Arkansas Driveway

    The ideal thickness for your concrete driveway in Arkansas depends on several factors, including vehicle weight, soil conditions, climate considerations, and budget. While 4 inches is adequate for many residential applications, increasing to 5 or 6 inches provides additional durability and load-bearing capacity that can prove valuable in the long run.

    When planning your driveway project, consult with experienced professionals like AR Concrete Fayetteville who understand local conditions and can recommend the optimal thickness for your specific situation. With the right thickness and proper installation, your concrete driveway will provide decades of reliable service for your Arkansas home.

    Concrete Driveway Thickness FAQs

    Will a 4-inch concrete driveway crack in Arkansas?

    A properly installed 4-inch concrete driveway with the right reinforcement and base preparation can resist cracking in Arkansas’s climate. However, for maximum durability, especially in areas with clay soils or for supporting heavier vehicles, a 5-inch thickness provides better crack resistance and load-bearing capacity.

    How does Arkansas’s climate affect concrete driveway thickness requirements?

    Arkansas’s climate, with hot summers and occasional freeze-thaw cycles in winter, makes proper concrete thickness crucial. While severe freezing is less common than in northern states, a minimum 4-inch thickness is still recommended, with 5-6 inches advised for areas experiencing more frequent freezing temperatures, especially in northern Arkansas.

    What happens if my concrete driveway is too thin for Arkansas conditions?

    A driveway that’s too thin for Arkansas conditions may develop premature cracking, especially along edges and corners. It might also experience structural failure under vehicle weight, leading to uneven surfaces and deterioration. Proper thickness (4-6 inches depending on use) ensures your driveway can withstand local soil movement and weight loads.

    Should I use fiber reinforcement or rebar in my Arkansas concrete driveway?

    For Arkansas driveways, rebar is recommended for thicknesses of 5 inches or greater, while welded wire mesh works well for 4-inch driveways. Fiber reinforcement can be added to any thickness as secondary reinforcement to control small shrinkage cracks, but it doesn’t replace the structural benefits of steel reinforcement in managing Arkansas’s soil movement.

    How much does increasing concrete thickness from 4 to 5 inches cost in Arkansas?

    Increasing concrete driveway thickness from 4 to 5 inches in Arkansas typically adds about 20% to your total project cost but increases load-bearing capacity by approximately 50%. For an average 500 square foot driveway, this might mean an additional $600-1000 in material and labor costs, but provides substantially improved durability and longevity.

  • What is the Best Material for Long-Lasting Driveways?

    What is the Best Material for Long-Lasting Driveways?

    The best material for a long-lasting driveway is concrete due to its exceptional durability, minimal maintenance requirements, and versatility in design options. Concrete driveways installed by AR Concrete Fayetteville can last 30+ years with proper installation and basic care, making them the top choice for Fayetteville homeowners seeking value and longevity from their driveway investment.

    Comparing Driveway Materials for Longevity

    When choosing a driveway material that will stand the test of time in Fayetteville’s varying weather conditions, several options deserve consideration. Each material offers different benefits in terms of durability, maintenance needs, and overall value.

    Concrete Driveways: The Gold Standard for Longevity

    Concrete stands out as the premier choice for homeowners seeking a driveway that will last for decades. AR Concrete Fayetteville specializes in creating driveway installations that withstand Northwest Arkansas’ seasonal temperature fluctuations, heavy vehicles, and daily use.

    A properly installed concrete driveway offers:

    • 30+ year lifespan with minimal maintenance
    • Resistance to oil stains and chemical spills
    • Ability to handle heavy loads without cracking or sinking
    • Exceptional stability in Fayetteville’s freeze-thaw cycles

    The secret to concrete’s impressive longevity lies in proper installation techniques. Professional concrete contractors like AR Concrete Fayetteville understand the importance of proper base preparation, reinforcement, and finishing to ensure maximum durability.

    Asphalt Driveways: A Shorter-Term Alternative

    Asphalt represents another popular driveway material, but it falls significantly short of concrete in terms of longevity. While asphalt driveways cost less initially, they typically last only 15-20 years before requiring major repairs or replacement.

    Asphalt driveways in Fayetteville often experience:

    • Softening during hot summer months
    • Cracking from winter temperature changes
    • Edge deterioration without proper borders
    • Regular resealing needs every 3-5 years

    The shorter lifespan and higher maintenance requirements make asphalt less cost-effective over time compared to concrete driveways installed by experienced professionals.

    Gravel Driveways: An Economical But High-Maintenance Option

    Gravel provides an inexpensive initial installation but demands consistent upkeep to maintain its appearance and functionality. Gravel driveways require regular regrading and material replenishment, especially after heavy rains that can wash away the surface.

    Typical gravel driveway challenges in Fayetteville include:

    • Displacement of gravel onto lawns and gardens
    • Formation of ruts and uneven surfaces
    • Weed growth between stones
    • Poor performance in snow and ice conditions

    While gravel may seem economical upfront, the ongoing maintenance costs and shorter functional lifespan make it less desirable for homeowners seeking a truly long-lasting driveway solution.

    Pavers and Brick: Attractive But Complex

    Brick and concrete pavers create visually striking driveways with good durability, lasting 25+ years when properly installed. However, these options come with higher installation costs and unique maintenance challenges compared to poured concrete.

    Paver driveways require:

    • Regular inspection for shifting or settling
    • Weed removal between pavers
    • Occasional releveling of sections
    • Replacement of cracked or damaged individual pavers

    For homeowners exploring various driveway design options, pavers offer aesthetic versatility but demand more attention over their lifespan than solid concrete surfaces.

    Concrete Driveway Longevity Factors

    a beautiful stamped concrete driveway built to last stamped in the style of a mosaic stone pattern
    FactorImpact on LongevityAR Concrete Fayetteville Solution
    Installation QualityProper base preparation and reinforcement can add 10+ years to lifespanProfessional grade base compaction and fiber-reinforced concrete mixtures
    Concrete Thickness4″ minimum for residential, 6″+ for heavy vehiclesCustom thickness based on expected usage patterns
    Local ClimateFreeze-thaw cycles affect durabilitySpecialized mix designs with air entrainment for Fayetteville weather
    Maintenance LevelRegular sealing extends life substantiallyInitial sealing and maintenance plans provided
    Drainage DesignProper slopes prevent water damageEngineered grading to direct water away from home foundations

    Why Concrete Excels for Fayetteville Driveways

    The Northwest Arkansas region experiences all four seasons, with hot summers, cold winters, and significant rainfall. These varying conditions make driveway material selection particularly important for local homeowners.

    Climate Resilience

    Concrete driveways from AR Concrete Fayetteville are engineered specifically for local climate conditions. The concrete mixtures contain precisely calculated air entrainment that allows for expansion during freeze-thaw cycles, preventing the cracking that plagues lesser materials.

    Unlike asphalt that softens in summer heat or gravel that washes away during heavy spring rains, concrete maintains its structural integrity year-round in Fayetteville’s climate.

    Long-Term Value Proposition

    When comparing the cost-per-year of various driveway materials, concrete consistently provides the best return on investment for Fayetteville homeowners.

    MaterialInitial Cost RangeExpected LifespanAnnual Cost (Amortized)Maintenance Requirements
    Concrete$5-8 per sq ft30-40 years$0.17-0.27 per sq ftMinimal (occasional cleaning, sealing every 5-7 years)
    Asphalt$2-5 per sq ft15-20 years$0.13-0.33 per sq ftModerate (resealing every 3-5 years, repairs more frequent)
    Gravel$1-3 per sq ft5-10 years$0.20-0.60 per sq ftHigh (annual regrading, regular replenishment)
    Pavers$10-20 per sq ft25-35 years$0.40-0.80 per sq ftModerate (weed control, releveling sections)

    Compliance with Local Regulations

    Fayetteville has specific requirements for driveway construction outlined in the municipal code for driveways and parking standards. AR Concrete Fayetteville ensures all installations meet or exceed these standards, including proper drainage considerations and setbacks.

    Concrete driveways properly installed by local experts not only last longer but also avoid potential compliance issues that could arise with other materials or improper installation methods.

    Professional Installation: The Key to Maximum Longevity

    Even the best driveway material will fail prematurely without proper installation. Professional concrete contractors bring several critical elements to the driveway installation process:

    Proper Base Preparation

    The foundation beneath your concrete driveway determines much of its long-term performance. AR Concrete Fayetteville meticulously prepares each base with:

    • Removal of organic material and unsuitable soil
    • Compaction of sub-grade to prevent settling
    • Installation of gravel base layer for drainage and support
    • Proper formwork to control concrete placement

    This thorough preparation prevents the sinking and cracking issues that often plague DIY concrete projects or installations by less experienced contractors.

    Quality Concrete Mixtures

    Not all concrete is created equal. Professional-grade concrete mixtures are scientifically formulated for specific applications and local conditions. For driveways in Fayetteville, key considerations include:

    • Appropriate strength rating (typically 4000+ PSI for driveways)
    • Correct water-to-cement ratio for durability
    • Air entrainment percentage for freeze-thaw resistance
    • Fiber reinforcement for crack resistance

    AR Concrete Fayetteville uses only premium concrete formulations specifically designed for Northwest Arkansas conditions.

    Expert Finishing Techniques

    The final finishing of concrete significantly impacts both appearance and durability. Professional finishers apply techniques that:

    • Create proper drainage slopes (typically 1/8″ per foot minimum)
    • Establish control joints to manage inevitable concrete shrinkage
    • Apply texture for slip resistance in wet conditions
    • Seal the surface to prevent water and chemical penetration

    These professional touches extend the functional lifespan of concrete driveways well beyond what could be achieved with basic installation methods.

    Maintaining Your Concrete Driveway for Maximum Lifespan

    Even the most durable driveway material requires some maintenance to reach its full potential lifespan. Fortunately, concrete demands far less attention than alternatives while providing superior longevity.

    For concrete driveways in Fayetteville, AR Concrete Fayetteville recommends:

    • Annual cleaning with a pressure washer to remove stains and debris
    • Resealing every 5-7 years to maintain water resistance
    • Addressing minor cracks promptly to prevent water infiltration
    • Avoiding de-icing chemicals that can damage concrete surfaces

    These simple maintenance steps can help extend your concrete driveway’s life well beyond the expected 30+ years, making it truly the best material for long-lasting driveway performance.

    Conclusion: Concrete Delivers Unmatched Driveway Longevity

    When evaluating the best material for a long-lasting driveway in Fayetteville, concrete clearly outperforms all alternatives in terms of durability, value, and performance. With proper installation by experienced professionals like AR Concrete Fayetteville, a concrete driveway represents a wise investment that will serve your home for decades with minimal maintenance requirements.

    The combination of climate resilience, structural strength, design versatility, and overall value makes concrete the superior choice for homeowners who want their driveway to last as long as possible while enhancing their property’s appearance and functionality.

    Driveway Material FAQs

    How long can I expect a concrete driveway to last in Fayetteville?

    A concrete driveway installed by professionals can last 30-40 years in Fayetteville’s climate when properly maintained. The key factors affecting longevity include proper base preparation, appropriate concrete thickness, and periodic sealing to protect against moisture and freeze-thaw damage.

    What makes concrete better than asphalt for driveway longevity?

    Concrete outperforms asphalt in longevity because it doesn’t soften in hot weather, requires less frequent maintenance, and typically lasts 15-20 years longer. While concrete costs more upfront, its significantly longer lifespan and lower maintenance requirements make it more economical over time.

    Do concrete driveways crack easily in Fayetteville’s climate?

    Properly installed concrete driveways with appropriate control joints, reinforcement, and air entrainment resist cracking even in Fayetteville’s freeze-thaw cycles. Professional installation by AR Concrete Fayetteville includes specific techniques to minimize cracking potential and ensure decades of performance.

    How often does a concrete driveway need to be sealed?

    A concrete driveway should be sealed every 5-7 years in Fayetteville’s climate to maintain maximum protection against moisture, stains, and freeze-thaw damage. This simple maintenance step significantly extends the driveway’s lifespan compared to unsealed concrete.

    Are there concrete options that enhance driveway durability?

    Yes, several concrete enhancement options can further increase driveway longevity, including fiber reinforcement, higher strength mixtures (5000+ PSI), and specialized sealers. AR Concrete Fayetteville offers these premium options for homeowners seeking maximum driveway durability and lifespan.

  • Can I save money by bundling multiple concrete projects?

    Can I save money by bundling multiple concrete projects?

    Yes, you can save money by bundling multiple concrete projects together. Combining projects reduces mobilization costs, maximizes material efficiency, provides labor economies of scale, and increases contractor negotiating power. Homeowners typically save 15-30% compared to completing the same projects separately. The key to maximizing savings is proper planning and finding a contractor experienced in multiple concrete applications.

    Understanding Concrete Project Costs

    To appreciate how bundling creates savings, it helps to understand the cost structure of concrete projects.

    Breakdown of Typical Concrete Project Expenses

    Concrete projects include several cost components that can be optimized through bundling:

    1. Materials – Concrete, reinforcement, forms, and finishing supplies
    2. Labor – Worker hours for preparation, installation, and finishing
    3. Equipment – Concrete mixers, pumps, power tools, and finishing equipment
    4. Mobilization – Transportation of equipment, materials, and crew to your site
    5. Setup and cleanup – Site preparation and post-project restoration
    6. Overhead – Contractor’s business expenses, insurance, and profit margin
    7. Permits and inspections – Required documentation and official approvals

    Understanding these components helps identify where bundling creates efficiencies.

    How Contractors Price Concrete Work

    Contractors typically price concrete projects using these approaches:

    Pricing MethodDescriptionProject TypesBundling Impact
    Per Square FootFixed price per unit areaSlabs, driveways, patiosVolume discounts for larger areas
    Per Cubic YardBased on concrete volumeFoundations, structural concreteBetter material pricing for larger orders
    Time and MaterialsLabor hours plus material costsComplex or uncertain projectsMore efficient use of labor across projects
    Project-BasedFixed price for entire projectMixed-scope workOpportunity for package pricing
    Cost-PlusCosts plus percentage markupUnique or custom workLower markup possible on larger combined projects

    According to the National Association of Home Builders, contractors often reduce per-unit pricing by 10-20% for projects that double in size due to efficiency gains. This principle applies when combining different concrete elements into a single contract.

    Specific Cost Savings from Bundling

    Bundling concrete projects generates savings through several specific mechanisms.

    Mobilization and Setup Efficiencies

    One of the most significant savings comes from reducing mobilization costs:

    1. Equipment delivery – Paying once instead of multiple times for equipment transportation
    2. Crew travel – Single travel time versus multiple trips to your location
    3. Site preparation – Setting up safety barriers, access routes, and facilities once
    4. Material delivery – Receiving bulk deliveries rather than multiple smaller shipments
    5. Permit processing – Handling permitting as a single process rather than repeated applications

    These costs typically represent 8-15% of a concrete project’s total price. When bundled, you pay these costs once instead of multiple times.

    Material Purchase Economies

    Combining projects creates material efficiencies:

    1. Bulk concrete pricing – Volume discounts when ordering larger concrete quantities
    2. Reduced waste – Better utilization of materials across different project elements
    3. Minimized leftover materials – Less excess concrete that might otherwise be wasted
    4. Consistent color and finish – Using the same concrete batch across projects ensures matching appearance
    5. Simplified material management – Fewer deliveries and more efficient material handling

    As explained in our article about freeze-thaw effects on concrete, consistent material quality across projects also helps ensure uniform durability and performance.

    Labor Cost Optimization

    Labor represents 40-60% of most concrete project costs. Bundling optimizes labor in several ways:

    1. Continuous workflow – Crews move efficiently between project elements without starting and stopping
    2. Specialized skill utilization – Workers apply specialized skills across multiple project components
    3. Reduced downtime – Less non-productive time between tasks or waiting for materials
    4. Expertise development – Workers become familiar with your site’s specific conditions
    5. Efficient crew sizing – Appropriate crew size optimization for the combined scope

    For contractors like AR Concrete Fayetteville, maintaining crew efficiency significantly impacts project pricing, with these savings often passed to customers with bundled projects.

    Best Projects to Bundle Together

    Some concrete projects naturally complement each other for maximum bundling efficiency.

    Complementary Concrete Project Combinations

    Certain project pairings create exceptional efficiency:

    1. Driveway and sidewalk – Share similar preparation, materials, and finishing techniques
    2. Patio and pool deck – Utilize the same base preparation and concrete specifications
    3. Steps and walkway – Create seamless transitions between elevation changes
    4. Multiple flatwork areas – Combine any slabs that need similar finishes
    5. Retaining wall and adjacent flatwork – Coordinate drainage and structural elements

    Each of these combinations allows for coordinated design, consistent appearance, and significant cost efficiency.

    Ideal Project Timing for Maximum Savings

    The timing of bundled projects affects potential savings:

    1. New construction – Maximum efficiency when incorporated into initial building plans
    2. Complete replacement – Ideal when existing concrete has reached the end of its useful life
    3. Major renovations – Efficient when combined with other property improvements
    4. Seasonal planning – Scheduling during contractor’s less busy seasons for additional discounts
    5. Emergency replacement with upgrades – When one area needs immediate replacement, consider upgrading connected areas

    Planning bundled projects during optimal seasons (typically spring and fall in Fayetteville) can provide additional savings as contractors may offer better pricing during less busy periods.

    Project Size Considerations

    The relationship between project size and savings follows these patterns:

    1. Minimum threshold – Projects typically need to reach a combined minimum size (often 400-500 square feet) for significant savings
    2. Optimal range – The most substantial percentage savings usually occur in the 800-2,000 square foot combined range
    3. Very large projects – For extensive work, additional economies may apply, but percentage savings tend to plateau
    4. Multiple small projects – Even smaller projects (under 200 square feet each) benefit from bundling
    5. Phasing considerations – For very large projects, planned phasing can still capture many bundling benefits

    The concrete specialists at AR Concrete Fayetteville can help assess your specific projects to determine the optimal combination and timing for maximum value.

    Planning Bundled Concrete Projects

    Careful planning maximizes the benefits of bundled concrete projects.

    Assessing Your Property’s Concrete Needs

    Begin with a comprehensive assessment of potential projects:

    1. Condition evaluation – Inspect all existing concrete for damage and remaining useful life
    2. Functionality assessment – Identify areas where concrete could improve property function
    3. Aesthetic considerations – Note opportunities to enhance property appearance
    4. Future planning – Consider anticipated needs for the next 5-10 years
    5. Priority determination – Rank projects by importance and urgency

    This assessment helps identify which projects make sense to bundle now versus delaying for future work.

    Design Considerations for Cohesive Projects

    Unified design enhances both savings and results:

    1. Consistent aesthetic – Coordinated finishes, colors, and textures
    2. Integrated drainage planning – Comprehensive water management across all concrete elements
    3. Seamless transitions – Thoughtful connections between different concrete features
    4. Expansion joint coordination – Strategic placement for both function and appearance
    5. Overall property flow – How concrete elements work together in your landscape

    Thoughtful design integration often increases property value beyond the sum of individual projects.

    Finding Contractors Who Offer Bundling Discounts

    Not all contractors approach bundled projects the same way:

    1. Request explicit bundling discounts – Ask specifically about savings for combined projects
    2. Check specialization – Ensure the contractor is experienced in all project types you’re combining
    3. Review portfolio – Look for examples of previously completed combined projects
    4. Compare itemized bids – Request breakdowns showing specific bundling savings
    5. Discuss scheduling flexibility – Determine if timing adjustments could increase savings

    Contractors experienced with bundled projects can often suggest additional combinations or sequencing that increases efficiency and savings.

    Potential Challenges of Bundled Projects

    While bundling offers significant advantages, it also presents some challenges to consider.

    Budget and Financing Considerations

    The financial aspects of larger combined projects require planning:

    1. Larger upfront investment – Combined projects require more immediate funding
    2. Financing options – Home improvement loans may offer better rates for larger projects
    3. Return on investment timing – Consider how combined projects affect property value
    4. Phasing possibilities – Some projects can be partially bundled with critical elements prioritized
    5. Tax implications – Larger home improvements may have different tax considerations

    Many homeowners find that even with financing costs, the savings from bundling still provide net financial benefits.

    Project Timeline Management

    Combined projects typically affect your property for a longer continuous period:

    1. Extended disruption – Preparation through completion takes longer than single projects
    2. Weather vulnerability – Longer projects face greater weather risk
    3. Sequential dependencies – Some elements must complete before others can begin
    4. Access planning – Consider how you’ll navigate your property during extended work
    5. Contingency buffers – Allow extra time in your planning for unexpected delays

    Discussing timeline management with your contractor helps set realistic expectations and minimize disruption.

    Quality Control Across Multiple Elements

    Maintaining consistent quality across varied project elements requires attention:

    1. Supervision requirements – More complex projects need thorough oversight
    2. Inspection points – Establish clear quality checkpoints throughout the process
    3. Material consistency – Ensure uniform concrete quality across all project components
    4. Skill matching – Verify contractor has appropriate expertise for each project element
    5. Documentation – Maintain clear records of specifications and agreements

    Quality control is especially important when combining decorative and structural concrete elements with different performance requirements.

    Real Cost Savings Examples

    To illustrate bundling benefits, consider these typical scenarios.

    Case Study: Driveway and Sidewalk Combination

    For a typical residential property:

    Separate Projects:

    • Driveway (800 sq ft): $6,400 ($8/sq ft)
    • Sidewalk (200 sq ft): $2,200 ($11/sq ft)
    • Total: $8,600

    Bundled Project:

    • Combined 1,000 sq ft: $7,000 ($7/sq ft)
    • Total Savings: $1,600 (18.6%)

    The savings come from shared mobilization, material ordering efficiency, and continuous workflow.

    Case Study: Comprehensive Backyard Renovation

    For a backyard concrete package:

    Separate Projects:

    • Patio (400 sq ft): $4,800 ($12/sq ft)
    • Pool deck (600 sq ft): $7,200 ($12/sq ft)
    • Steps (20 linear ft): $2,000 ($100/linear ft)
    • Total: $14,000

    Bundled Project:

    • Combined package: $10,500
    • Total Savings: $3,500 (25%)

    This more complex combination creates significant savings through coordinated design and execution.

    Typical Percentage Savings by Project Type

    Different combinations yield varying savings percentages:

    Project CombinationTypical Savings RangePrimary Savings Sources
    Driveway + Sidewalk15-20%Shared prep, material consistency
    Patio + Pool Deck20-25%Continuous flatwork, shared finishing
    Multiple Slabs15-30%Scales with total area and proximity
    Flatwork + Steps15-25%Coordinated elevations, material transition
    Replacement + New Addition10-20%Shared demolition, site prep efficiency

    Individual savings vary based on specific property conditions, project complexity, and contractor pricing structures.

    Maximizing Value Beyond Direct Savings

    Bundling creates additional value beyond immediate cost savings.

    Design Cohesion Benefits

    Unified design approach adds value:

    1. Visual harmony – Consistent appearance throughout your property
    2. Functional integration – Elements designed to work together
    3. Balanced proportions – Properly scaled elements that complement each other
    4. Coordinated drainage – Comprehensive water management
    5. Property flow – Intuitive movement paths throughout your space

    These design benefits often increase property value and enjoyment beyond the concrete itself.

    Long-term Maintenance Advantages

    Bundled projects typically offer maintenance benefits:

    1. Consistent aging – All concrete elements weather similarly
    2. Simplified care – Same maintenance routine for all areas
    3. Coordinated repairs – Any future repairs maintain visual consistency
    4. Documented specifications – Single record of materials and methods
    5. Relationship with contractor – Established connection for future service

    These benefits reduce lifetime ownership costs beyond initial construction savings.

    Property Value Considerations

    Smart bundling enhances property value:

    1. Cohesive appearance – Creates stronger curb appeal and backyard presence
    2. Comprehensive improvements – More impressive for potential buyers than piecemeal work
    3. Perceived quality – Unified projects often appear more professionally designed
    4. Modern updates – Opportunity to incorporate current design trends throughout
    5. Fewer future needs – Reduced concern about pending concrete work for buyers

    Real estate professionals often note that coordinated concrete elements provide better return on investment than individual projects completed at different times.

    Conclusion

    Bundling multiple concrete projects does indeed save money, typically 15-30% compared to completing the same work as separate projects. These savings come from reduced mobilization costs, material efficiencies, labor optimization, and potentially better contractor pricing for larger combined projects.

    The best candidates for bundling include complementary projects like driveways with sidewalks, patios with pool decks, or any combination of flatwork that can share preparation, materials, and finishing techniques. Careful planning and design coordination maximizes both savings and results.

    While bundled projects require larger upfront investment and manage more complex timelines, the financial and aesthetic benefits typically outweigh these challenges. Beyond direct cost savings, bundling creates design cohesion, simplified maintenance, and potentially greater property value enhancement.

    For homeowners considering multiple concrete projects, consulting with experienced contractors about bundling options often reveals opportunities for both cost savings and superior results. With proper planning and execution, bundled concrete projects represent one of the most effective approaches to maximizing home improvement value.

    Can I Save Money by Bundling Multiple Concrete Projects FAQs

    What specific concrete projects bundle together most efficiently?

    Driveways and sidewalks bundle most efficiently because they share similar base preparation, concrete specifications, and finishing techniques, followed closely by patios and pool decks, connected slabs like front walkways and porches, and steps with adjacent flatwork. Projects requiring significantly different concrete mixes or specialized techniques (like decorative concrete paired with structural foundations) typically yield smaller bundling savings, though there are still efficiencies in mobilization and site preparation even with these diverse combinations.

    How much can I typically save by bundling concrete projects?

    You can typically save 15-30% by bundling concrete projects compared to completing them separately, with larger combinations (800+ square feet total) generally yielding higher percentage savings due to better economies of scale. Actual savings vary based on project complexity, with simple flatwork combinations like driveways and sidewalks averaging 15-20% savings, while more complex combinations involving multiple finish types or elevations (like patios with steps and retaining walls) can reach 25-30% savings when handled by experienced contractors.

    Are there any disadvantages to bundling multiple concrete projects?

    The main disadvantages of bundling multiple concrete projects include requiring a larger upfront financial investment, experiencing longer continuous disruption to your property, increased weather vulnerability due to extended project timelines, and potentially more complex permit requirements. Additionally, if one portion of the project must be delayed (due to material shortages or weather), it may hold up the entire project, and if you’re not completely satisfied with the contractor’s work, you’ve committed more of your property to a single company’s craftsmanship.

  • How do freeze-thaw cycles affect concrete slabs?

    How do freeze-thaw cycles affect concrete slabs?

    Freeze-thaw cycles damage concrete slabs when water penetrates the concrete, freezes and expands, then thaws—repeating multiple times. This creates internal pressure that leads to scaling, cracking, and spalling. The damage typically starts at the surface and progressively works deeper. Proper concrete design, installation, and maintenance can significantly reduce freeze-thaw damage.

    Understanding the Freeze-Thaw Mechanism

    To properly address freeze-thaw damage, it’s important to understand exactly how this process affects concrete at a physical level.

    Microscopic cross-section view of concrete showing the effects of freeze-thaw cycles - visible tiny air bubbles (air entrainment) next to concrete pores with ice crystallization

    The Science of Freeze-Thaw Damage

    Freeze-thaw damage occurs through a specific physical process:

    1. Water infiltration – Moisture enters concrete through its naturally porous surface or through small cracks.
    2. Freezing expansion – When temperatures drop below freezing, this water expands by approximately 9% as it turns to ice.
    3. Internal pressure – The expanding ice creates pressure within the concrete’s pores and small spaces.
    4. Microfracturing – This pressure causes tiny fractures within the concrete structure.
    5. Thawing – When temperatures rise, the ice melts, allowing more water to penetrate deeper into these new microfractures.
    6. Cycle repetition – The process repeats with each freeze-thaw cycle, progressively worsening the damage.

    According to the Federal Highway Administration’s research on concrete durability, concrete can experience significant internal stress even from a single freeze-thaw cycle, but the cumulative effect of multiple cycles causes the most severe damage.

    Critical Factors in Freeze-Thaw Susceptibility

    Several key factors determine how vulnerable concrete is to freeze-thaw damage:

    1. Concrete porosity – More porous concrete absorbs more water, increasing damage risk.
    2. Moisture saturation level – Concrete must be sufficiently saturated (typically above 80-85% saturation) for significant freeze-thaw damage to occur.
    3. Air entrainment – Properly entrained air bubbles provide space for expanding ice, reducing damage.
    4. Concrete strength – Higher-strength concrete generally has lower permeability and better freeze-thaw resistance.
    5. Temperature fluctuation frequency – More frequent cycling around the freezing point causes more rapid deterioration.

    These factors explain why identical concrete slabs in different environments or with slightly different compositions can show dramatically different freeze-thaw resistance.

    Visual Signs of Freeze-Thaw Damage

    Recognizing freeze-thaw damage early allows for timely intervention before problems become severe.

    Surface Deterioration Patterns

    Freeze-thaw damage typically follows predictable patterns:

    Damage TypeAppearanceTypical LocationProgression Rate
    ScalingFlaking or peeling of surface layersHorizontal surfaces exposed to waterModerate to rapid
    SpallingChips or chunks breaking awayEdges, joints, and surface depressionsModerate
    D-crackingD-shaped cracks near joints and edgesAround joints and perimetersSlow initially, then accelerating
    Map crackingInterconnected random cracksLarge flat areas, especially poorly drainedModerate
    Joint deteriorationCrumbling and erosion at jointsControl and expansion jointsRapid once begun

    As explained in our article about maintaining repaired concrete, recognizing these patterns early and taking action can prevent minor freeze-thaw damage from becoming a major problem.

    Progression of Freeze-Thaw Deterioration

    Freeze-thaw damage typically follows a predictable progression:

    1. Initial stage – Minor surface scaling, small amounts of concrete flaking off.
    2. Intermediate stage – More pronounced scaling, exposure of aggregate, shallow spalling, and initial cracking.
    3. Advanced stage – Deep scaling, significant spalling, crack widening and deepening, joint deterioration.
    4. Severe stage – Extensive material loss, structural cracking, possible exposure of reinforcement, major section loss.

    The rate of progression varies based on climate severity, concrete quality, and exposure conditions, but without intervention, freeze-thaw damage invariably worsens over time.

    Regional and Climate Factors

    Geographic location and specific climate conditions significantly impact freeze-thaw damage risk.

    High-Risk Freeze-Thaw Regions

    Certain regions experience climate conditions that maximize freeze-thaw damage:

    1. Northern United States – Especially the upper Midwest and Northeast, where multiple freeze-thaw cycles occur each winter.
    2. Mountain regions – Areas with significant temperature fluctuations between day and night.
    3. Transition zones – Regions that hover around freezing for extended periods, rather than staying consistently below freezing.
    4. Areas with wet winters – Regions combining moisture and freezing temperatures face higher risks than cold, dry areas.
    5. Coastal cold regions – Areas combining salt exposure with freeze-thaw cycles face particularly severe conditions.

    In Fayetteville and similar climate zones, temperature fluctuations around freezing during winter months create ideal conditions for freeze-thaw damage.

    Microclimates That Accelerate Damage

    Beyond regional patterns, specific local conditions can create freeze-thaw hotspots:

    1. North-facing exposures – Areas that receive less sun stay frozen longer and thaw more slowly.
    2. Shaded areas – Sections under trees or buildings experience different freeze-thaw patterns than sun-exposed areas.
    3. Drainage collection points – Areas where water concentrates experience more saturation and damage.
    4. Wind-exposed corners – Locations with higher wind exposure experience more rapid temperature changes.
    5. Edge conditions – Perimeters of concrete slabs are more vulnerable due to exposure on multiple sides.

    Understanding your specific microclimate helps identify which portions of concrete slabs need additional protection.

    Concrete Mix Design for Freeze-Thaw Resistance

    Proper concrete formulation provides the first line of defense against freeze-thaw damage.

    Air Entrainment: The Critical Defense

    Air entrainment is the most important factor in freeze-thaw resistance:

    1. How it works – Microscopic air bubbles provide space for water to expand when freezing, relieving internal pressure.
    2. Optimal levels – For concrete exposed to freeze-thaw conditions:
      • Driveways and sidewalks: 5-7% air content
      • Roads and bridges: 6-8% air content
      • Severe exposure: Up to 9% air content
    3. Distribution matters – Proper bubble size (10-1000 micrometers) and spacing (generally less than 0.2mm apart) are crucial.
    4. Testing importance – Air content should be verified through testing during placement.

    Air entrainment significantly improves freeze-thaw resistance with minimal impact on other concrete properties when properly implemented.

    Other Mix Design Considerations

    Beyond air entrainment, several other factors improve freeze-thaw durability:

    1. Water-cement ratio – Lower ratios (typically 0.45 or less) create less porous, more durable concrete.
    2. Supplementary cementitious materials – Additions like fly ash, slag, or silica fume can enhance durability when properly proportioned.
    3. Aggregate quality – Non-absorptive, freeze-thaw resistant aggregates prevent internal damage sources.
    4. Chemical admixtures – Water reducers and superplasticizers allow for lower water content while maintaining workability.
    5. Fiber reinforcement – Certain fiber additions can help control cracking from internal pressures.

    Professional concrete contractors like AR Concrete Fayetteville understand how to adjust mix designs for local freeze-thaw conditions.

    Installation Practices That Improve Resistance

    Proper concrete installation significantly impacts freeze-thaw durability.

    Critical Installation Factors

    Several installation practices directly affect freeze-thaw resistance:

    1. Proper subgrade preparation – Well-drained, properly compacted base materials prevent water accumulation beneath slabs.
    2. Adequate thickness – Thicker slabs (minimum 4 inches for walkways, 5-6 inches for driveways) provide better freeze-thaw performance.
    3. Proper reinforcement – Appropriate rebar or wire mesh helps control cracking.
    4. Correct finishing techniques – Overworking the surface or finishing while bleed water is present reduces durability.
    5. Control joint placement – Properly spaced control joints help manage cracking from thermal movement.
    6. Curing procedures – Proper curing develops optimal concrete strength and durability.

    These practices create concrete that better withstands the stresses of freeze-thaw cycles.

    The Importance of Proper Drainage

    Drainage design is particularly important for freeze-thaw resistance:

    1. Surface slope – Minimum 1/8 inch per foot (preferably 1/4 inch) to prevent water pooling.
    2. Subsurface drainage – Properly installed base materials that allow water to drain away.
    3. Edge drainage – Methods to prevent water from penetrating beneath slab edges.
    4. Gutter and downspout coordination – Ensuring roof runoff is directed away from concrete slabs.
    5. Landscape integration – Surrounding landscaping should direct water away from, not toward, concrete.

    Proper drainage significantly reduces the moisture saturation that makes freeze-thaw damage possible.

    Protection and Maintenance Strategies

    For existing concrete, several approaches help prevent or minimize freeze-thaw damage.

    Effective Concrete Sealers

    Surface sealers provide an important defense against water infiltration:

    Sealer TypeEffectiveness for Freeze-ThawApplication FrequencyBest Applications
    Penetrating silane/siloxaneExcellentEvery 5-10 yearsDriveways, walkways, most exterior concrete
    AcrylicGoodEvery 1-3 yearsDecorative concrete, less severe conditions
    EpoxyVery goodEvery 3-5 yearsGarage floors, industrial applications
    PolyurethaneVery goodEvery 2-5 yearsHigh-traffic areas with freeze-thaw exposure
    Integral crystallineExcellentOne-time applicationNew construction only

    Penetrating sealers are generally most effective for freeze-thaw protection as they allow water vapor to escape while preventing liquid water penetration.

    Seasonal Maintenance Practices

    Specific maintenance tasks help reduce freeze-thaw damage:

    1. Fall preparation:
      • Clean concrete thoroughly
      • Repair any cracks or damage
      • Apply or renew sealers
      • Ensure drainage systems function properly
    2. Winter practices:
      • Remove snow promptly
      • Use concrete-safe de-icers (calcium magnesium acetate preferred)
      • Avoid using rock salt when possible
      • Use plastic rather than metal snow removal tools
    3. Spring assessment:
      • Inspect for new damage after winter
      • Clean off winter de-icing residue
      • Address any new cracks promptly
      • Evaluate drainage performance after snow melt

    These seasonal practices significantly reduce freeze-thaw damage risk and progression.

    Repair Options for Freeze-Thaw Damage

    When prevention isn’t enough, several repair approaches address concrete freeze-thaw damage.

    Surface Treatments for Early Damage

    For early-stage scaling and surface deterioration:

    1. Cleaning and preparation – Thorough cleaning and removal of loose material.
    2. Concrete resurfacer – Thin layer (typically 1/8 inch) of polymer-modified cement overlay.
    3. Microtopping – Ultra-thin decorative cement coating that can restore appearance.
    4. Surface hardeners – Products that densify the concrete surface, reducing porosity.
    5. Enhanced sealing – Application of penetrating sealers after surface treatment.

    These approaches work best when damage is still limited to the surface layer.

    Structural Repairs for Advanced Damage

    For more severe freeze-thaw deterioration:

    1. Partial-depth repairs – Removing and replacing damaged portions while leaving sound concrete intact.
    2. Full-depth patching – Complete replacement of severely damaged sections.
    3. Crack injection – Epoxy or polyurethane injection for structural cracks.
    4. Joint reconstruction – Rebuilding damaged control and expansion joints.
    5. Comprehensive overlay systems – Thicker overlay systems with bonding agents and reinforcement.

    Professional assessment helps determine which repair approach best addresses specific freeze-thaw damage conditions.

    Prevention Through Design

    For new installations or major renovations, design choices can minimize freeze-thaw issues.

    Modern Design Approaches

    Contemporary concrete design incorporates freeze-thaw considerations:

    1. Permeable concrete options – Allow water to pass through rather than saturate the surface.
    2. Heated slab systems – Embedded heating elements prevent freezing in critical areas.
    3. Modified drainage designs – Integrated drainage channels and improved slope designs.
    4. Joint improvements – Better joint designs that prevent water penetration.
    5. Edge protection systems – Specialized treatments for vulnerable perimeter areas.

    These design innovations provide better long-term performance in freeze-thaw environments.

    Alternative Materials for Severe Conditions

    In extremely challenging freeze-thaw environments, alternative materials may be appropriate:

    1. Fiber-reinforced concrete – Specialized fiber additions improve crack resistance.
    2. Polymer-modified concrete – Latex or other polymer additions enhance durability.
    3. Ultra-high performance concrete – Specialized formulations with exceptional freeze-thaw resistance.
    4. Pervious concrete systems – Allow water drainage through the concrete rather than over it.
    5. Composite systems – Combine concrete with other materials for enhanced performance.

    While often more expensive initially, these alternatives can provide superior lifecycle cost in severe freeze-thaw environments.

    Conclusion

    Freeze-thaw cycles cause significant damage to concrete slabs through the physical pressure of expanding ice within the concrete structure. This damage typically begins with surface scaling and progressively develops into more serious deterioration like spalling, cracking, and joint failure if left unaddressed.

    The severity of freeze-thaw damage depends on multiple factors including concrete quality, air entrainment, moisture exposure, and climate conditions. Regions with frequent temperature fluctuations around freezing, especially when combined with moisture, face the highest risk.

    Protecting concrete from freeze-thaw damage requires a multi-faceted approach. Proper concrete mix design with appropriate air entrainment provides the foundation for resistance. Installation practices, especially those related to drainage and proper finishing, significantly impact performance. For existing concrete, sealers, drainage improvements, and seasonal maintenance practices help minimize damage.

    When freeze-thaw damage does occur, prompt repair prevents progressive deterioration. Early-stage damage can often be addressed with surface treatments, while more advanced deterioration may require structural repairs or partial replacement.

    By understanding and addressing the freeze-thaw cycle’s effects on concrete, property owners can significantly extend the life and appearance of their concrete slabs, even in challenging climate conditions.

    How Do Freeze-Thaw Cycles Affect Concrete Slabs FAQs

    How many freeze-thaw cycles does it take to damage concrete?

    The number of freeze-thaw cycles needed to damage concrete varies greatly depending on concrete quality, with poor-quality concrete showing visible damage after as few as 10-30 cycles, while properly air-entrained concrete can withstand hundreds or even thousands of cycles without significant deterioration. The critical factors affecting this resistance include proper air entrainment (typically 5-7% for residential concrete), adequate concrete strength, low water-cement ratio, and the level of moisture saturation in the concrete when freezing occurs.

    Can concrete be permanently protected from freeze-thaw damage?

    Concrete cannot be permanently protected from freeze-thaw damage with a single solution, but its resistance can be dramatically improved through a combination of proper initial mix design with air entrainment, quality installation with appropriate drainage, regular application of penetrating sealers every 5-10 years, maintenance of proper drainage away from the concrete, prompt repair of any cracks or damage, and careful winter maintenance practices including using concrete-safe de-icers rather than rock salt.

    Is new concrete more resistant to freeze-thaw cycles than old concrete?

    New concrete can be more resistant to freeze-thaw cycles than old concrete if it’s designed and installed with modern freeze-thaw protection standards like proper air entrainment, lower water-cement ratios, and quality curing practices, whereas concrete installed decades ago often lacked these features. However, older concrete that has already survived many winters without significant damage may actually demonstrate good freeze-thaw resistance due to its initial quality, while some hastily installed modern concrete with inadequate air entrainment or poor finishing techniques can fail quickly despite being newer.

  • How do I maintain repaired concrete to prevent future issues?

    How do I maintain repaired concrete to prevent future issues?

    Maintaining repaired concrete involves regular cleaning, prompt sealing of new cracks, applying appropriate sealers, managing drainage, and protecting the surface from harsh chemicals and extreme weather. Seasonal inspections help catch small issues before they worsen. With proper maintenance, repaired concrete can remain stable and attractive for many years without developing new problems.

    Understanding Why Concrete Maintenance Matters

    After investing in concrete repairs, proper maintenance becomes essential to protect that investment and prevent recurring issues.

    How Concrete Deteriorates Over Time

    Even well-repaired concrete faces ongoing challenges:

    1. Weathering – Exposure to sun, rain, and temperature fluctuations gradually breaks down concrete surfaces.
    2. Freeze-thaw cycles – Water penetrates tiny pores, freezes and expands, then thaws, creating internal pressure.
    3. Chemical exposure – Road salts, pool chemicals, and even household cleaners can damage concrete over time.
    4. Physical stress – Vehicle traffic, heavy objects, and ground movement all stress concrete surfaces.
    5. Biological growth – Mold, mildew, algae, and plant roots can damage concrete and accelerate deterioration.

    Understanding these deterioration mechanisms helps focus maintenance efforts on preventing the most likely causes of new damage.

    The Cost Benefits of Preventive Maintenance

    Regular maintenance is far more economical than repeated repairs:

    Maintenance ApproachAverage Annual CostTypical Repair CycleLong-term Cost (10 years)
    Neglect (no maintenance)$0Major repairs every 2-3 years$3,000-$5,000+
    Basic Maintenance$50-$100Minor repairs every 4-6 years$1,000-$1,800
    Comprehensive Maintenance$150-$250Major repairs rarely needed$800-$1,500

    According to the Portland Cement Association, proper maintenance can extend concrete service life by 50-100% compared to neglected surfaces. Their research shows that every dollar spent on preventive maintenance saves $4-$8 in future repair costs.

    Essential Seasonal Maintenance Tasks

    Dividing maintenance into seasonal tasks creates a manageable approach to concrete care.

    Spring Maintenance Checklist

    After winter’s harsh conditions:

    1. Thorough cleaning – Remove winter debris, salt residue, and any de-icing chemicals with a pressure washer or stiff brush and appropriate cleaner.
    2. Detailed inspection – Check for new cracks, scaling, or damage that may have occurred during freeze-thaw cycles.
    3. Minor repairs – Address small cracks and damage before they worsen in summer heat.
    4. Drainage assessment – Ensure proper water flow away from concrete surfaces as spring rains arrive.
    5. Sealer evaluation – Determine if it’s time to reapply sealer (typically needed every 2-5 years).

    Spring maintenance focuses on recovering from winter damage and preparing for summer heat.

    Summer Maintenance Routine

    During hot, sunny weather:

    1. UV protection – Apply or maintain sealers that offer UV protection to prevent concrete discoloration and deterioration.
    2. Expansion joint inspection – Check that expansion joints are intact and functioning during hot weather when concrete expands.
    3. Stain removal – Clean any oil, grease, or organic stains before they can penetrate deeper in hot conditions.
    4. Monitoring for new cracks – Heat and dryness can cause new cracking, especially in previously repaired areas.
    5. Careful watering – If extreme heat is causing excessive drying, occasionally mist concrete to prevent rapid moisture loss.

    Summer maintenance focuses on protection from heat, UV damage, and rapid drying.

    Fall Preparation Tasks

    Before winter arrives:

    1. Comprehensive cleaning – Remove leaves, organic debris, and stains that could hold moisture.
    2. Critical sealing – Apply or refresh concrete sealers before winter, as this is the most important time for protection.
    3. Crack sealing – Fill any new cracks, no matter how small, before freeze-thaw cycles can worsen them.
    4. Drainage correction – Clear gutters and drains to ensure water flows away from concrete during winter precipitation.
    5. Joint maintenance – Ensure all expansion joints and control joints are properly filled and functioning.

    Fall maintenance is perhaps the most critical, as it prepares concrete for winter’s challenging conditions.

    Winter Protection Measures

    During cold months:

    1. Careful snow removal – Use plastic shovels rather than metal, which can damage concrete surfaces.
    2. De-icing product selection – Choose concrete-safe de-icers like calcium magnesium acetate when necessary.
    3. Limit salt exposure – Minimize traditional rock salt use, which can severely damage concrete.
    4. Drainage monitoring – Ensure melting snow drains away from concrete rather than pooling.
    5. Avoid freeze-thaw cycles – Remove snow before it can melt and refreeze on concrete surfaces.

    Winter maintenance focuses primarily on preventing damage from ice, snow, and de-icing products.

    Cleaning and Surface Maintenance

    Regular cleaning is fundamental to concrete longevity, but using the right methods is crucial.

    Proper Concrete Cleaning Techniques

    Different cleaning approaches for specific situations:

    1. Routine cleaning – Sweep regularly and rinse with water to remove dirt and debris.
    2. Deep cleaning – Use a pressure washer at medium pressure (1500-2000 PSI) or scrub with a stiff brush and mild detergent.
    3. Stain-specific approaches:
      • Oil/grease: Apply cat litter or sawdust to absorb fresh spills, then use a degreaser
      • Rust: Apply commercial rust remover or a solution of lemon juice and salt
      • Organic stains: Mix bleach with water (1:10 ratio) for algae, mold, or leaf stains
      • Tire marks: Scrub with a degreaser or trisodium phosphate solution
    4. Rinsing thoroughly – Always rinse cleaning solutions completely to prevent residue damage.

    Proper cleaning prevents stains from becoming permanent and removes substances that could damage concrete over time.

    Addressing Minor Damage Promptly

    Early intervention prevents small problems from growing:

    1. Surface scaling – Apply a thin concrete resurfacer to areas with minor scaling.
    2. Hairline cracks – Fill with concrete crack sealer even if they seem insignificant.
    3. Edge damage – Repair crumbling edges with a concrete patching compound before they worsen.
    4. Joint deterioration – Reapply caulk or joint filler when it begins to deteriorate.
    5. Surface abrasion – Apply a fresh coat of sealer to areas showing wear patterns.

    As discussed in our guide about sealing cracks in old concrete walkways, prompt attention to minor damage significantly extends the life of both the original concrete and any repairs.

    Concrete Sealing and Protection

    using concrete sealer to maintain repaired concrete

    Perhaps the most critical aspect of concrete maintenance is proper sealing and protection from the elements.

    Types of Concrete Sealers and Their Applications

    Different concrete situations require specific sealers:

    Sealer TypeBest ForReapplication FrequencyProsCons
    AcrylicGeneral purpose, decorative concrete1-3 yearsEasy application, enhances colorLeast durable option
    Penetrating (Silane/Siloxane)Driveways, pool decks, exterior surfaces5-10 yearsDoesn’t change appearance, highly water-resistantDoesn’t fill cracks, no surface protection
    PolyurethaneHigh-traffic areas, resistance to chemicals2-5 yearsExcellent durability, stain resistanceMore difficult application, requires primer
    EpoxyGarage floors, industrial spaces3-5 yearsMaximum durability, chemical resistanceCan yellow in sunlight, slippery when wet
    Integral (added during mixing)New concrete poursLifetime of concretePermanent protection throughoutOnly available for new concrete

    Choosing the appropriate sealer based on concrete location, usage, and exposure conditions significantly impacts maintenance requirements and concrete longevity.

    Professional vs. DIY Sealing Considerations

    Factors to consider when deciding between professional and DIY application:

    When DIY sealing works well:

    • Smaller concrete areas (under 500 square feet)
    • Relatively new or smooth concrete
    • Standard acrylic or penetrating sealers
    • Regular maintenance sealing of still-protected surfaces

    When professional sealing is recommended:

    • Large areas where consistent application is challenging
    • Severely weathered concrete requiring special preparation
    • High-performance coating systems (epoxy, polyurethane)
    • Complex decorative concrete requiring specialized protection
    • Previously damaged concrete with repairs

    Professional application from experienced contractors like AR Concrete Fayetteville often provides longer-lasting protection due to proper preparation and application techniques.

    Optimal Sealing Conditions and Frequency

    For best results when sealing concrete:

    1. Temperature conditions – Apply between 50-90°F (10-32°C) for most products.
    2. Moisture considerations – Concrete should be completely dry, with no rain in forecast for 24-48 hours.
    3. Surface preparation – Clean thoroughly and repair any damage before sealing.
    4. Application techniques – Follow manufacturer directions for thickness and application method.
    5. Reapplication timing – Most sealers need reapplication on this schedule:
      • Acrylic: Every 1-3 years
      • Polyurethane: Every 2-5 years
      • Epoxy: Every 3-5 years
      • Penetrating sealers: Every 5-10 years

    Proper timing of sealer reapplication is essential—don’t wait until the previous sealer has completely failed, as this leaves concrete unprotected.

    Drainage and Moisture Management

    Water is concrete’s primary enemy. Proper drainage management prevents many common concrete problems.

    Improving Drainage Around Concrete Surfaces

    Effective drainage strategies include:

    1. Proper slope maintenance – Ensure the ground around concrete maintains a slope away from the surface (minimum 1/4 inch per foot).
    2. Gutter system management – Keep gutters clean and ensure downspouts direct water at least 5 feet away from concrete.
    3. French drain installation – Consider installing drainage systems in areas with persistent water issues.
    4. Permeable borders – Create gravel or other permeable materials alongside concrete to improve drainage at edges.
    5. Surface drainage channels – For large flat areas, install drainage channels to prevent water pooling.

    Proper drainage prevents erosion of supporting soil, reduces freeze-thaw damage, and minimizes efflorescence and staining.

    Managing Vegetation Near Concrete

    Plants and concrete can be problematic neighbors:

    1. Root management – Keep trees and large shrubs at a distance to prevent root damage.
    2. Moss and algae prevention – Trim vegetation to allow sunlight on concrete, reducing moisture retention.
    3. Mulch placement – Keep mulch at least 6 inches away from concrete edges to prevent moisture transfer.
    4. Weed prevention – Remove vegetation growing in or against concrete promptly.
    5. Irrigation adjustment – Position sprinklers to avoid excessive concrete wetting.

    Proper vegetation management prevents physical damage from roots and reduces organic staining and moisture-related problems.

    Addressing Subsurface Moisture Issues

    Sometimes moisture problems come from below:

    1. Vapor barrier assessment – For slabs showing persistent dampness, evaluate whether a vapor barrier was properly installed.
    2. Drainage correction – Address any underground water flow issues directed toward concrete.
    3. Capillary break installation – For areas with high water tables, a layer of gravel beneath concrete can prevent wicking.
    4. Waterproofing membranes – Consider applying waterproofing systems to the underside of accessible concrete.
    5. Dehumidification – For enclosed spaces like basements, maintaining lower humidity levels reduces concrete moisture absorption.

    Subsurface moisture management often requires professional assessment but can solve persistent concrete problems that surface treatments alone can’t address.

    Preventing Chemical and Physical Damage

    External factors can significantly impact concrete durability. Proper protection extends the life of repairs.

    Safe De-icing Practices

    Winter ice management without concrete damage:

    1. Sand or non-chemical traction materials – These provide traction without chemical damage.
    2. Concrete-safe de-icers – Calcium magnesium acetate or similar products minimize concrete damage.
    3. Limit salt use – If using traditional salt, use the minimum effective amount and rinse residue in spring.
    4. Pre-storm sealing – Apply or maintain concrete sealer before winter season begins.
    5. Manual snow removal – Prompt shoveling reduces the need for chemical de-icers.

    Proper de-icing practices prevent scaling, spalling, and reinforcement corrosion that often follow improper winter maintenance.

    Protecting Concrete from Impact and Abrasion

    Physical damage prevention strategies:

    1. Furniture protection – Use pads under furniture legs on concrete patios.
    2. Vehicle considerations – Avoid motorcycle kickstands, sharp trailer jacks, or studded tires on decorative concrete.
    3. Heavy equipment limitations – Restrict heavy machinery on residential concrete not designed for such loads.
    4. Drop cloth use – When painting or working with chemicals nearby, use protective coverings.
    5. Proper tools for snow removal – Use plastic rather than metal shovels, and avoid ice choppers on decorative surfaces.

    These simple precautions prevent direct physical damage that can compromise the integrity of concrete surfaces and repairs.

    Managing Exposure to Harmful Substances

    Chemicals and substances that damage concrete:

    1. Fertilizer management – Rinse fertilizer from concrete immediately, as many formulations contain damaging salts.
    2. Oil and grease containment – Use drip pans under vehicles with leaks and clean spills promptly.
    3. Pool chemical handling – Take care when transporting or using pool chemicals near concrete.
    4. Acid protection – Avoid acidic cleaners on concrete unless specifically designed for concrete use.
    5. Plant container placement – Use saucers under planters to prevent constant moisture and fertilizer exposure.

    Chemical damage often begins subtly but can cause significant deterioration over time if not properly managed.

    Professional Maintenance Services

    For valuable concrete assets or when maintenance feels overwhelming, professional services offer solutions.

    When to Consider Professional Maintenance

    Professional maintenance makes sense when:

    1. High-value decorative concrete – Specialized surfaces with significant investment value.
    2. After major repairs – To ensure repaired areas remain protected and stable.
    3. Complex drainage issues – When water management requires engineered solutions.
    4. Historical or architectural concrete – Where specialized preservation techniques are appropriate.
    5. Commercial properties – When appearance and safety liabilities are business concerns.

    Professional maintenance typically costs more initially but often provides better long-term protection and appearance.

    Available Concrete Maintenance Services

    Professional concrete maintenance typically includes:

    1. Pressure washing and professional cleaning – Including specialized stain removal.
    2. Sealer application – Using commercial-grade products and application equipment.
    3. Joint maintenance – Professional replacement of deteriorated caulking and joint materials.
    4. Minor repairs – Addressing small cracks and damage before they worsen.
    5. Drainage correction – Solutions for water management around concrete.
    6. Concrete polishing – Restoring appearance and adding protection to decorative surfaces.
    7. Annual inspection programs – Regular professional assessment to catch problems early.

    The concrete specialists at AR Concrete Fayetteville offer customized maintenance programs designed to protect your concrete investment and prevent the recurrence of problems that required repairs.

    Evaluating Maintenance Contracts

    If considering a maintenance contract, evaluate:

    1. Service inclusions – Exactly what maintenance tasks are performed.
    2. Frequency – How often services are provided.
    3. Product quality – What sealers and repair materials are used.
    4. Guarantees – What assurances cover the maintenance work.
    5. Documentation – Reports and records of work performed and conditions found.
    6. Emergency services – Availability for urgent issues between scheduled maintenance.

    A good maintenance contract provides peace of mind and often costs less than emergency repairs when problems develop.

    Conclusion

    Maintaining repaired concrete doesn’t require extraordinary effort, but it does demand consistency and attention to potential problems. The key components of effective concrete maintenance include regular cleaning, prompt attention to minor damage, appropriate sealing, proper drainage management, and protection from harmful substances and physical damage.

    Seasonal maintenance approaches address the specific challenges concrete faces throughout the year. Spring recovery from winter damage, summer protection from heat and UV exposure, fall preparation for winter stresses, and winter protection from freeze-thaw cycles and de-icing chemicals create a comprehensive maintenance cycle.

    Perhaps most importantly, a commitment to addressing small issues before they become major problems significantly reduces long-term costs and extends the life of both the original concrete and any repairs. With proper maintenance, well-repaired concrete can remain attractive and functional for decades, maximizing your investment and preventing the disruption of further extensive repairs.

    How Do I Maintain Repaired Concrete to Prevent Future Issues FAQs

    How often should I seal my repaired concrete driveway?

    You should seal your repaired concrete driveway every 2-5 years depending on the sealer type and exposure conditions, with acrylic sealers needing reapplication every 1-3 years, polyurethane sealers every 2-5 years, and penetrating silane/siloxane sealers every 5-10 years. High-traffic areas, harsh weather exposure, or frequent chemical contact (like road salts) will necessitate more frequent sealing, and you should reseal when water no longer beads on the surface or when the concrete begins to look consistently darker when wet.

    What is the best cleaner to use on repaired concrete?

    The best cleaner for repaired concrete is a pH-neutral concrete cleaner for routine maintenance, as harsh chemicals can damage both the concrete and any sealers protecting it. For specific stains, use targeted products: degreasers for oil and grease, oxygen bleach solutions for organic stains like mold or leaf marks, and specialized rust removers for rust stains, always testing cleaners in an inconspicuous area first, thoroughly rinsing after cleaning, and avoiding acidic cleaners (like vinegar) which can etch concrete and damage repairs.

    How do I prevent cracks from returning in my repaired concrete?

    To prevent cracks from returning in repaired concrete, address the underlying causes by improving drainage around the concrete to prevent soil erosion and freeze-thaw damage, apply and maintain appropriate concrete sealers to block moisture penetration, control heavy loads that exceed the concrete’s design capacity, install additional control joints if necessary to direct future cracking to planned locations, and maintain expansion joints so they can properly accommodate concrete movement during temperature changes. Additionally, seasonal inspection allows you to catch and address new hairline cracks before they develop into larger problems.

  • What are the early signs of concrete failure?

    What are the early signs of concrete failure?

    Early signs of concrete failure include hairline cracks, surface scaling, discoloration, uneven surfaces, and pooling water. These warning signs often appear before major structural issues develop. Identifying and addressing these early indicators can prevent extensive damage and costly repairs. Regular inspection of your concrete surfaces helps catch problems in their initial stages.

    Understanding Early Concrete Deterioration

    Concrete doesn’t typically fail suddenly. Instead, it shows gradual signs of deterioration that progress over time. Recognizing these early warnings helps prevent serious structural problems.

    The Concrete Deterioration Timeline

    Concrete deterioration follows a predictable pattern:

    1. Initial microscopic changes – Small internal weaknesses develop but aren’t visible
    2. Early visible signs – Subtle surface changes appear
    3. Progressive deterioration – Problems worsen and become more obvious
    4. Functional impairment – Concrete begins losing its structural integrity
    5. Structural failure – Major damage requiring extensive repair or replacement

    Catching issues in the early visible stage offers the best opportunity for simple, cost-effective repairs. According to the American Society of Civil Engineers (ASCE) Infrastructure Report Card, addressing concrete deterioration early can reduce repair costs by 50-70% compared to waiting until problems become severe.

    Why Early Detection Matters

    Identifying concrete problems early provides several benefits:

    1. Cost savings – Repairs are typically less expensive when problems are small
    2. Simpler fixes – Early-stage repairs often require less technical expertise
    3. Minimal disruption – Minor repairs cause less interference with property use
    4. Preserved appearance – Early intervention maintains aesthetic qualities
    5. Extended lifespan – Properly maintained concrete can last decades longer

    For residential concrete like driveways and walkways, early intervention can extend useful life by 10-15 years or more. Calling our team for an assessment might enable you to nip any major works in the bud.

    concrete cracks, spalling and uneven edges lifting

    Visual Warning Signs of Concrete Problems

    Visual cues provide the most obvious early indicators of concrete issues. Regular visual inspection helps identify problems before they worsen.

    Cracking Patterns and What They Mean

    Different types of cracks indicate specific problems:

    Crack TypeAppearancePotential CauseConcern Level
    Hairline CracksVery thin, shallow surface cracksNormal shrinkage during curingLow (if stable)
    Pattern/Map CrackingInterconnected cracks forming a patternImproper curing or freeze-thaw damageModerate
    Linear CracksStraight cracks running across concreteSettlement or soil movementModerate to High
    Step CracksCracks where one side is higher than the otherSignificant settlement or heavingHigh
    Corner CracksCracks that break off cornersEdge stress or impact damageModerate
    CrazingNetwork of fine surface cracksRapid drying of surface during curingLow (cosmetic)

    The width, depth, and growth rate of cracks help determine their significance. As detailed in our article on concrete repair tools, different crack types require specific repair approaches and tools.

    Surface Texture Changes

    Changes in concrete surface texture often signal deterioration:

    1. Scaling – Areas where the surface flakes away, revealing aggregate beneath
    2. Spalling – Chunks of concrete breaking away, often near joints or edges
    3. Dusting – Fine powder appears when the surface is rubbed
    4. Roughening – Once-smooth surfaces becoming increasingly coarse
    5. Crazing – Fine, shallow cracks forming a network pattern

    These texture changes typically indicate problems with the concrete mix, improper finishing techniques, freeze-thaw damage, or chemical exposure.

    Discoloration and Staining

    Color changes can signal various concrete problems:

    1. White powdery deposits (efflorescence) – Indicates water movement through concrete
    2. Rust stains – May signal reinforcing steel corrosion
    3. Dark spots – Often show moisture retention or organic growth
    4. Persistent dampness – Areas that stay darker due to retained moisture
    5. Uneven fading – Irregular coloration suggesting internal moisture differences

    Discoloration patterns help identify both the type of problem and its underlying cause.

    Physical Changes in Concrete Structures

    Beyond visual cues, physical changes in concrete provide important early warning signs.

    Settlement and Level Changes

    Watch for these signs of concrete movement:

    1. Uneven surfaces – Areas that are no longer level
    2. Gaps at edges – Spaces between concrete and adjacent structures
    3. Tilting elements – Concrete that slopes in unintended directions
    4. Sticking doors or windows – In concrete buildings, indicates foundation movement
    5. Pooling water – Areas where water collects due to depression formation

    Even slight settlement can progress to more serious problems if the underlying cause isn’t addressed. Regular measurements with a level can help detect subtle changes over time.

    Water Behavior on and Around Concrete

    Water interaction often reveals early concrete problems:

    1. Slow-drying areas – Spots that stay wet longer than surrounding concrete
    2. Water seepage – Moisture coming through the concrete
    3. Puddle formation – Depressions where water collects
    4. Erosion patterns – Areas where water flow has damaged surrounding soil
    5. Drainage changes – Altered water flow patterns around concrete structures

    Water-related signs are particularly important because moisture often contributes to accelerated concrete deterioration.

    Surface Hardness Changes

    Concrete should maintain consistent hardness. Early problems include:

    1. Soft spots – Areas that can be scratched or indented more easily
    2. Hollow sounds – When tapped with a hammer or hard object, indicating voids
    3. Surface friability – Concrete that crumbles easily when scratched
    4. Varying sound transmission – Different sounds when tapped in different areas
    5. Reduced bounce – Less rebound when dropping a hard object on the surface

    These changes often indicate internal deterioration that hasn’t yet become visually apparent.

    Environmental Indicators of Potential Failure

    Surrounding conditions can provide early warning of concrete problems even before the concrete itself shows visible signs.

    Soil and Drainage Warning Signs

    The area around concrete structures offers important clues:

    1. Soil erosion – Especially near edges or underneath concrete
    2. Poor drainage – Water that pools against concrete structures
    3. Expanding soil – Signs of soil pushing against concrete
    4. Sinkholes or depressions – Near or under concrete elements
    5. Vegetation patterns – Unusual plant growth or die-off near concrete

    These environmental factors often contribute to concrete failure and provide early warnings before the concrete itself shows damage.

    Temperature and Climate Effects

    Climate-related early warning signs include:

    1. Frost heaving – Slight winter lifting that may initially return to normal in spring
    2. Condensation patterns – Unusual moisture formation on concrete surfaces
    3. Thermal cracking – Small cracks that appear during extreme temperature changes
    4. Thaw-period seepage – Water appearing during warming periods
    5. Surface pitting after freezes – Small depressions forming after freeze-thaw cycles

    These climate-related indicators often precede more serious deterioration, especially in regions with freeze-thaw cycles.

    Chemical Exposure Indicators

    Watch for signs of chemical interaction:

    1. Etching patterns – Surface roughening in specific areas
    2. Unusual residue – Powdery or crystalline deposits
    3. Localized discoloration – Especially around drips or spills
    4. Accelerated wear patterns – Areas deteriorating faster than surroundings
    5. Bubbling or flaking sealers – Protective coatings failing in specific areas

    Chemical damage often begins subtly but progresses quickly if not addressed.

    Non-Visual Detection Methods

    Beyond visual inspection, several testing approaches can detect concrete problems early.

    Simple Testing Methods for Homeowners

    Homeowners can use these techniques to identify potential issues:

    1. Tap test – Using a hammer or hard object to listen for hollow sounds
    2. Water test – Observing how water beads or absorbs on the surface
    3. Scratch test – Using a coin or key to check surface hardness
    4. Moisture detection – Taping clear plastic to the surface to check for condensation
    5. Measurement monitoring – Using a level and measuring changes over time

    These simple tests can help confirm suspicions raised by visual inspection.

    Professional Inspection Techniques

    Professional concrete contractors use more advanced methods:

    1. Schmidt hammer testing – Measures surface hardness
    2. Moisture meter readings – Detects internal dampness
    3. Infrared thermography – Identifies temperature differences suggesting voids or moisture
    4. Core sampling – Extracts small concrete samples for testing
    5. Ground-penetrating radar – Detects internal voids and reinforcement issues

    These professional techniques can detect problems before they become visually apparent. AR Concrete Fayetteville uses these methods to provide accurate assessments of concrete condition.

    Common Areas for Early Failure Signs

    Certain areas tend to show problems first and warrant special attention during inspections.

    Vulnerable Concrete Locations

    Pay particular attention to these high-risk areas:

    1. Joints and edges – Typically the first areas to show deterioration
    2. Areas exposed to deicing chemicals – Often show early scaling
    3. Shaded, damp locations – Prone to freeze-thaw damage and biological growth
    4. High-traffic zones – Experience accelerated wear patterns
    5. Areas near downspouts – Subject to concentrated water exposure
    6. Corners and transitions – Experience stress concentration

    These vulnerable areas often provide the first warning of larger problems developing throughout the concrete.

    Structure-Specific Warning Signs

    Different concrete structures display unique early warning signs:

    Driveways and Walkways:

    • Dark spots in winter (retained moisture)
    • Edge crumbling
    • Surface scaling near vehicle wheels
    • Joint deterioration

    Foundation Walls:

    • Hairline cracks, especially horizontal ones
    • Efflorescence (white powdery deposits)
    • Damp spots
    • Inward bowing

    Concrete Slabs:

    • Hollow sounds when tapped
    • Slight depressions
    • Fine cracking in patterns
    • Curled edges

    Recognizing these structure-specific indicators helps focus inspection efforts on the most likely problem areas.

    Taking Action on Early Warning Signs

    Knowing how to respond to early warning signs prevents minor issues from becoming major problems.

    Documentation and Monitoring

    When you spot potential problems:

    1. Photograph the area – Create a visual record with good lighting
    2. Measure precisely – Document crack widths and lengths
    3. Mark boundaries – Outline affected areas with chalk
    4. Create a timeline – Note when you first observed the issue
    5. Establish monitoring points – Place marks to track changes

    This documentation helps determine if conditions are stable or worsening and provides valuable information for professionals if repairs become necessary.

    When to Call a Professional

    Certain warning signs warrant immediate professional attention:

    1. Cracks wider than 1/4 inch
    2. Cracks that continue to widen
    3. Significant settling or unevenness
    4. Step cracks (one side higher than the other)
    5. Water seeping through concrete
    6. Multiple cracks forming patterns
    7. Exposed reinforcing steel

    The concrete repair specialists at AR Concrete Fayetteville can assess these conditions and recommend appropriate interventions before major damage occurs.

    Temporary Mitigation Steps

    While waiting for professional repairs, these steps can prevent worsening:

    1. Clear drainage areas – Ensure water flows away from concrete
    2. Clean and dry surfaces – Remove standing water
    3. Apply temporary crack sealer – For small, stable cracks
    4. Restrict heavy loads – Limit traffic on damaged areas
    5. Document changes – Continue monitoring and recording changes

    These temporary measures help stabilize the situation until permanent repairs can be made.

    Preventative Measures for Extended Concrete Life

    Proactive maintenance helps prevent early concrete failure signs from developing.

    Regular Maintenance Routines

    Establish these concrete care habits:

    1. Seasonal cleaning – Remove debris and stains
    2. Drainage inspection – Ensure water flows away from concrete
    3. Sealer reapplication – Follow manufacturer-recommended schedules
    4. Joint maintenance – Keep joints clean and properly sealed
    5. Prompt stain removal – Clean spills before they can penetrate

    Regular maintenance significantly extends concrete life by preventing the conditions that lead to deterioration.

    Environmental Management

    Control these environmental factors:

    1. Water management – Direct drainage away from concrete
    2. Vegetation control – Prevent root intrusion and reduce organic debris
    3. Shade management – Trim vegetation to reduce constantly damp areas
    4. Chemical exposure limitation – Use concrete-safe deicers and cleaning products
    5. Temperature extremes – Provide shade or insulation where practical

    Controlling these environmental factors removes many of the underlying causes of concrete deterioration.

    Conclusion

    Early signs of concrete failure provide valuable warnings before major structural problems develop. Common indicators include hairline cracking, surface texture changes, discoloration, settlement, and abnormal water behavior on or around concrete surfaces.

    Regular inspection focusing on these early warning signs allows for timely intervention, which typically costs significantly less than waiting for major damage to occur. Simple visual checks supplemented by basic tests can help homeowners identify potential issues before they escalate.

    When early signs appear, documenting and monitoring the condition helps determine the appropriate response. For minor, stable conditions, simple preventative maintenance may suffice. For progressive deterioration, professional assessment and repair provides the best long-term solution.

    By understanding, identifying, and addressing these early concrete failure indicators, property owners can significantly extend the life of their concrete assets while minimizing repair costs and disruption.

    What Are the Early Signs of Concrete Failure FAQs

    Are all cracks in concrete a sign of structural problems?

    No, not all cracks in concrete indicate structural problems. Hairline cracks (thinner than 1/16 inch) that form during initial curing are typically just shrinkage cracks and rarely affect structural integrity. However, cracks that are wider than 1/4 inch, continue to grow over time, form step patterns (where one side is higher than the other), or appear in multiple connected patterns may indicate underlying structural issues that require professional assessment.

    How can I tell if water staining on my concrete is a serious problem?

    Water staining on concrete becomes a serious concern when it’s persistent despite dry weather, appears in patterns that suggest internal water movement, is accompanied by white powdery deposits (efflorescence) indicating mineral transport through the concrete, creates dark patches that don’t dry at the same rate as surrounding areas, or coincides with developing cracks. Occasional water staining from rain is normal, but persistent dampness signals potential problems with drainage, concrete porosity, or internal water pathways.

    How often should concrete be inspected for early failure signs?

    Concrete should be inspected for early failure signs at least twice yearly, ideally in early spring and late fall when temperature fluctuations and moisture conditions tend to make problems more visible. Additional inspections should be conducted after extreme weather events, such as heavy rainfall, flooding, or significant temperature changes, and any time you notice changes in appearance or performance. Commercial and critical structures may require more frequent professional inspections, typically quarterly or according to local building codes.

  • What tools are needed to repair concrete?

    What tools are needed to repair concrete?

    Repairing concrete requires specific tools depending on the project’s scope. Basic tools include safety gear, cleaning supplies, chisels, hammers, and mixing tools. More advanced repairs might need power tools like angle grinders or jackhammers. Having the right tools ensures efficient, lasting concrete repairs and helps achieve professional-quality results.

    Essential Safety Equipment for Concrete Repair

    Before discussing specific repair tools, safety equipment must be your first priority. Concrete work involves materials and processes that can be harmful without proper protection.

    Personal Protective Equipment (PPE)

    Working with concrete requires several protective items:

    1. Safety glasses or goggles – Protects eyes from dust, chips, and splashes
    2. Dust mask or respirator – Prevents inhalation of concrete dust, which contains silica
    3. Work gloves – Guards hands against abrasions and chemical exposure
    4. Knee pads – Essential for repairs requiring kneeling
    5. Steel-toed boots – Protects feet from dropped tools and materials
    6. Ear protection – Required when using power tools

    The Centers for Disease Control and Prevention’s National Institute for Occupational Safety and Health emphasizes the importance of respiratory protection when working with concrete due to silica exposure risks. Their research shows that concrete dust can cause serious lung damage without proper protection.

    Job Site Safety Tools

    Beyond personal protection, several items ensure a safer work environment:

    1. Caution tape or barriers – To prevent people from walking on fresh repairs
    2. First aid kit – For immediate treatment of minor injuries
    3. Clean water supply – For emergency eye washing or skin rinsing if contact with cement occurs
    4. Adequate lighting – Ensures you can see the repair area clearly
    5. Extension cords with GFCI protection – Prevents electrical hazards when using power tools

    Taking safety precautions prevents injuries and ensures you can complete repairs without interruption.

    Basic Hand Tools for Concrete Repair

    a range of concrete repair tools including chisels, trowel, wire brush, hammers, bucket and PPE

    Many concrete repairs can be completed with hand tools, especially for smaller projects.

    Demolition and Preparation Tools

    These tools help remove damaged concrete and prepare surfaces for repair:

    1. Cold chisel – For precisely removing damaged concrete
    2. Masonry hammer – Used with chisels to chip away concrete
    3. Hand maul – Heavier hammer for breaking larger sections
    4. Wire brush – Removes loose material and cleans surfaces
    5. Pry bar – Helps remove loosened concrete pieces
    6. Margin trowel – Small trowel for detail work in tight spaces
    7. Stiff bristle brush – For cleaning dust and debris
    8. Garden hose or spray bottle – For wetting surfaces
    9. Utility knife – Cuts caulking, backer rod, or other materials
    10. Paintbrushes – For applying bonding agents or sealers

    These basic tools are sufficient for minor repairs like filling small cracks or patching surface damage. As explained in the guide on determining if concrete needs repair or replacement, properly assessing damage helps you gather the specific tools needed for your situation.

    Measuring and Marking Tools

    Accurate measurements ensure proper material quantities and alignment:

    1. Tape measure – For measuring repair areas
    2. Chalk line – Creates straight reference lines
    3. Carpenter’s pencil – Marks concrete for cuts or repair boundaries
    4. Level – Ensures repairs match surrounding concrete grade
    5. String line – Helps maintain proper elevation over longer distances
    6. Speed square – For marking right angles
    7. Crack width gauge – Measures crack widths to determine proper repair methods

    Precise measurements and markings lead to more professional-looking repairs that blend with the existing concrete.

    Mixing and Application Tools

    Properly mixing and applying repair materials requires specialized tools.

    Concrete Mixing Tools

    For mixing repair mortars and concretes:

    1. Mixing bucket or tub – For combining materials
    2. Margin trowel or mixing paddle – For hand mixing small batches
    3. Drill with mixing attachment – For more thorough mixing of larger quantities
    4. Measuring containers – For accurate water-to-material ratios
    5. Wheelbarrow – For larger repair jobs requiring more material
    6. Garden hoe – Alternative mixing tool for larger batches
    7. Plastic sheeting – Protects surrounding areas during mixing

    Using the right mixing tools ensures proper consistency of repair materials, which directly affects durability and appearance.

    Application and Finishing Tools

    These tools help apply and shape repair materials:

    ToolPrimary UseBest For
    Pointing trowelApplying material to small areasCrack filling, small patches
    Float trowelSmoothing and levelingLarger flat surfaces
    Steel trowelCreating smooth finishesFinal finishing
    Concrete edgerCreating rounded edgesWalkway or step repairs
    Groover/jointerCreating control jointsLarger repair areas
    Concrete floatInitial smoothingLeveling after placement
    BroomCreating non-slip textureWalkways, driveways
    SpongeTexturing and detail workMatching existing finishes

    The right finishing tools help your repairs blend with surrounding concrete, making them less noticeable.

    Power Tools for Larger Repairs

    For more extensive concrete repairs, power tools become necessary to work efficiently.

    Demolition Power Tools

    When removing larger sections of damaged concrete:

    1. Rotary hammer with chisel bits – For controlled removal of damaged concrete
    2. Angle grinder with diamond cup wheel – For surface preparation and crack widening
    3. Concrete saw – Creates clean cuts for defined repair boundaries
    4. Jackhammer – For removing thicker or larger concrete sections
    5. Impact drill – For smaller demolition needs
    6. Power washer – Thoroughly cleans surfaces before repairs

    These tools speed up the preparation process significantly but require proper training and safety precautions.

    Power Mixing and Application Tools

    For larger repair projects:

    1. Electric cement mixer – Ensures thorough mixing for larger batches
    2. Concrete vibrator – Removes air pockets in deeper repairs
    3. Power trowel – Creates smooth finishes on larger surfaces
    4. Pressure washer – Cleans surfaces thoroughly before and after repairs
    5. Air compressor with spray equipment – For applying sealers or coatings
    6. Concrete grinder – Levels uneven surfaces or removes coatings

    These tools become essential when working on commercial projects or extensive residential repairs.

    Specialized Tools for Specific Repair Types

    Different concrete repair projects require specialized tools.

    Crack Repair Tools

    For addressing concrete cracks specifically:

    1. Caulk gun – Applies crack sealants and fillers
    2. Crack chaser saw – Widens and shapes cracks for better repair
    3. Injection ports and equipment – For epoxy injection in structural cracks
    4. V-notch trowel – For applying certain crack repair materials
    5. Foam backer rod – Used before applying sealants in wider cracks

    Using specialized crack repair tools ensures longer-lasting solutions for this common concrete problem.

    Concrete Leveling Tools

    When addressing uneven concrete:

    1. Laser level – Provides precise height references
    2. Screed board – Levels newly placed concrete
    3. Bull float – Smooths and levels larger areas
    4. Self-leveling compound tools – For applying leveling materials
    5. Extension poles – Reaches across larger slabs without walking on fresh material

    These tools help restore proper drainage and eliminate trip hazards in concrete surfaces.

    Tool Rental vs. Purchasing Considerations

    For homeowners and contractors deciding whether to rent or buy concrete repair tools:

    When to Rent Tools

    Consider renting when:

    1. Infrequent use – Tools needed for one-time or rare projects
    2. High cost equipment – Expensive tools like concrete saws or jackhammers
    3. Storage limitations – Larger tools that require significant storage space
    4. Testing before buying – Trying tools before investing in purchasing
    5. Specialized equipment – Tools used only for very specific applications

    Most equipment rental centers offer daily, weekend, and weekly rates for concrete repair tools.

    Essential Tools Worth Owning

    These tools justify purchasing for anyone who does occasional concrete work:

    1. Safety equipment – Always have your own properly fitted PPE
    2. Basic hand tools – Trowels, chisels, hammers, and brushes
    3. Measuring tools – Tape measure, level, and marking implements
    4. Mixing tools – Buckets, trowels, and drill with mixing attachment
    5. Caulking gun – Useful for many repair and home maintenance tasks
    6. Wire brush – Essential for surface preparation

    Building this basic toolkit allows you to handle minor repairs quickly without renting equipment.

    Tool Maintenance for Longevity

    Properly maintained tools last longer and perform better.

    Cleaning After Use

    Concrete can permanently damage tools if not promptly cleaned:

    1. Rinse immediately – Don’t let concrete dry on tools
    2. Scrub thoroughly – Remove all material residue
    3. Use appropriate cleaners – Mild acid solutions for stubborn concrete
    4. Dry completely – Prevent rust and corrosion
    5. Apply lubricant – Protect metal surfaces after cleaning

    Establishing a cleaning routine after each use significantly extends tool life.

    Proper Storage Techniques

    Storing tools correctly prevents damage and keeps them ready for the next use:

    1. Dry environment – Prevents rust on metal tools
    2. Hanging system – Keeps tools organized and prevents damage
    3. Power tool cases – Protects expensive equipment
    4. Temperature control – Extreme temperatures can damage some tools
    5. Inventory system – Keeps track of all tools and identifies when maintenance is needed

    Professional concrete contractors like AR Concrete Fayetteville maintain strict tool maintenance protocols to ensure equipment reliability and longevity.

    Conclusion

    The right tools make concrete repair projects more efficient, effective, and professional-looking. Basic hand tools like chisels, hammers, and trowels are essential for most small repairs. Power tools become necessary for larger projects requiring more extensive concrete removal or surface preparation.

    Always prioritize safety equipment regardless of project size. Proper eye, lung, and skin protection prevents injuries and long-term health issues associated with concrete work.

    For occasional DIY repairs, investing in basic hand tools and renting power equipment as needed provides the best balance of cost and capability. For frequent concrete work, gradually building a comprehensive tool collection improves efficiency and reduces long-term expenses.

    Remember that quality tools, properly maintained, will serve you through many concrete repair projects. The initial investment in good equipment pays dividends in better repairs and less frustration during the work process.

    Of course if you have any doubts yo can contact us at AR Concrete Fayetteville for a free quote and advice.

    What Tools Are Needed to Repair Concrete FAQs

    What is the most important tool for small concrete crack repairs?

    The most important tool for small concrete crack repairs is a quality caulk gun designed to handle thick materials, as it allows precise application of crack fillers and sealants into narrow spaces without waste or mess. Additionally, preparation tools including a wire brush for cleaning the crack thoroughly and a chisel for widening and shaping are essential companion tools that ensure the repair material adheres properly and creates a lasting fix.

    Do I need special tools to match the texture of my existing concrete?

    Yes, matching the texture of existing concrete requires specialized finishing tools, including concrete stamps for patterned concrete, various bristled brooms for different broom finishes, specialized rubber texture mats for stone or slate appearances, sponges or texture rollers for more subtle textures, and sometimes even concrete stencils for decorative concrete. The key is identifying your concrete’s original finishing technique and selecting the appropriate tool to recreate that same texture while the repair material is still workable.

    What’s the best all-around power tool investment for concrete repairs?

    The best all-around power tool investment for concrete repairs is a quality angle grinder with interchangeable discs, as this versatile tool can cut concrete, widen cracks, remove thin layers of damaged surface, grind down uneven areas, and even polish concrete when fitted with the appropriate attachments. A 4.5-inch grinder with diamond cup wheel, cutting wheel, and grinding disc options provides the most versatility for various concrete repair tasks while remaining manageable for both homeowners and professionals.